 Last May I offered up an Easy Balance Practice for you to play with in your home practice. Since then, I have continued to study the subject of balance and have come across a recurring theme in non-yoga fields, such as sports medicine and biomechanics, which is the importance of variability. It seems that it is very important for maintaining and improving balance to change up the way you do balance activities as a way to keep your brain and body in sync. Changing up the way you do balance activities can come in the form of extending the time you hold a balance pose or in changing your body position a bit from the typical way you might do a pose. I was so intrigued by the concept of variability, I decided to try and invent a new balance pose each week of 2015: so far, 3 new balance poses! I will share those with you in a future post!
However, for today, I’d like to simply take a step forward from Easy Balance Sequence. In this Challenging Balance Practice, I will stick to some tried and true yoga asana, but I will occasionally suggest slight variations that will increase the challenge of the pose. So let’s dive in.
Challenging Balance Practice
1. Mountain Pose (Tadasana) to Arms Overhead Pose (Urdva Hastasana), with heels lifted
Start in Mountain Pose with a block between your thighs, on its narrow or middle width, depending on which one allows your feet to be about hips-distance apart. Squeeze the block with your inner leg muscles and become more aware of the soles of your feet on the floor, getting the right amount of squeeze to bring a sense of evenness to the inner and outer edges of your feet. Maintain the pose for about 16 breaths.
Then, grab a second block and place that between your hands, leaving the first block to use between your thighs. Now, with the first block between your thighs and a second block between your hands, come back into a strong Mountain pose. Then, on an inhalation, take your arms overhead into Arms Overhead pose with the block firmly held between your hands. Now the fun begins. Keeping your weight evenly across the balls of both feet, lift your heels 2-3 inches off the floor and maintain that position while breathing appropriately. Keep your gaze forward and slight ly down, fixing it on something that will not move. See how long you can stay up before you lose your balance, fatigue your legs muscles, or feel too wobbly in your ankles. Then come down, bringing your arms down as well. Repeat one more time, seeing if you can match the amount of time you achieved the first time. Over the course of several weeks, try to hold the pose a bit longer each practice.
2. Tree Pose (Vrksasana)
In the Easy Balance Practice, I had you practice with a wall just behind your back so you could lean back against it if you started to lose your balance. Today, I want you to start working further away from the wall or in the center of the room. When you do come up into the Tree pose, start with your arms out to your sides, as in Warrior 2 pose. Once you get steady there, take your arms directly overhead. See how long you can remain relatively steady before coming down with a sense of control. Repeat on the second side.
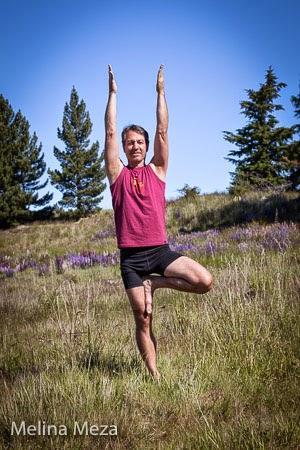 To add a challenge, try Tree pose with a block between your hands and take your arms up and overhead. Also, gradually advance the amount of time you spend in the pose as you get better at it.
3. Extended Side Angle Pose (Utthita Parsvakonasana)
In the Easy Balance Practice, I had you do Triangle pose. The standing poses have a definite balancing component to them, even though both feet are on the ground. Today, let’s try a version of the Extended Side Angle Pose (Utthita Parsvakonasana) where you are depending on just two limbs, your legs, to keep you balanced, instead of there. For the basic instructions on Extended Side Angle pose, see http://yogaforhealthyaging.blogspot.com/2014/11/featured-pose-extended-side-angle.html.
For this practice, instead of bringing your bottom hand to a block or the floor, place your bottom elbow on the top of your front leg thigh near the knee. Press down lightly with that arm into the leg, and let your legs do most of the work keeping you in the pose. See how long you can stay before your muscles begin to fatigue or your balance becomes wobbly and then exit as smoothly as you can. Repeat to the second side, noticing if one side is easy on your balance than the other. Do a short Standing Forward Bend (Uttanasana) after the second side, maybe 30 seconds, as a counter pose to side angle.
4. Warrior 3 (Virabradrasana 3)
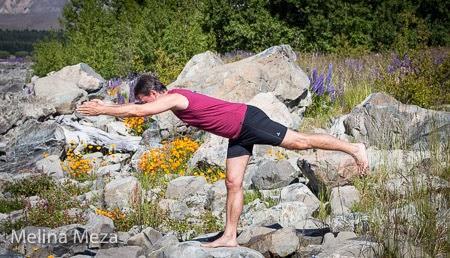
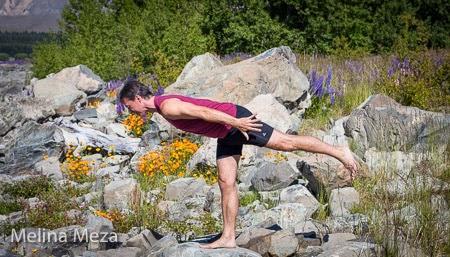
As a quick review, in our last sequence, I had you working on Warrior 3 at the Wall . To take it to the next step, I’d like you to work towards Warrior 3 away from the wall, starting with arms by yours sides reaching towards your lifted foot.
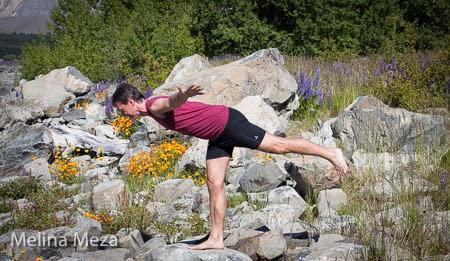
 Once that version gets easy, advance to taking your arms out to your sides.
 Finally, you can work toward the full pose, reaching forward with your arms.
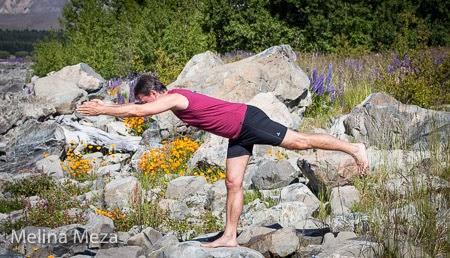 Usually each variation becomes a bit more challenging for the balance. For all the details, see (Featured Pose: Warrior 3 ).
After you have tried this pose on each side, take a short Standing Forward Bend (Uttanasana) as a nice counter-pose. Then, from the forward bend, bend your knees, drop your hips into a brief squat, and then sit down on your mat.
5. Full Boat Pose (Navasana)
Start by sitting with your legs extended straight in front of you. Then, as you did in the Easy Balance Sequence, move into Full Boat Pose by quickly cycling through variations 1, 2, and 3 to the place where you are balancing on your lower sacrum and buttocks muscles, your arms are reaching forward and your legs floating with the shins parallel with the floor.
To take it to the next level, begin to straighten your legs, with your big toes lined up in front of or just higher than the level of your eyes.
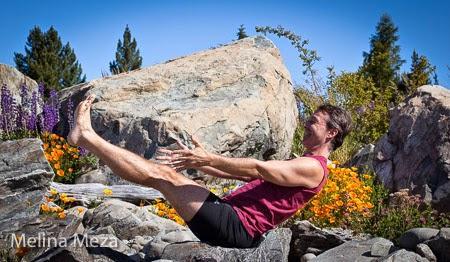 Maintain the full pose for 6-10 breaths or longer. Then come out of the pose, rest for a moment, and repeat one more time. To challenge yourself, vary the position of your arms, gradually bringing them up overhead as in Warrior 1 pose.
6. Side Plank Pose (Vasisthasana)
We have written a bit about the use of Side Angle Pose recently as it pertains to scoliosis (see Side Plank Pose (Vasithasana) ) So, follow Nina’s fine instructions on getting into Side Plank Plank pose by starting in Downward Facing Dog, swinging forward into High Plank pose, and then shifting into Side Plank pose.
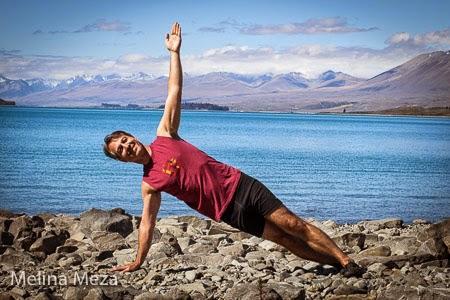 However, for this sequence, instead of lifting or lowering your ribs or hips, make your body one long line from your feet to the crown of your head. Try it initially with your feet one in front of the other, and work towards the more challenging variation where your feet are stacked one on top of the other. Because this requires a lot of upper body strength in addition to balance, initially stay for shorter periods of time, maybe just a few breaths, and gradually work your way to longer holds. Try it on each side twice.
 7. Child’s Pose (Balasana)
Take a well-deserved rest in Child’s Pose for up to 2 minutes, and move your fingers and wrists around to release any excess tension there.
8. Relaxation Pose (Savasana)
As you rest in Savasana, ideally for 5 to 10 minutes, pay attention to feeling the more subtle balance of your body lying on the floor, establishing an even balance between your shoulder blades, the back of your pelvis, the backs of your legs and arms, and the back of your head. Notice the areas of the body where you can still feel the residual effects of the poses you worked on today. Finally, let go of whatever judgments around success or failure may have come up with the challenge of balancing poses, and instead let your attention follow the easy movement of your breath for several minutes.
I hope you enjoy this sequence. Regular practice will help you maintain and improve your balance.
Subscribe to Yoga for Healthy Aging by Email ° Follow Yoga for Healthy Aging on Facebook ° Join this site with Google Friend Connect

