 Warrior 3 challenges your balance very differently than many other balance poses, as you need to resist gravity to keep your body parallel with the floor. Balancing in Warrior 3 is not only a bit more difficult, but it also takes more strength and energy to maintain your balance Keeping your body parallel with the floor strengthens all the muscles along the back of your body, including your buttocks and the backs of your thighs as well all your back muscles from your lower back up to the base of your neck and out into your arms. Atthe same time, you are stretching your legs, hips, front body and shoulders.
Moving gracefully in and out of the pose takes a combination of strength, flexibility, balance, and agility, so you can use to pose to cultivate all four essential skills. And in general this pose is very stimulating and energizing.
Baxter prescribes this for:
- Improving balance
- Improving hip flexibility
- Building back body strength
- Building upper body strength for those who can’t bear weight on the arms
- Improving concentration and focus
- Energizing the body and mind
1. Classic Version
 Start by coming into the classic version of Warrior 1 pose. From there, pivot onto the ball of your back foot and tip your torso forward about 45 degrees over your right hip joint. On an exhalation, straighten your right leg as you slowly lift your left leg behind you and bring your torso and arms down to parallel with the floor.
Once in you’re in the pose, focus on keeping your hips even with the floor and reach your arms straight forward, with your head slightly lifted (easier for balance) or aligned with your spine (more challenging) and your gaze slightly forward.
To come out of the pose, bend your right knee slightly, and bring your left foot back and down to floor into Warrior 1 position. From there, release your arms to your sides and straighten your front leg, and turn your feet parallel. Repeat on the left side.
2. Using the Wall
 For those of you who are weak, have balance problems, or are afraid of trying the versions in the middle of the room, this variations is the perfect way to start! It's also an excellent way to warm up for any of the other versions.
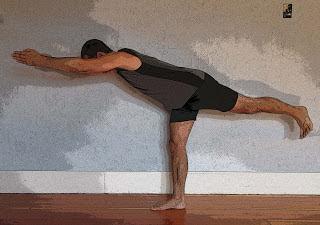
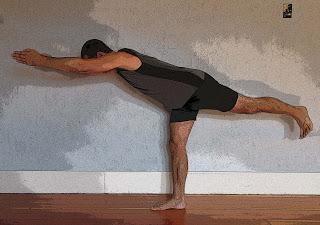
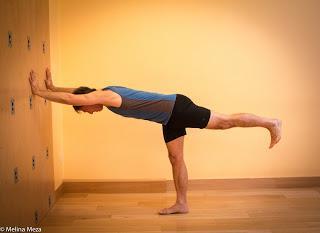
Start by coming into Half Downward-Facing Dog at the wall. From there, step your left foot toward your right foot, to the mid point between your feet, and allow your hips to shift a little to the left so more of your weight is on your left foot. Next, keeping your hips parallel with the floor,swing your right leg up and back, in line with your arms and torso.
Once you’re in the pose, focus on keeping your arms, chest, and right leg in a straight line, without letting your chest or belly sag toward the floor. To challenge your balance, try lightening the press of the hands on the wall or come onto your fingertips.To come out of the pose, lower your left foot to floor, returning to Half Downward-Facing Dog pose at the wall. Thenbend your knees and slowly walk forward to standing upright, about one foot from the wall. Release your hands from the wall and shake out your wrists for few breaths. Repeat the pose on the left side. 3. Arms Back
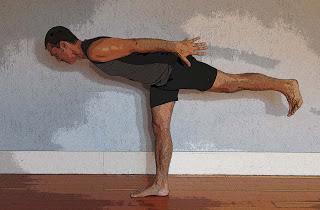
 If you have shoulder problems or don’t feel strong enough for the classic pose, this version is for you. It’s also easier to balance in this version, so it’s good way to work toward to the classic version, or just to warm up for it. Start by coming into Warrior 1 pose with your arms by your sides instead of overhead, From there, pivot onto the ball of your back foot and tip your torso forward about 45 degrees over your right hip joint. On an exhalation, keeping your arms by your sides, straighten your right leg as you slowly lift your left leg and bring your torso parallel with the floor.Once in you’re in the pose, focus on keeping your hips even with the floor and reaching your arms back along your sides, with your head slightly lifted (easier for balance) or aligned with your spine (more challenging) and your gaze slightly forward. To come out of the pose, bend your right knee slightly, and bring your left foot back and down to floor into Warrior 1 position with your arms by your sides. From there, straighten your front leg, and turn your feet parallel. Repeat on the left side.4. Tilted Part Way (sorry, no photo)
If you have tight hips or tight hamstrings and can’t come to parallel with the floor in the full version, or if you want to slowly work your way from the wall version to the full version, this variation is for you. It’s also a good way to warm up for the classic version.Start by coming into the classic version of Warrior 1 pose. From there, pivot onto the ball of your back foot and tip your torso forward about 45 degrees over your right hip joint. On an exhalation, straighten your right leg as you slowly lift your left leg up slightly as you tip your torso into an angle that’s comfortable for you, creating a long, straight line from your left heel to your fingertips. Once in you’re in the pose, follow the alignment instructions for the classic pose.To come out of the pose, bend your right knee slightly, and bring your left foot back and down to floor into Warrior 1 position. From there, release your arms to your sides and straighten your front leg, and turn your feet parallel. Repeat on the left side. Subscribe to Yoga for Healthy Aging by Email ° Follow Yoga for Healthy Aging on Facebook ° Join this site with Google Friend Connect

