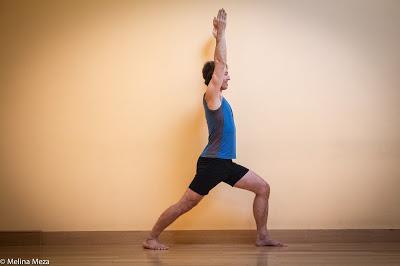
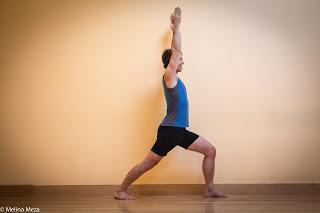
by Baxter Warrior pose is an energizing, strengthening standing backbend. It cultivates balance, builds strength in your legs, arms, and upper back, and stretches your hips, upper back, and shoulders. Because the pose improves posture, it helps maintain the health of your lungs and respiratory system.
Baxter prescribes this for:
- Improving balance
- Improving poor posture, especially rounded upper back
- Strengthening weak legs
- Stretching tight hips, spine, and shoulders
- Energizing body and mind
- Helping fatigue and depression
- Preparing for backbends
Timing: For the most improvements in strength and flexibility, hold Warrior 1 pose from 90 seconds to 2 minutes. However, if you are newer to the practice and still building up your strength, you can start by holding the pose for 30 seconds or less, if needed. You can practice this pose dynamically by moving from starting leg position to the full pose on inhalation and returning to the starting position on an exhalation. Repeat 6 times.
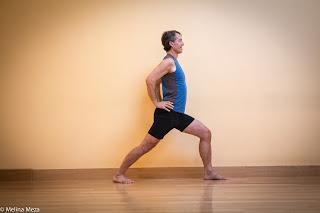
Cautions: Those with knee pain should try standing with their feet 6 to 12 inches closer together and be especially attentive to the alignment of the front knee over the ankle, bending less if necessary. Those with lower back pain should try version 3 first, standing with feet 6 to 12 inches closer together in this version.1. Classic Version
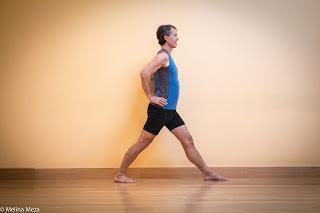
From Mountain pose, take the starting position by stepping your feet about three feet apart. Turn your right foot and leg out 90 degrees and pivot on your back heel about 4-5 inches to turn your back foot and leg in about 45-60 degrees. Rotate your chest and belly toward your front leg. To come into the full pose, inhale and swing your arms forward and up along the sides of your head, with your palms facing each other. Then exhale and bend your right knee directly over your right ankle (an angle of no more 90 degrees). Firm the muscles around your back knee to keep your back leg straight and lengthen from your back heel up through your hips, spine, and arms as you arch your spine into gentle backbend. Balance your head over your shoulders and gaze straight ahead. To come out of the pose, inhale and straighten your front leg, exhale and release your arms to your sides, then turn your feet to parallel. Repeat on the second side, and finish by stepping your feet together into Mountain pose. 2. Bird-Wing Arms(sorry, no photo)This version is good for those with shoulders that are tight or painful when arms are overhead, as well as for opening the front chest for those with a collapsed chest or as a preparation for backbends such as Bridge pose and Upward Plank pose.Begin by taking the starting position for the classic version. Then inhale, bend your elbows, and take your arms out to the sides into bird-wing position, keeping your elbows in line with or slightly below your shoulders and your forearms pointing straight up. Exhale and bend your front knee as in the classic version. Follow the leg, hip, spine, and head instructions for the classic version lengthening up from your back heel to the crown of your head. Widen your front chest and as you relax your shoulders downward. To come out of the pose, follow the instructions for the classic version. Repeat on the second side, and finish by stepping your feet together into Mountain pose. 3. Hands on HipsThis version makes the pose accessible to those with shoulder problems, such as stiffness, rotator cuff injury, or frozen shoulder, who can’t do version 2. For those who have balance problems, this version is easier than versions 1 and 2, allowing you to gradually work toward raising your arms.Begin by taking the starting position for the classic version. Inhale and bring your hands to your hips, widen your front chest, and move your elbows back a bit. Follow the leg, hip, spine, and head instructions for the classic version, lengthening up from your back heel to the crown of your head. Widen your front chest and as you relax your shoulders slightly downward. To come out of the pose, follow the instructions for the classic version, relaxing your arms by your sides on your exhalation. Repeat on the second side and finish by stepping your feet together into Mountain pose. 4. Hands on Chair Back(sorry, no photo)This version makes the pose accessible to those with poor balance or who are too weak to do the classic pose. Start by standing a few inches away from the chair in Mountain pose, with your hands resting on the top of the chair. Inhale and step your left foot straight back 2 ½ to 3 feet, and turn your left foot in about 45-60 degrees. Exhale and bend your right knee over your ankle. Follow the leg, hip, spine, and head instructions for the classic version, lengthening up from your back heel to the crown of your head. Press your hands down onto the top of the chair, while keeping your arms long and straight.To come out of the pose, step your left foot forward to match your right foot and straighten both legs. Then come into Mountain pose with your arms at your sides for a breath or two. From there, repeat on the second side by placing your hands on the chair back again and on an inhalation stepping your right foot back into the Warrior 1 position.Subscribe to Yoga for Healthy Aging by Email ° Follow Yoga for Healthy Aging on Facebook ° Join this site with Google Friend Connect


