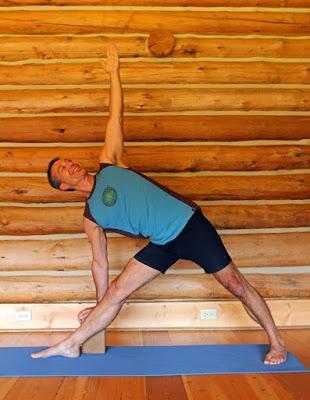
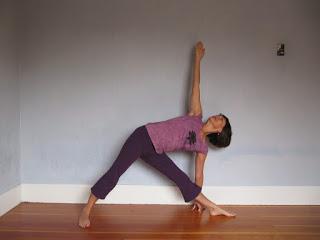
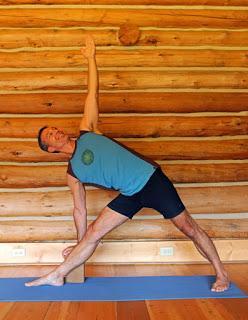
 Triangle pose strengthens and stretches both your upper and lower body, and strengthens the core muscles at the sides of your torso. So it’s good pose to use for warming up for backbends, seated forward bends or twists, or inverted poses. Because of the way you move into and out of the pose, it helps improve balance. And overall this pose creates a wonderful feeling of openness. Without being overly demanding, this pose can be energizing when you’re lethargic or uplifting when you’re feeling blue. The four variations make it accessible to most people.
Baxter prescribes this for:
- stiffness and tightness in legs and shoulders
- general muscular weakness
- improving core strength
- improving balance
- mild fatigue
- depression
Cautions: For people with low back pain or sacroiliac problems, Triangle pose may aggravate your condition, so monitor your symptoms. Come out if you experience pain, and if it hurts consistently, skip the pose entirely. Because looking up toward the top arm can harm your neck bones, we recommend looking forward or down.
1. Classic Version

When you are aligned, maintain the energy in your limbs, bring some awareness to your breath, and focus on staying steady and balanced on the feet.
To come out of the pose, keep your legs strong and your arms out to your sides as you inhale and lift your torso and head back to the upright starting position. Then exhale, release your arms by your sides, and turn your feet to parallel. Make sure your feet are even side to side before repeating on the second side. When you’ve finished both sides, step your feet back to Mountain pose and stay for a few moments before moving on.
2. Top Hand on Waist(sorry, no photo)
This version is good for people who have pain or restricted mobility in the shoulder, and for people with balance problems as it’s a bit easier to balance in this version. (If you have trouble balancing in this version, try version 4.)
To come into the pose, start out as you would for the classic version, but rather than bringing both arms out to your sides, place your left hand on your left hip with your elbow pointing out to the side. Then, when you enter the full pose, keep your arm in the same position, so your elbow now points directly up. Follow the instructions for the classic pose for aligning the rest of your body. If you can’t keep both sides of your waist long in the pose, use a block as in version 3. When you are aligned, follow the instructions for the classic pose for finding a focus in the pose.
To come out of the pose, follow the instructions for the classic pose, leaving your hand on your hip until you come to the upright position, and then releasing both arms.
3. Bottom Hand on Block
Set up for the pose by placing the block to the right side of your mat so it will be just behind your right heel when you step your legs wide apart (it’s okay to move it if it isn’t in the right place when you come into the pose). Then follow the instructions for coming into the classic version of pose, bringing your palm or fingertips firmly onto the block. Follow the instructions for the classic pose for aligning yourself and finding a focus in the pose.
To come out of the pose, follow the instructions for the classic pose, moving the block to your left side before repeating the pose.
4. Bottom Hand on Chair Seat(sorry, no photo)
This variation is for anyone who can’t bring the bottom hand to a block without side bending their spine, and provides a gentler alternative for people who have back pain, weakness, or balance problems.
Set up for the pose by placing a chair so that when you step your feet apart, it will be right behind your right foot, with the chair seat facing the long edge of your mat. Then follow the instructions for coming into the classic version of pose, bringing your palm or fingertips firmly onto the chair seat instead of the floor. Since you will be higher up than in the classic pose, your bottom arm may angle a bit forward and down, so bring your top arm in line with bottom arm. Then follow the instructions for the classic pose for aligning yourself and for finding a focus in the pose.
To come out of the pose, follow the instructions for the classic pose. Then step your feet together into Mountain pose, move the chair to your left side, and repeat the pose on the second side.
Subscribe to Yoga for Healthy Aging by Email ° Follow Yoga for Healthy Aging on Facebook ° Join this site with Google Friend Connect
