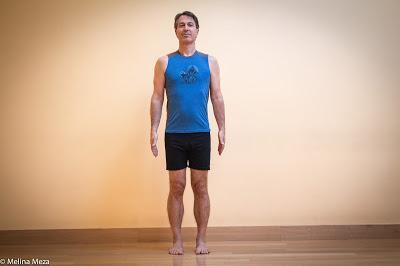
 Many yoga traditions consider Mountain pose to be the original standing pose, from which all the other standing poses emerge. So mastering this pose helps you perform all the other poses. This pose is also an ideal, active standing position that supports healthy overall posture, teaching you healthy alignment of your pelvis and spine over your feet, and your head over your torso. It also cultivates strong legs, an even balance between your feet, and an even opening in your chest and your upper back.
Baxter prescribes this for:
- Improving posture
- Low back pain
- Improving balance
- Text neck or head forward syndrome
- Weakness in the legs or spine
- Resting between standing poses
- Standing meditation pose
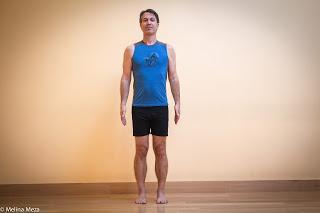 Stand with your feet hips-distance apart and parallel to each other. Distribute your weight evenly on your feet and actively firm your upper thigh muscles evenly toward your thighbones. From your tailbone, lengthen upward through your spine to the crown of your head, as if you were growing taller. Without squeezing your shoulder blades together, widen the front of your chest so your chest and your upper back are both broadening. Position your head directly over your shoulders, with your chin parallel to the floor. Either relax your arms at your sides or actively reach down from your shoulders into your fingers, with your palms facing your thighs. As you maintain these internal actions, gently lengthen your inhalations and exhalations, while remaining active and alert. To come out of the pose, simply relax the physical effort of Mountain pose and notice the posture your body returns to. If desired, repeat the pose one more time.2. Block between Thighs
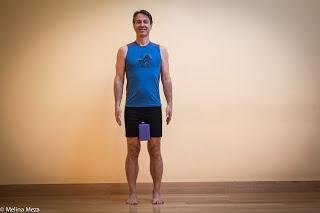 This variation strengthens and brings awareness to your legs, especially your inner thigh muscles, which are often weaker than your other leg muscles. Start by taking the classic version of Mountain pose. Next, place a block on its narrowest width between your thighs, half way between your pelvis and inner knees. Step your feet a bit closer together. Then firm your legs into the block while lengthening down into your feet. If you tend flatten your lower back, roll your thighs in and push the block back slightly to encourage a normal lumbar curve. If you have a sway back that is painful, squeeze the block and draw your tailbone down slightly towards the block. Follow the leg, spine, chest, and head instructions for the classic version, and use the same breathing technique. To come out of the pose, remove the block and relax your physical effort, especially your legs. 3. Reverse Prayer Position
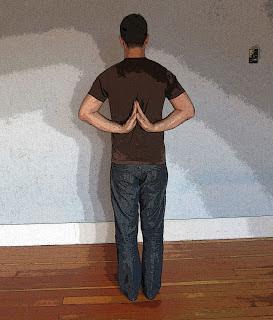 This version opens your front chest, opens your shoulder joints for taking your arms behind your back, strengthens the muscles between your shoulder blades, and stretches your forearms and wrists.Start by taking the classic version of Mountain pose. Bring your palms together into Prayer position (Namaste) in front of your chest and firmly press your palms together. Next, keeping your elbows bent, bring your hands together behind your back, with your fingertips pointing down. Move your hands a few inches out away from your lower back, and spin your fingertips up toward the your head. With the sides of your hands lightly touching your lower back, wriggle your hands up the line of your spine as high as you can comfortably go or until your palms come completely together. If your palms come together, bring your thumbs together as well. Follow the leg, spine, chest, and head instructions for the classic version, and use the same breathing technique. Hold your arm position for approximately 30 seconds, gradually working up to 1-2 minutes over time. To come out of the pose, carefully wiggle your hands down your back at least six inches and then release your hands down by your sides. Shake out your hands and arms before moving on.4. Elbows Clasped Behind Back
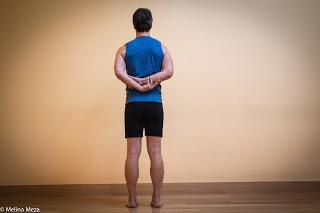
Like version 3, this version opens your front chest, opens your shoulder joints for taking your arms behind your back, and strengthens the muscles between your shoulder blades, but this version more accessible for most people.Enter the pose like version 3, but instead of bringing your palms together behind your back, bring your just your right arm behind your back. Then bring your left arm back and, depending on your flexibility, clasp opposite elbows or forearms. Follow the leg, spine, chest, and head instructions for the classic version, and use the same breathing technique. Hold the arm position for 30-60 seconds and then release your arms. Repeat the arm position on the left side by taking your left arm back first. After finishing both sides, shake out your arms before moving on. Subscribe to Yoga for Healthy Aging by Email ° Follow Yoga for Healthy Aging on Facebook ° Join this site with Google Friend Connect

