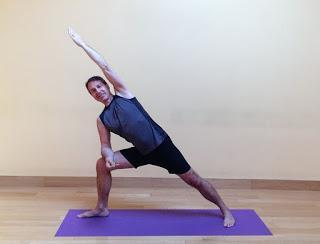
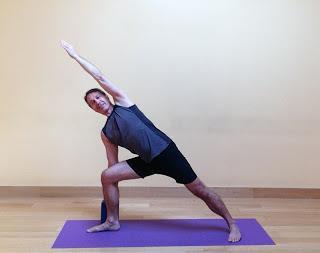
by Baxter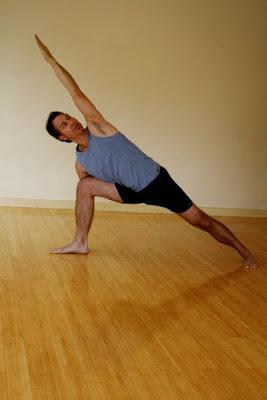 Extended Side Angle pose is an excellent pose for strengthening both muscles and bones. This pose strengthens the muscles in your legs, all along the sides of your torso, and around your shoulder joints. When you hold the pose for at least 30 seconds, it strengthens the bones in your hips, spine, and wrists, which are the most bones that are commonly fractured, as well as your leg and arm bones.
This pose also increases flexibility in your hips and shoulders, and helps improve balance.. Because this pose is energizing, it can help enliven you when you're feeling tired or lethargic. And because it is grounding, it can be helpful for anxiety or stress.
Baxter prescribes this for:
- osteoporosis
- balance problems
- anxiety and stress
- general weakness and fatigue
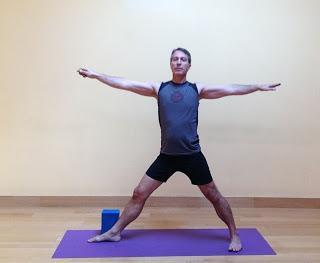
Timing: If you are a new practitioner or out of shape, hold the pose for 6 to 8 breaths. More experienced practitioners can work towards longer holds of 12 to 24 breaths (1-2 minutes). You can also do the pose dynamically, starting from a wide-legged stance, with front foot turned out and back foot turned in. Move into Warrior 2 pose on your inhalation, into Extended Side Angle pose on your exhalation, back to Warrior 2 pose on your inhalation, and back to your starting position on your exhalation.
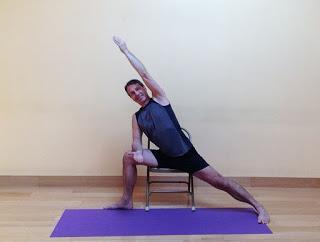
Cautions: Those with knee issues/pain should start with the chair version (version 4) and use caution with the other variations. Those who have shoulder issues/pain when your arm overhead can place your top hand your hip instead.1. Classic Version
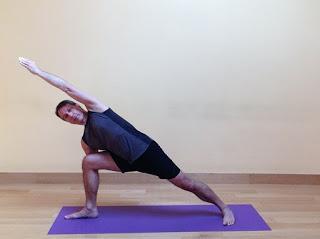
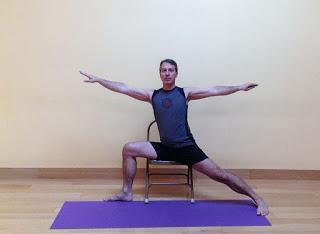
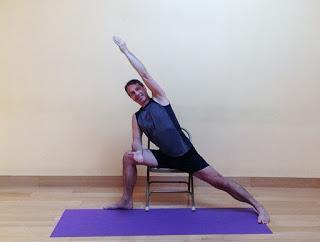
To come out the pose, follow the instructions for the classic version. Rest for 1-2 breaths and then repeat on the pose on the left side.4. On a ChairThis version is for those who have weak legs or knee or hip pain when bearing full weight on a bent knee, as well as those with balance problems. Start by placing the chair in the center of your mat, with front of the chair seat facing the long edge of your mat and the front legs just on the mat. Then, sit on the front edge of the chair seat, with your knees bent and feet flat on the floor.
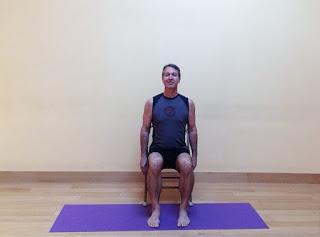
To maintain the pose, follow the same cues we provided for the classic version. To come out of the pose, inhale and bring your torso back up to vertical and your arms out to your sides. On your exhalation, bend your left knee and bring both your legs together in front of you, and release your arms to your sides. Rest for 1-2 breaths and then repeat on the pose on the left side.Subscribe to Yoga for Healthy Aging by Email ° Follow Yoga for Healthy Aging on Facebook ° Join this site with Google Friend Connect
 Extended Side Angle pose is an excellent pose for strengthening both muscles and bones. This pose strengthens the muscles in your legs, all along the sides of your torso, and around your shoulder joints. When you hold the pose for at least 30 seconds, it strengthens the bones in your hips, spine, and wrists, which are the most bones that are commonly fractured, as well as your leg and arm bones.
