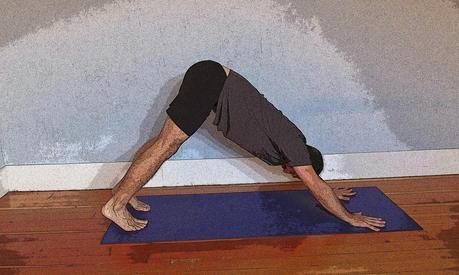
 Two things prompted me to want to write about Downward Facing Dog pose (Adho Mukha Svanasana)—about one of the most commonly practiced modern yoga poses—today. The first was the answer by Judie Craven, RN, in the amazing interview we posted yesterday Yoga for Cancer: An Interview with a Nurse and Cancer Survivor to the question of what one of her favorite yoga poses was:“Downward-Facing Dog. My job can be pretty stressful! Down Dog helps to release tension better than any other pose for me. It stretches my whole body and makes me feel strong—like I can accomplish anything.”
The second reason was that in looking back on what we have shared with you in the past about this pose, I discovered we have done a good job telling you all about modified versions of Downward-Facing Dog pose, but we had failed to talk about the full version! Well, we remedy that today! As Judie so rightly points out, Downward-Facing Dog pose provides a great combination of stretching and strengthening actions for your body. It opens up your shoulders and upper back, just as Mountain pose with arms overhead would, but with the added challenge of resisting gravity. It also stretches and lengthens the muscles in your lower back, the backs of your hips, and the backs of the legs (especially the hamstring and calf muscles). It simultaneously builds strength in your upper body, which is tasked with pushing back strongly towards your hips, the front thighs, which contract to help fold your pelvis over your legs, and your core abdominal muscles, which help to stabilize your belly so it does not sag into the pull of gravity. Finally, it is a partial inversion, and as such can have some of the effects of some of the full inversions, such as helping to improve the regulation of your heart and lung function as well as quieting your nervous system, possibly accounting for the stress reducing effects Judie noted. Nina says this is an excellent pose for building up the arm strength that will allow you to do more challenging poses, such as arm balances or pushing up into a backbend. And because it provides allover stretching, it is a very good warm-up pose for almost any kind of practice, including a forward bend, backbend, twist, or inversion practice. The version using the chair makes the pose accessible to almost everyone, including people who cannot get up and down from the floor. If you have wrist problems, you can practice the version with your forearms on the floor.I prescribe this pose for:
- overall strengthening and stretching
- a first step in strengthening your arms and upper body
- part of a stress-reducing practice
- anxiety or an overactive mind
- low back pain that is muscular in nature (versus disc or nerve related)
- an introduction to inverted poses for beginners
Cautions
Because this pose is a partial inversion and does require quite a bit of effort to maintain, those with newly diagnosed or poorly controlled high blood pressure should practice a modified version, such as Half Downward-Facing Dog Pose at the Wall.
Because your wrists bear quite a bit of body weight in this pose, people with Carpel Tunnel Syndrome or types of wrist or hand pain should practice versions that reduce the weight on the wrists and hands, such as the Forearm version (see below). People with acute colds and sinus issues or chronic allergies may find the partial inversion could worsen their symptoms. When your symptoms are in full swing, try a version where you are not inverted (Half Downward-Facing Dog Pose at the Wall) or are less inverted (using the chair—see below). Then, when you are healthy and symptom free, you can return to the classic version.Classic Version
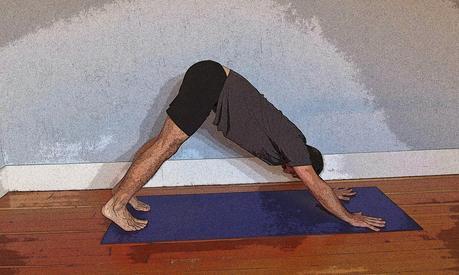
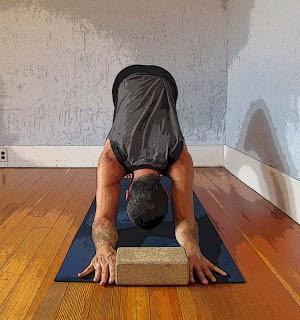
 1. Start in Hands and Knees pose (as you would set up for Cat/Cow) and move your hands forward about one hand length so your arms are now angled forward at about a 30 degree angle with the floor and turn your toes under. 2. Press firmly through your arms towards your hands, fully extending your elbows. As you press forward, begin to lift your knees off the floor and push your hips up and back, away from your hands, as you gradually begin to straighten your legs. If you have particularly tight hamstrings or calves, maintain a slight bend to your knees, at least at first. 3. Creating the feeling of a long spine is of primary importance in doing Downward-Facing Dog, so use the push of your hands forward into your mat to cultivate a feeling of lengthening up and back from your wrists to your sitting bones.4. Next, focus on your legs. Imagine you are lifting the middle of your hamstring muscles up towards your sitting bones while simultaneously releasing your mid-calf muscles towards your heels. You can also bring a feeling of increased contraction to the muscles at the front of your thighs, the Quadriceps, to assist in opening and lengthening your back leg muscles. 5. Think about “releasing” your heels toward the floor, not pushing them down. Keep in mind that the vast majority of people do not have ankle joints that will allow their heels to come all the way to the floor, so don’t make that a priority or goal. Instead, keep a sense of even descent, making sure to look back occasionally to make sure your heels are positioned evenly behind the balls of your foot, not dropping left or right. And for that small minority of folks who can get their heels to the floor, make sure you do not round the lower back towards the ceiling to do that: spinal length is more important than heels to the floor. 6. If you feel like your belly and lower back are collapsing toward the floor or going into a sway back position, provide more support to this region by consciously engage your abdominal muscles up and into your body towards your lower spine.7. There are different ways to position your head in this pose. In general, I recommend keeping your head in line with the rest of the spine. One way to do that is to think about keeping your ears lined up with your arms. Another head position is to release the top of your head down toward the floor, and this is the head position you’ll need to use if you are doing the version of Downward-Facing Dog with head support (see All About Supported Inverted Poses). Some teachers suggest tucking the chin toward the chest. However, if you have neck issues, be cautious with the second and third head positions. 8. Bring your awareness to the quality of your breath. Try to keep your breath steady and even, even if your breathing in the pose is faster than your resting breath. After all, you are working to stay in the pose, so some change to your breath in natural and to be expected! However, if you become short of breath or you find you are holding your breath, perhaps due to over-efforting to stay in the pose, it might be time to come down and rest for a few moments before trying again. 9. If you are new to Downward-Facing Dog, stay in the pose for just a few breaths. As your understanding of the actions of the pose improve and your endurance increases, gradually lengthen the amount of time, staying as long as 1-2 minutes or longer. 10. To come out of the pose, bend your knees and bring them lightly the floor to Hands and Knees position. Consider resting in Child's Pose for a few breaths, releasing any hand or wrist tension. Feel free to try the pose a second or third time. There are, of course, many other more subtle ways to work in this pose, but these points will get you started in the right direction. As one teacher used to say, “Another day, another Dog!” Variation 1: Bent KneesThis version is excellent for people with extremely tight hamstrings, calves, hips, or lower back muscles that cause your lower back to round when your legs are straight, interfering with the length of your spine. To practice this version, rather than straightening your legs, bend your knees to the degree that allows you to maintain the length of your spine. Instead of allowing your leg muscles to relax, keep your leg muscles engaged, which will allow some areas to get stronger as you stretch your tight hamstrings and calves, (that’s right, even when the knees are bent you can still get some stretch to those areas!)Variation 2: Chair Version
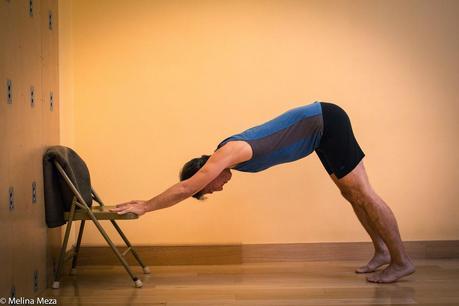
 Placing your hands on the seat of the chair takes some of the weight off your hands and keeps your wrists in a more neutral position, so this version is good for people who have wrist or hand problems. Depending on your hand and wrists issues, you can choose between two hand positions: hands flat on the chair seat and hands holding the chair edges. Because you bear less weight on your upper body than in the classic version, this version is a good starting pose for people who are not yet strong enough for the classic pose. And working with the chair also allows people who cannot get up and down from the floor to get some of the same benefits as the floor version provides. See Featured Pose: Downward-Facing Dog Variations for instructions.Variation 3: Forearm Version
 This version is useful for anyone who has wrist or hand problems. See Featured Pose: Downward-Facing Dog Variations for instructions and two different arm positions.Subscribe to Yoga for Healthy Aging by Email ° Follow Yoga for Healthy Aging on Facebook ° Join this site with Google Friend Connect

