Yes yes, I know, an overdue review – but heyyyy forgive me cos I already posted up not one, but two Sneak Previews of all 10 swatches of Laneige’s new Two-Tone Lip Bar yes yesyes? :)
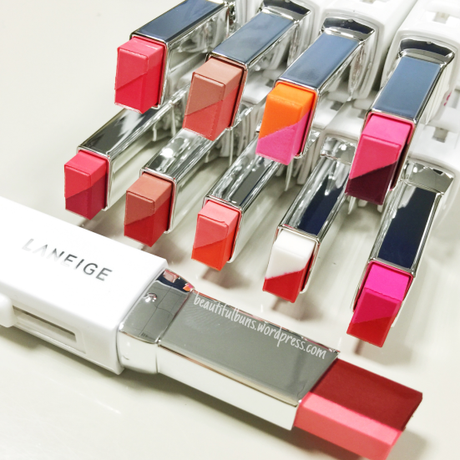 Laneige Two-Tone Lip Bar
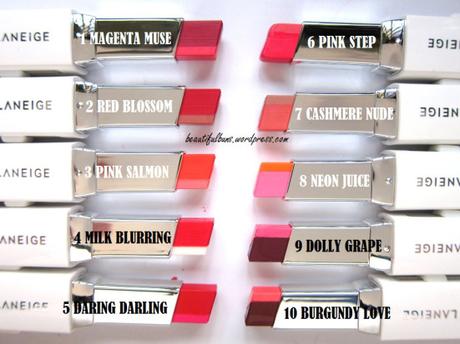
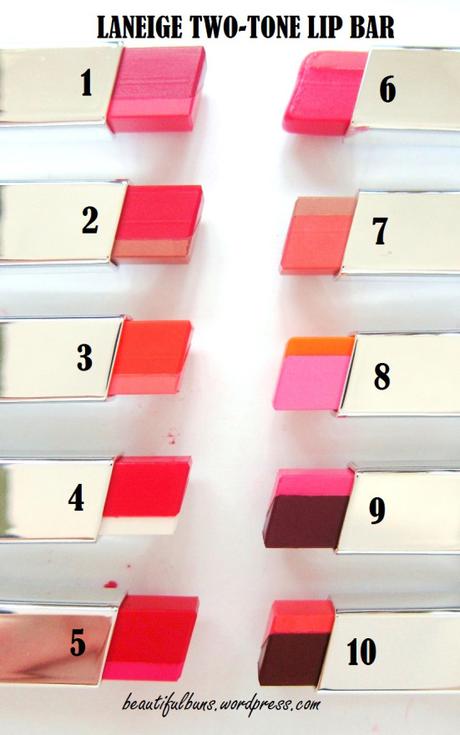
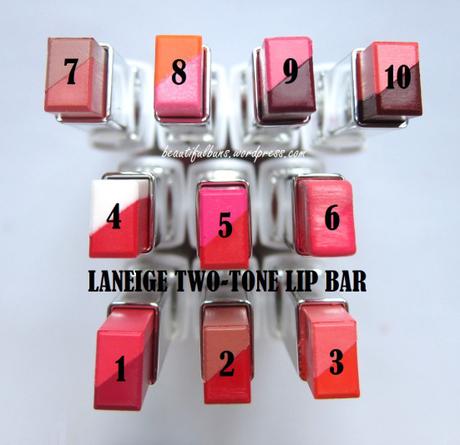

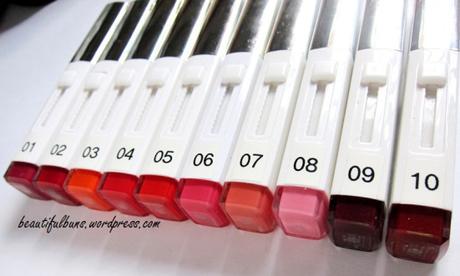
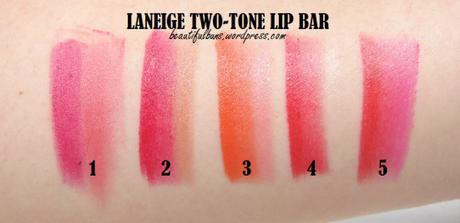
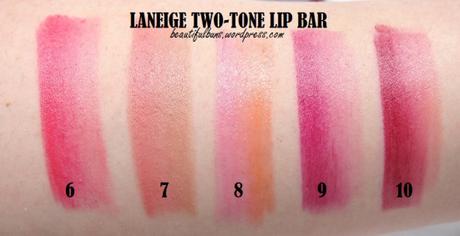
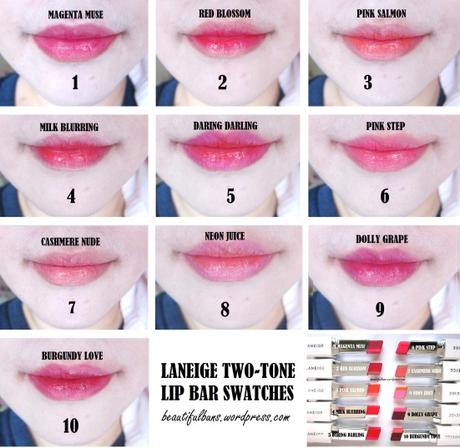
I say…
The Packaging: It comes in a rectangular plastic tube with a click-on cap and a push-up lever. Now this lever is slightly confusing at first (well, for me at least) – press the level down to push the lipstick up (versus the usual method of pushing up /twisting up to get the lipstick up). The lever is slightly stiff, which means you need to put in slightly more effort than usual to push the lever down. On the bright side, it won’t accidentally get pushed when it’s in the handbag.
Take note: It is very important to note is that you MUST open the cap before pushing the lever – or else you’ll end up with a bumped-end lipstick. The texture of the lipstick is also very slightly softer than your usual lipstick – perhaps due to the level of moisture (which therefore made it slightly softer), as well as the rectangular shape which is thinner than the usual circular bullet (which gives it more bulk and therefore more strength and not so prone to breakage). Make sure that you don’t exert too much pressure when applying it (or in my case, swatching on the arm heh – you can see from my Sneak Preview where I borrowed the lippies from Laneige that #1 had already been broken).
The Scent: None.
The Application: I’m mostly enamoured with the concept of this product – two lipstick colours in one, and in a rectangular angled stick that makes for more precise application. However, I realize that the diagonal cross-cut of the lipstick can make application somewhat uneven (one side has more of the lighter shade, while the other side has more of the darker shade). This means you can’t just touch up simply on the go -you need a mirror to make sure the gradient is done properly. See below for my tutorial on how to get an almost-perfect gradient ombre lip using this product.
The Verdict: The color payoff is strong, the lipstick is creamy with a good amount of moisture and some shine (don’t expect a superb glow though). A single layer gives pretty good color (but note that the lighter shades won’t be able to hide/cover the fine lines/chapped lips), while 2 or more layers really makes the color pop. It lasts pretty long, and fades into an even-coloured pinkish/reddish tint on the lips. Take note that after it fades, unless you’re very well hydrated, the tint can go onto the lip flakes (I found myself peeling off tinted lip flakes, which was kinda meh). When I’ve got pretty good lips (thanks to the Laneige Lip Sleeping Mask), I have no such issues. I’m pretty happy with all these lippies (I’ve been carrying around all 10 ever since I got them hurhurhur). If I had to decide on my faves at the mo’, I’ll say it’s 5 Daring Darling (for bright fushcia-red lips), 6 Pink Step (for daily wearable pink lips) and 9 Dolly Grape (for a classier, more intense deep red).
HOW TO GET GRADIENT OMBRE LIPS
Now, because of the diagonal cross-cut of the lipstick, there isn’t an even division between the light and dark shades when you are swiping it across in one stroke. This means it’s not that easy to get the gradient ombre effect that you want. Here’s my simplified guide on how I get my ombre lips.
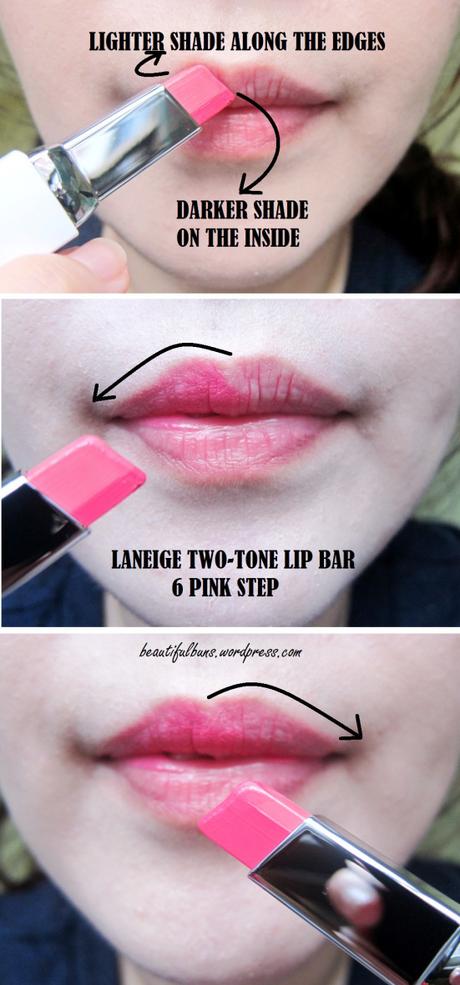
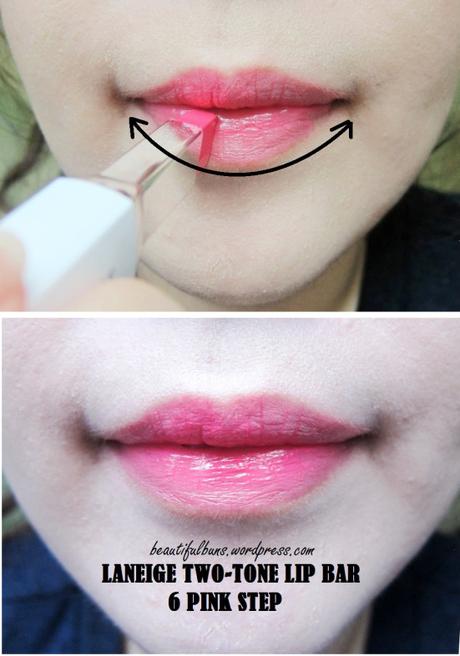
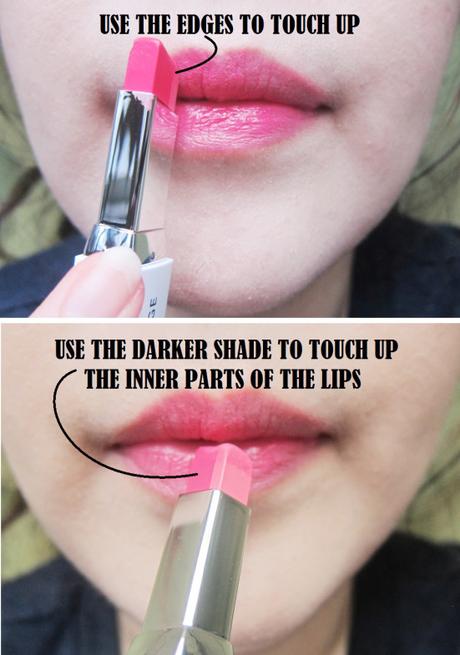
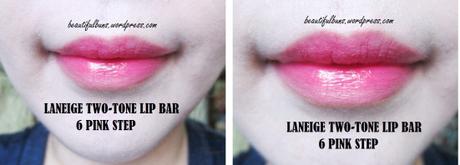

And there you have it! Now everybardy can haz gradient ombre Kpop star lips :D
 Laneige Two-Tone Lip Bar
