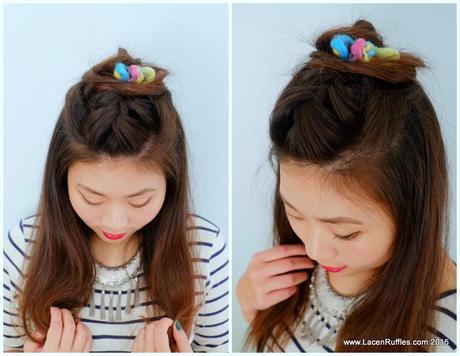
Is anyone else obsessed with half-up hair buns lately?
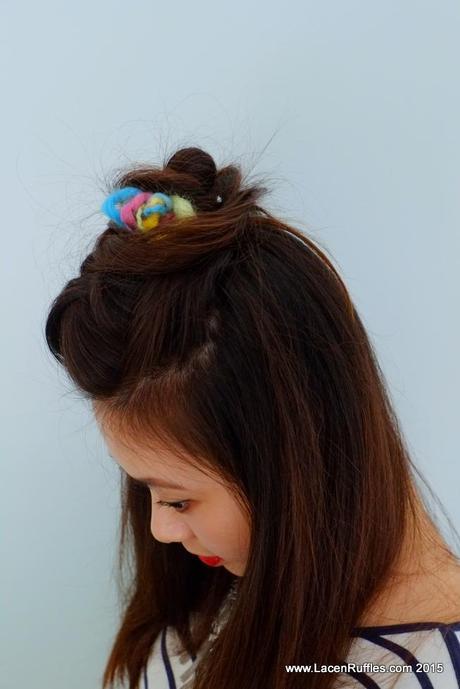
No, I'm not taking about those beyond sexy man buns here. These are hair buns so delicious that it's formed the perfect middle ground between a full bun and letting your hair fall naturally, which is always a hard decision to make. The best part? The messier your hair is, the more effortlessly chic it looks! I'd declare it as the go-to hairdo for post workout, post flights and road trips. You know, those occasions when you only have five minutes to save your hair disaster and be selfie-ready! But here's my problem. I have thin and fine hair, and I've had half-up bun that looked like a tiny macaroon on top my head- DOH! It's simply flat and dull. I won't let this get in the way of my bun obsessions though. Here I've created a simple half-up hair bun tutorial adding braids and colourful threads to this adorable hairdo for a voluminous look, follow me!
Half-up Hair Bun Tutorial
♥ Bobby pins
♥ One hair elastic (black if you have dark hair like me; clear for blonde/ light coloured hair)
♥ Two croc clips
♥ A few short pieces of colourful threads
♥ A brush and a teasing comb
♥ Hairspray (I used Aubrey Organics Natural Superhold Hairspray)
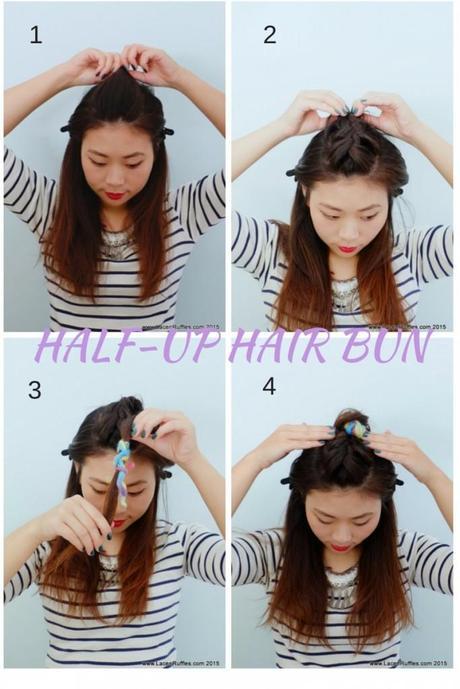
1. Comb your hair out. Take a small section of your hair above the ears. Use croc clips to keep the rest of your hair out of your way.
2. Do a French braid from the front with the small section of your hair. Stop when you reach the top of your head and secure your braid with an elastic to form a ponytail. Stretch your braid slightly to add volume.
3. Tie the threads from the middle section of your ponytail towards the end.
4. Twist your hair in one direction.
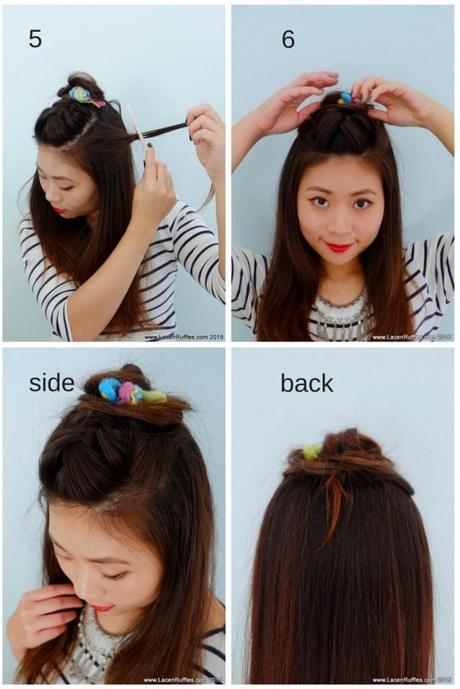
5. Wrap around the the top of your head where the elastic is. Tuck in the end of your hair to form a bun. Secure with several bobby pins. Slight loosen your bun by pulling out a few pieces of hair.
6. Now take a a small piece of hair above your ears on both side. Slightly tease it with a small teasing brush.
7. Pull the piece of hair towards your bun and wrap it loosely around the root. Pin to secure. Repeat this with the other side of your hair. Finish with hairspray all over to hold.
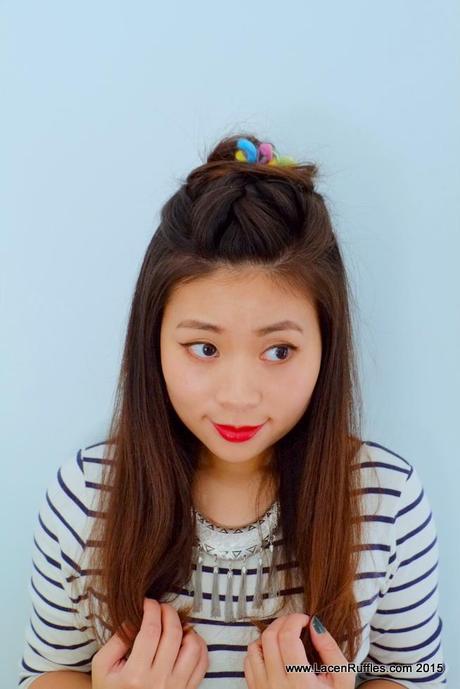
8. Viola - there you have it, a voluminous half-up hair bun, or a baby bun whatever you want to call it!
Still not getting the volume you want? Try these:
Tips for Getting Voluminous Hair
♥ Spray dry shampoo at your roots first and finish by spraying it all over before you create this bun look. Your hair will be dry and fluffy thus looking more voluminous.
♥ Salt water spray also helps to add volume to your hair (try this DIY recipe).
♥ Always apply conditioner towards the end of your hair only; avoid applying it near the roots which will drag your hair down with the extra weight. If your hair doesn't tangle up that much, skip conditioning all together before your next hairdo to create texture and volume (one of the best bridal beauty tips from my MUA!).
♥ Flip your head when blow drying your hair - it works wonder!

♥ Sick of faking it? Go for a DIY hair growth treatment at home with a LaserComb available for purchase from hair professionals such as this one from Transition Hair.
So tell me Sunshine, have I inspired your buns obsession? Have you tried creating a half-up hair bun? Do you have any tips to share for getting that voluminous glam hair look? Share your tips with our fellow bun lovers in the comment below! If you try this hairstyle I'd love you to tag me in your pics using #Lacenruffles. Love this hair tutorial? Be sure to check out our 1920s glam ghD curls tutorial previously vlogged here too.
Until next time, stay chic.

