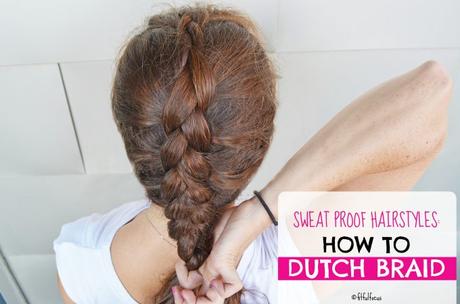
Welcome to another tutorial in the sweat proof hairstyle series, a series devoted to helping you keep your hair off your face and tangle free during workouts! (Miss the first one? Check out How To French Braid.)
The Dutch braid is one of my favorites. It looks fancy, but in actuality, it's just as easy to do as the French braid.
All of the steps are the same as French Braiding with one simple difference: you braid UNDER instead of over. This will give the braid a raised effect. It's stunning and it stays in place! Ready for the step-by-step?

- Brush out any tangles and brush your hair back, away from your forehead.
- Gather a big chunk of hair (1-2 inches wide) from the top-center of your head. Divide that chunk into three equal-sized pieces.
- Begin by starting a regular braid. Hold two strands in your right hand and the third in your left hand. Pull the right-most piece under the middle piece, so that it becomes the center piece. Then pull the left-most piece under the new middle piece. Repeat 2x.
- Now it's time to start incorporating new pieces. The next time you pull a right piece under the middle, add an extra piece of hair from the right side. Likewise, the next time you pull a left piece under the middle, add an extra piece of hair from the left side to braid along with it. The less hair you grab (and the more times you cross pieces under) the more intricate the braid will be. It's best to pull pieces from near your face and neck vs. pieces that are already close to the braid.
- Continue Step 4 until all of your hair is incorporated into the braid. This should occur by the time you reach the nape of your neck.
- You can tie the braid at the nape of your neck, or continue with a regular braid all the way down.
Add your fitness, fashion and healthy living tips to the Fit & Fashionable Friday Link Up ( full link up rules here).

Let's Chat:
Have you ever tried a Dutch braid?

