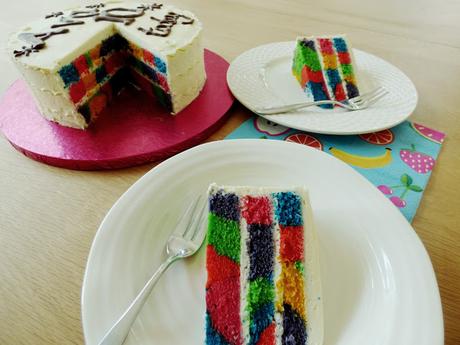
 It is not a difficult cake to make, the baking part is very easy, if you can bake a sponge you can bake this cake. A novice baker may find the butter cream covering a little tricky.
I bought the funky pink cake board for just £2 from Hobbycraft, this is where I also got my cake colours from £10 for a set of 8.
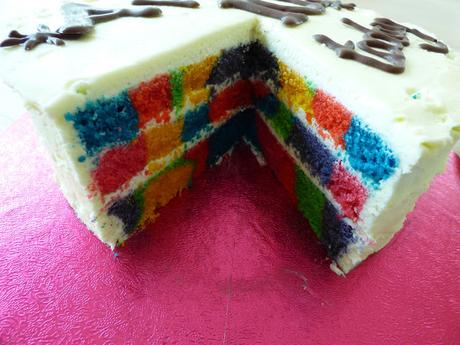
Ingredients for Rainbow Tie Dye Cake
9oz butter
9oz caster sugar4 eggs
9oz self raising flour
tablespoon of milk if required
6 bright cake colours
cake board
Traditional Butter cream ingredients
9oz softened butter
18oz (500g) icing sugarstrawberry flavouring (optional)
Equipment needed
Mixing bowlElectric hand whisk
3 cake tins (or use one twice once one sponge has baked)
scales
6 small bowls
6 spoons
6 piping bags
large serrated knife
palette knife
Greaseproof paper
Butter and line 3 cake tins with the greaseproof paper
Oven temp 180 degreesMethod
- Using a hand whisk
- Cream together the sugar and butter
- beat in 1 egg
- add a large spoon of flour, repeat this until all the eggs and flour are combined.
- Split the mixture evenly into 6 bowls
- Add your chosen food colouring to each bowl, (I used the end of a spoon to dip into the pot of each colour) mix in. Remember you can always add more color.
- Use separate spoons so as not to accidentally mix colours.
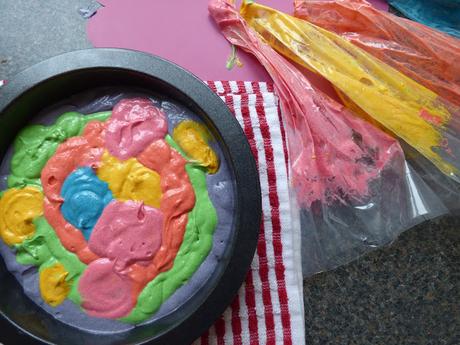
- Carefully spoon each coloured cake mix into a piping bag (you do not need a nozzle).
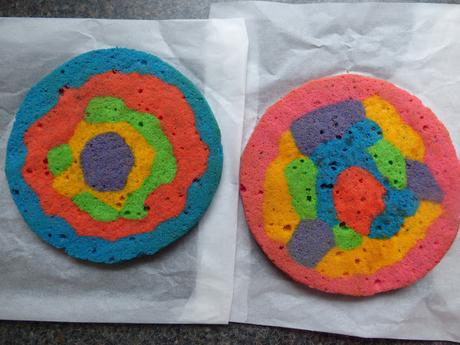
- Snip the end off of each nozzle and pipe in a circle your choice of color. Swapping colours at each circle. If you have any let over mixture I added it into the tin in large splodge of mixture to create a color patch. Just make sure you have equal amount of cake mix in each tin.
You do need to think about how you will stack your cake and where the colours will be, ideally you do not want for example 2 section of blue in the same place when they are stacked.
Place into the oven for 25-30 minutes. Check it is cooked by pushing a skewer or knitting needle into the sponge, it should come out clean.
Leave the cake to cool for 15 minutes before turning out onto a cooling rack.
Making the Butter cream
Using a hand whisk (this will give you a whiter looking butter cream) whisk together butter and icing sugar, add any flavouring should you wish. If your mixture is too thick add a drop of milk. It is far better to have too much butter cream than to run out part way through decorating a cake.Once the sponge has cooled, you will need to carefully trim with a sharp knife the outside edge and top of each sponge to remove the outer baked area. Removing the greaseproof paper at the bottom of each cake will reveal the vibrant colours of the sponge.
I secured the bottom layer of my cake to a cake board with a blob of butter cream. Then spread a generous amount of butter cream to sandwich your 3 sponges together.
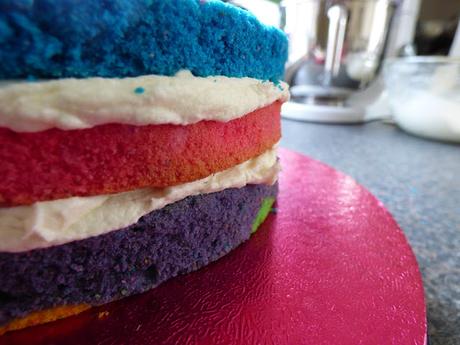
Once assembled make sure your cake is level and even around the edges. Add a generous amount of butter cream to the top of the cake, and gently ease this around to the edges. Using a palette knife will makes this easier, you should also have a mug of hot water and some kitchen roll. You will find it easier if you wipe the palette knife clean and dipping it in the hot water as you work.
I found filling a piping bag with butter cream and then applying this to the sides of the cakes easier to cover. Then using the palette knife against the side of the cake, whilst turning the plate gave an even covering.
Tip
If at anytime you find you are getting in a mess with the butter cream and it picking up the crumb of the cake, put the cake in the fridge for an hour have a cup of tea and then come back and continue.I decorated the top of my cake using Choco Writers (see my Halloween chocolate designs for how easy this is to do or the 60th birthday cake), you can pipe easily with liquid chocolate onto baking paper. Once you have perfected your design and it has set it is easy to transfer onto your cake.
Tip
Any left over butter cream can be kept in the freezer until the next time you bake, or sandwich some biscuits together for a quick treat.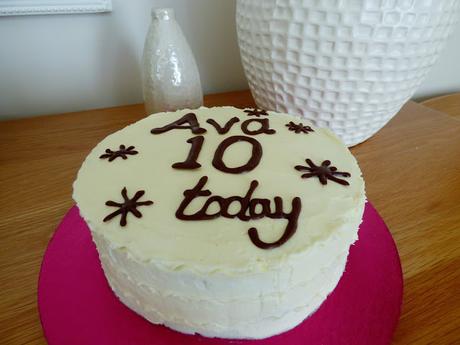
Love this recipe? You may also like my Loom Bands Birthday Cake.
