With the Elf this year, I actually mapped out what to do each day on a calendar that lives on our fridge. None of the ideas are terribly time consuming, but some do require a little prep.
December 1
On the day Libby came back to our house, we staged a North Pole Breakfast. The original printables I wanted to use went with our red and aqua theme this year, but a few days before the breakfast, I went online to get them and the blog had closed up shop. I'm a graphic designer and totally capable of creating my own, but I just simply did not heave enough time (I was a bit busy writing a book in November) so I turned to Etsy and paid a few bucks to a nice printable (sometimes it's just worth investing a few bucks to take the stress off). It wasn't exactly what I wanted, but it was pretty good none the less. I dressed it up with a tablecloth, plates and wind up trains from the dollar store and a paper table runner that I found at Homesense.
Libby became the centrepiece.
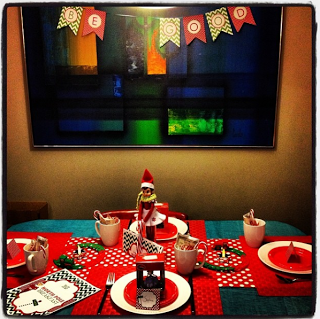
We left the bunting up on the painting afterwards. It's been a good reminder.
December 2
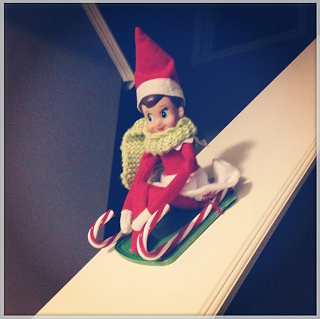
I saw this one on Pinterest done with just a little round ziplock bowl lid and loved it. But, when we had the plastic candy canes I bought at the dollar store - I was inspired to tape them to a rectangular lid and make a whimsical toboggan.
Libby was held on with a hair elastic(under her skirt) and safety pin (on her hands). To hold her to the banister, I used photographers Gaffer tape (I have come to realize this year that having a roll of that around is every Elf Mom's friend - it holds strongly and doesn't peel paint if you take it off in a day or two)
December 3
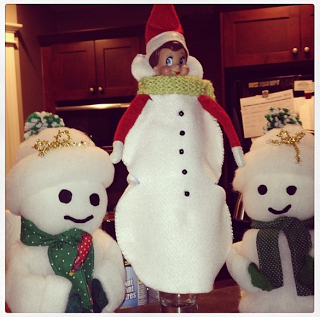
I saw this one on Pinterest, but not like this. I saw it as a felt Christmas tree costume...and then I couldn't find green felt at our Dollar Tree! So I improvised with some white felt I had bought for another project and never used. I held the two pieces together and put Libby on top of them and drew out the snowman shape. I cut it out and then cut a "U" in the top of the front piece for her face. I didn't stitch all the way around. Just at the top and a few stitches in the middle of each ball. I was just going to draw on buttons, but the marker didn't look right, so I stitched on some black beads as buttons instead.
Libby knit the scarf herself last year. :)
December 4
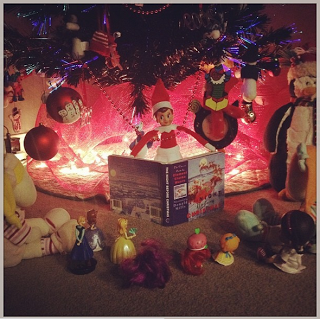
This one is super easy for last minute - just grab a holiday book in a smaller size and gather the toys around under the tree. The hardest part was getting Libby to sit. I didn't want her to be standing and rigid in the bud vase I'd used for the breakfast and the snowman. But I managed to get her positioned on some bead garland and that ended up working fine.
December 5
This one was probably the most awkward of this week. I ended up crafting madly and making the hubby help when it was getting late and the girls wouldn't go to sleep etc. But we got a length of paper chain made and then I couldn't figure out how to string it up around the mirror so I could just lodge her into the rings.
I ended up using the gaffer tape to hold it to the ceiling and then gathering them under the mirror into a hammock.
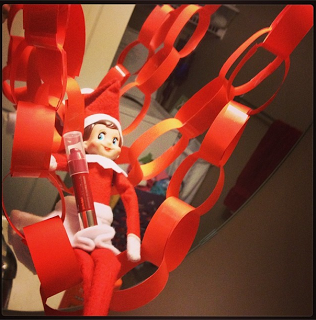
And wrote her special message on the mirror in a red lipstick I got as a freebie at Sephora (red looks so nasty on me)
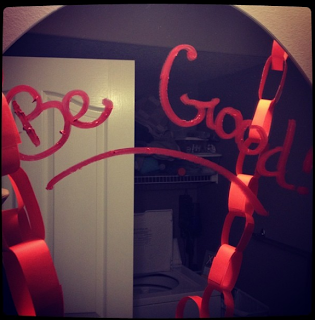
Unfortuately, when we got home that night, it was a mad rush and Hubby had to get ready for an appointment and I needed ingredients for dinner and the twins were alone downstairs getting into trouble for three minutes. Guess what they did.
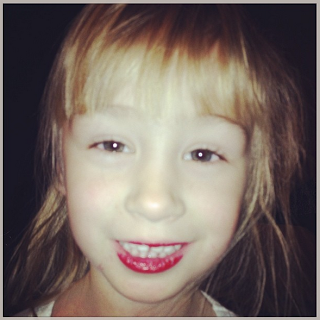
Yeah - so be forewarned if you are doing anything that involves markers or lipstick and it might be left within reach. Especially lipstick and girls. (But they did do an impressive job of applying that bright red...too bad it also ended up on all of their clothes)
We didn't know if Libby would be back the next day, since it was impossible to get the lipstick without touching the elf......but...
December 6
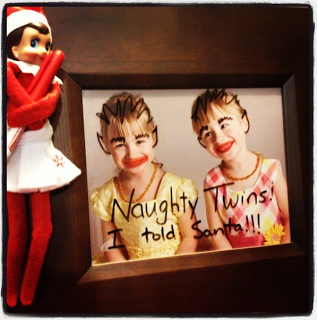
The incident on Thursday led perfectly into my plan for Friday. Instead of simply scribbling on the picture with a dry erase marker - Libby sent a warning message.
I tried to use the gaffer tape again to Tape libby to the frame, but she kept falling off all night. In the morning, I had to act fast to get a toilet paper tube onto thee frame to hold her better for the day.
December 7
Libby must have been feeling bad about calling the twins naughty. Because she was back with kisses the next day. I had initially just planned to do the elf kisses (free printable here), but then I couldn't figure out how I would position her with them. Enter Pinterest and the free printable kissing booth.
To give the booth some substance, and to hold Libby up, I affixed it to a cracker box. The Breton Crackers come in the perfect size box, though you need to be creative in cutting out the window because the printable is a bit wider. I kept the flaps on one end of the box so I could tape it to the counter for stability.
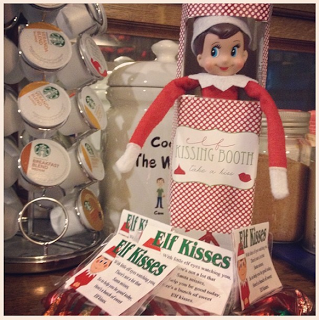
These were a big hit - probably because of the chocolate.
December 8
This one is pretty easy too. All you need is some cardboards, straws, paper and twine....and something to tie the elf onto - I used our paper towel holder.
Tie the elf to the 'pole' using twine, string, yarn, whatever.
Just print the messages onto paper (or cardstock, if you want to make it even quicker - no need for cardboard if you do it this way). Glue or tape them to the cardboard. I actually used peel and stick fun foam for my backing which was quick and light and on hand.
The biggest trouble I had was finding toys that could stand up. Luckily, I found some small halloween size tubs of playdoh and had an epiphany. Those would not only serve to hold the toy, the weight would keep them in place! Worked perfectly.
One toy revolt, coming right up...
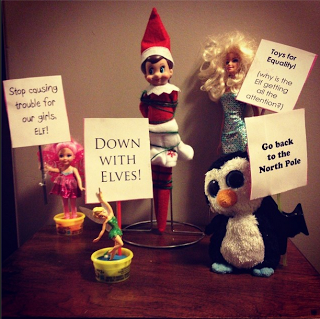
So, there they are - a week's worth of ideas. Feel free to steal and make them your own. And if you like them - please pin them and share with others.
