Safari is one of the most used applications in the world of iPads (and iPhones) and with the launch of iOS 7, it has undergone a huge change. There’s tons of new and exciting features that make this version of Safari the best one yet. Even if you are a Safari veteran, working in iOS 7 may present a challenge, so we’ve gathered a couple of tricks and tips that should make your iOS 7 experience easier and better.
1. Create a Reading List

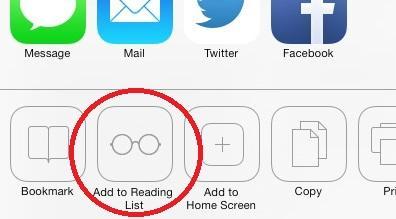
Just tap the glasses icon to access your reading list.
You’re browsing the web and you come across a really interesting article that you’d like to read, but don’t have enough time at the moment. Here’s where Safari’s Reading List comes in hand. You can add items to it by tapping the Share button, then the glasses icon (Add to Reading List). The page will be stored for later and you can read it even if you’re offline. For accessing your Reading List, simply press the book icon in the top right corner and then the glasses icon again.
2. Share with AirDrop

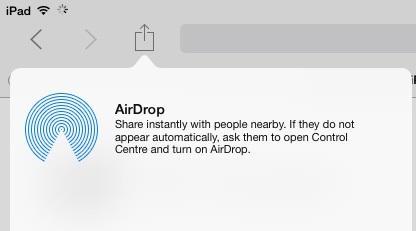
Sharing’s never been easier!
AirDrop is one of the brand new features of iOS 7. It allows you to share files, pages and links between two iOS devices. Tapping the Share button will open a screen where you’ll have an option to share via AirDrop, email, Twitter or Facebook. Tap the AirDrop icon and then the Contact from the list to send your URL. The recipient almost immediately receives a notification that you want to share something with them and has an option to either accept or reject your share.
3. Private Browsing

You can now browse without worrying about saved history or passwords.
Most people didn’t bother with private browsing in iOS 6 because it was too complicated to enable. However, Apple has made this feature quicker and easier in iOS 7 (to everyone’s relief). All you need to do is tap the new tab button (the plus at the bottom of your screen) and then the Private button in the bottom left corner. A darker UI scheme will indicate that you’ve entered the Private mode. You can now browse the web without saving history, cookies and passwords.
4. Create Folders for Your Bookmarks

Find your favourites easily by placing bookmarks into folders.
If you don’t want to search through a long list of bookmarks in order to find your favourites, it’s best to create new folders in which you’ll store them. You can rename the folders and edit them at your will, and move the pages you already have bookmarked. Press the book icon at the top of your screen and then the book tab. Next, tap the Edit button and press New Folder at the bottom. After that, you will be asked to name your folder (shopping, sport, news etc.). Tap Bookmarks at the top to go back and finally press Done to finish editing.
Good to know: Safari automatically syncs your bookmarks (using iCloud), so bookmarks from your computer will sync to iOS and vice versa.
5. Tab Management

You can’t close them all at once, but at least the tab limit is gone.
In previous versions of iOS, users could open eight tabs maximum at the same time, but with iOS 7 this is no longer the case. Tabs are now stacked vertically on top of each other (whereas before they were laid out horizontally), easier to go through and you’re not limited to only eight tabs.
To view or open new tabs all you have to do is press the plus icon. You will be presented with thumbnails (screenshots, if you will) of all the open tabs which you can then scroll through and select the one you want. To rearrange tabs press and hold on a tab and move it wherever you like. To close a tab, just swipe it off your screen to the left or tap the X button in the upper left corner of the tab. At this point, there’s still no options for closing all tabs at once.

