I bought the Salon Express Kit a few weeks ago at CVS, The retail price of this kit is $9.99 but I happened to have $4.00 in CVS coupons so I only ended up paying $6 and change. I've also seen this at other drugstores and Sally's Beauty Supply.


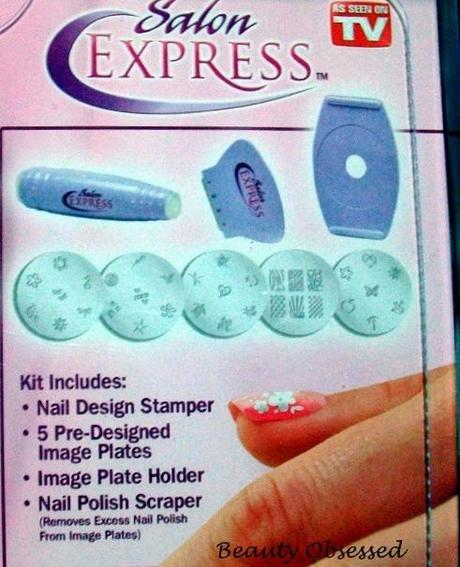
Here's the contents of the kit:
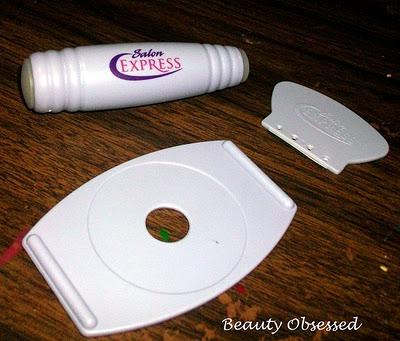
 (left to right) Dual ended Stamper, scraper and plate holder
 The stamper has a large and a small end. Depending on the design you use and the size of your nail bed.
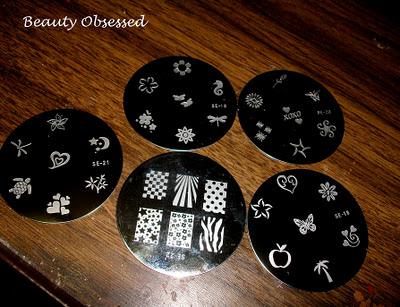
 The kit comes with 5 different metal plates. They came with a protective peel able blue coating. I already took them off of course. I'm not sure if I was supposed to cover them back up with the plastic. Too late bc I threw them away :/
 Image holder for the plates.
Here is the little pamphlet of some useful tips it came with:


I tried this about 3 times and had no luck which was a little discouraging bc I usually pick up on these kinda of things pretty quick. I didn't have any special stamping polish but I've heard that you don't need them, so I tried using regular polish but I guess it wasn't thick enough. I've also heard a lot of people say it takes a lot of practice.
The problem I had was that I either would only get half of the design to transfer onto the stamper or not at all. I ordered two stamping polishes in Black & White from The Born Pretty Store hoping that would help. My stamping polishes arrived today so I'm ready to dive back into this determined to finally get the hang of it.
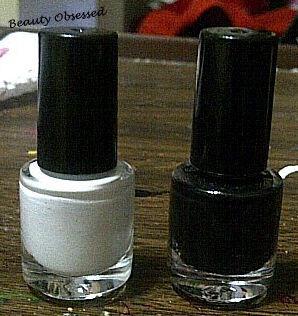
Here's a picture of the stamping polishes I bought. I didn't realize they were this small but I'll probably never use them both up and together they only cost $3.00.

On my left hand I used the black stamping polish and it finally worked!! Yeahh!! You have to understand my excitement, this is the first time after many attempts that I actually got the design to transfer onto my nail.
Of course it's far from perfect but at least I know I can do it now. *Remember these pictures are strictly for the reviewing aspect. I know how horrible they look and I need to work on aligning the designs onto my nail better. I'm just glad I got them to stamp!
Using the design below with black stamping polish


Here's my right hand using Sally Hansen's Insta- Dri Nail Polish in Speedy Sunburst. My ring finger was stamped with a different design from one of the other plates. It would have came out better if I stamped it more towards the middle of my nail. I know, the design is a mess but I'm glad to know I can use regular polishes too.
Using the design below (besides my ring finger) with Sally Hansen Insta-Dri Polish


TIPS FOR NAIL STAMPING BEGINNERS:
- This can be a messy process so before you begin get your area set up. Make sure to protect whatever surface you're working on if you don't want nail polish on it. You can use paper towels, an old towel or anything that will cover.
- You want to also have nail polish remover with cotton balls (the more the better) and maybe Q-Tips. Like I said it can get messy, plus you need to clean off the stamper and plate between each use.
- The nail polish is the key to making this work. Like it mentions in the little pamphlet of tips, the thicker the polish the more it will adhere to the stamper. Stamping polishes work well but if you don't own any, Sally Hansen's Insta-Dri polishes work well and I'm sure there are a lot more brands that work too. I haven't tried any others so I cant say but polishes that only need one coat, or thicker metallic and shimmery polishes will work best.
- The directions say you can lightly file the stamper to get the polish to stick better. At first I was scared to try this but then I saw a nail stamping video on YouTube where they lightly used a buffer and filed the stamper vertically once or twice. I ended up trying this and I feel like it did help, it doesn't at all ruin the stamper. Just make sure not to use a rough file and file gently.
- I wouldn't recommend using the scraper that comes with the kit bc it's metal and will probably scratch the plates. I've been using an old credit card and it works great for scraping. I also noticed that if I hold the scraper (or card) at a 45 degree angle it helps.
- Work quickly when transferring the stamper onto your nail, if you wait too long the nail polish will dry onto the stamper and wont transfer onto your nail.
One thing I wish I could change was the image plates I received. Besides the plate that I used for the designs above, there's some images I don't really care for (i.g. turtle, apple, pine tree, dragonfly and a few more). Those I will probably never use but it's fine bc you can buy different plates online for really cheap. I'm going to practice more and I know I will get the technique down sooner than later (I hope). So if you're new to nail stamping and feel like it doesn't work or you'll never get it, you will. If there's one thing I know about nail stamping it's that the more you practice the better you will get.
How do you feel about nail stamping and have you tried this kit? If you have any tips I would love to hear them :)

Click the links below :) Follow via GFC Follow me on Twitter


