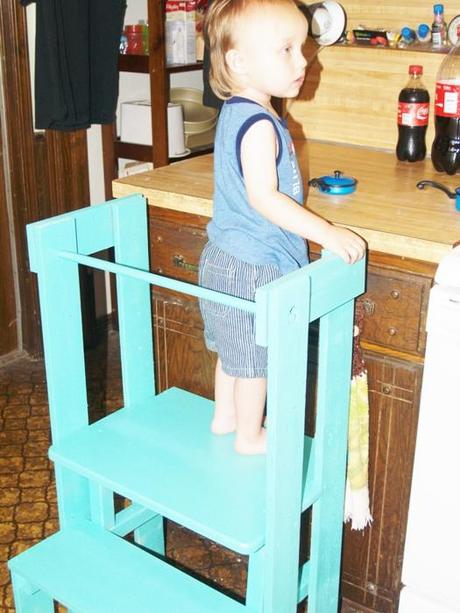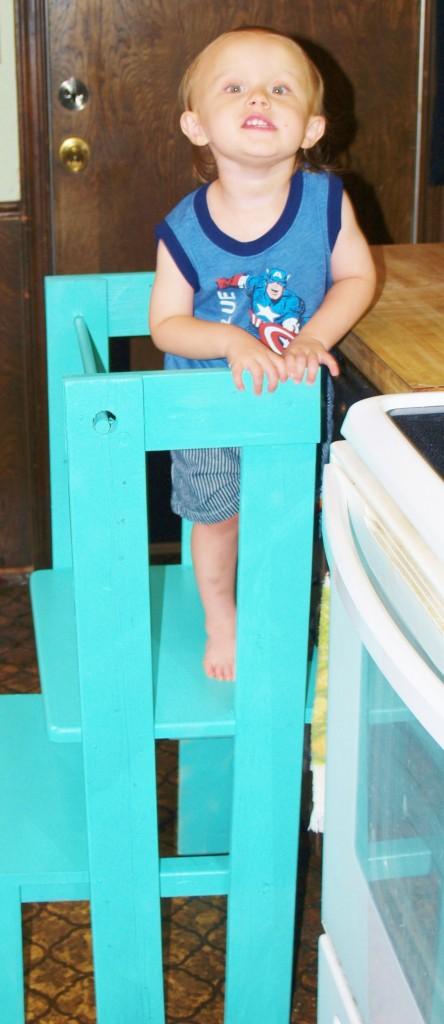
Rocket loves to “help” in the kitchen. If one of us goes in there for anything at all, he is always not far behind dragging one of his Little Tikes plastic chairs so he can stand on it to be closer to the counter. While those chairs are great for sitting, they are very unstable for standing on. Discouraging him from standing on a chair in the kitchen usually brings on an upset little boy. His mother and dad bought him little plastic pots and pans and some plastic food thinking that would suffice, but they were wrong. He wants to be up where the action is!
I began looking on Pinterest for something that someone…..anyone had built for their own child. I found something called an Activity or Learning Tower for the Montessori program on Amazon. The costs for them started at $119 through $199. All were very large and heavy. In fact, for someone who does not have an open style kitchen/living area it would block a big part of the floor space, particularly in a galley style kitchen like mine. Eventually I found one that someone had made using an Ikea Beckvam step stool. The step stool cost $14.99 but because the closest Ikea store to me was 2 hours away, shipping and handling brought that cost to about $25.00. That was more than I wanted to spend on part of the stand so I kept looking and talking with my husband about it. I just knew there was something we could put together for less than $20 that would be lighter weight yet stable for him to stand on. I was right!
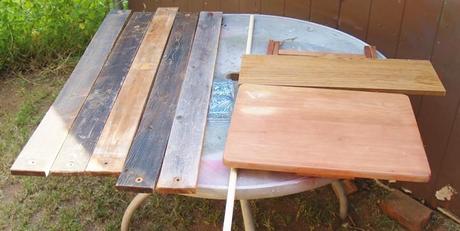
I have put together the tools and items you will need to make a stand like this one –telling you what we used and you can too if you have them but if not, take the list to the lumber store and get what you need. Ours ended up costing less than $15 because we recycled scrap wood, a book shelf and a wooden TV tray. Hopefully, you will have them too! By the way, the stand is VERY stable and weighs 12 pounds.
The most interesting part is that if you turn the stand around, adults can sit on it like a stool – an added bonus we did not anticipate! The stool seats an adult level with the Little Tikes table and makes it very easy to sit and play or color with your child. This picture is the back side where the dowel is, but on the other side is no dowel and you can use it as a seat!
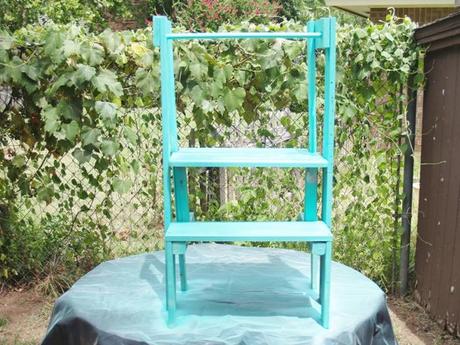
Tools, Paint and Hardware:
Drill
Phillips Bit
5/8” Boring Bit
Chop or Circular Saw
Sander (a palm sander is good – or sand paper and elbow grease)
Jig Saw
Tape Measure
#8 one and a half inch wood screws (you have to buy a box of these for about $5 each box)
#8 two inch wood screws (box)
#8 two and a half inch wood screws (box)
1 Can Krylon Primer
2 Cans Krylon Sea Glass Satin Finish Spray Paint
Wood – New or Recycled:
4 – 1×4’s 36” Long
2 – 1×4’s 11” Long
2 – 1×4’s 10and1/2” Long
1 – 19x8x1 (we used a recycled shelf)
1 – 19x14and1/2 (we used an old wooden TV tray)
1 – 2x2x8 – cut two 16 and ½“pieces and two 8” pieces
1 – 5/8” wooden dowel Cut to 21 ½” long
Directions:
- Cut all wood to size.
- Attach 10 & 1/2” 1×4’s to the 19x8x1 (bookshelf)
- Attach 16 ½” 2×2’s to underside of 19x8x1 (bookshelf) front inside the legs.
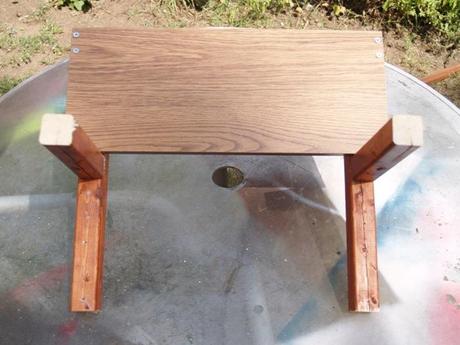
- Attach 8” 2×2’s to the 161/2” 2×2’s butting up against the 19x8x1 (bookshelf).
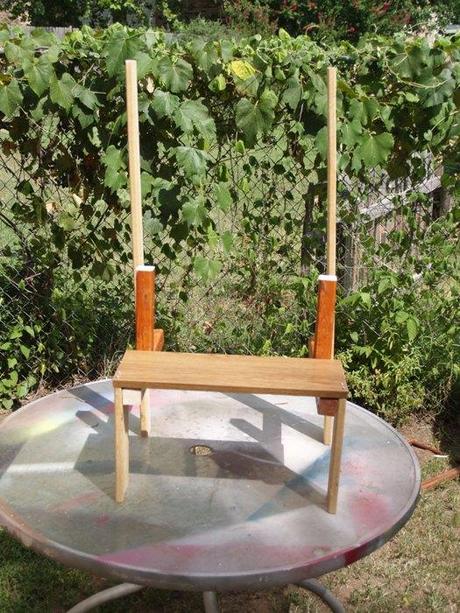
5. Cut a ¾” by 5 ½” notch in the 19×14 ½” (TV tray) in the back of tray piece.
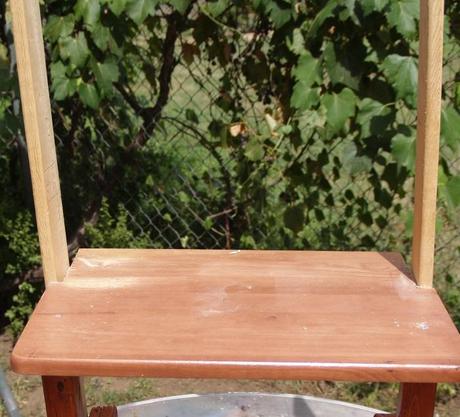
- Attach two 1×4’s (36” long) to the back end of the 2×2” (16 ½” long ones).
- Place notched end of 19x8x1 (TV tray) inside the two 1×4’s (36”) and on top of the 2x2x8 (8”).
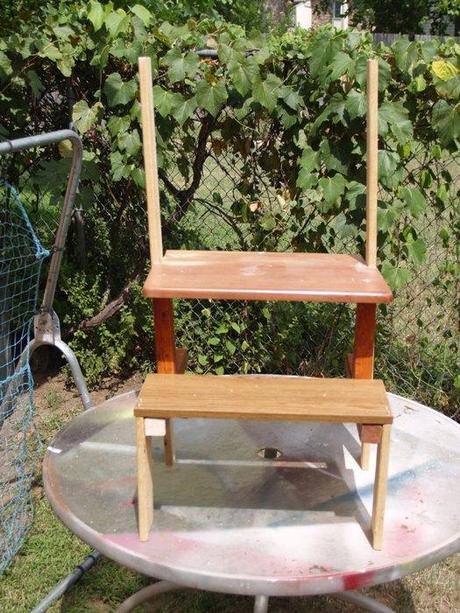
- Screw TV tray piece down into the 2x2x8 pieces then screw into the side of the TV Tray piece through the 1×4 (36”).
- Attach other 1×4 (36” pieces) to the side of TV Tray piece about 1 ½” back from front.
- Added the two 1×4 (11” pieces) to the outside top of the 36” board pieces.
- Screw into place both front and back for security.
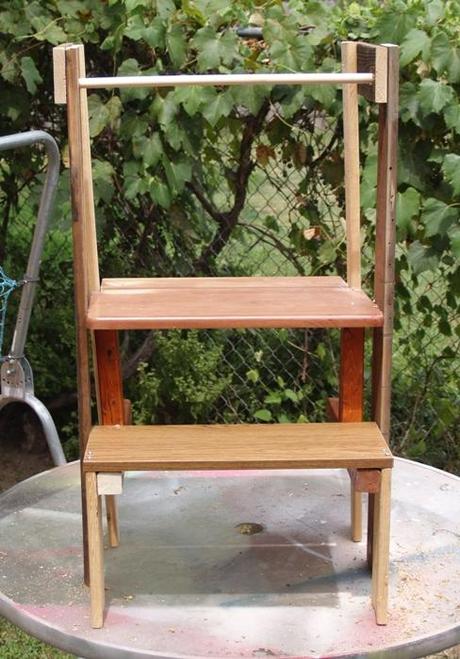
- Mark a spot 2” back from front edge of the 11” 1×4’s and drill holes using the boring bit on both sides.
- Insert dowel through holes.
- Screw in dowel to the 36” pieces using 2 ½” wood screws.
- Prime and then paint it allowing for at least 1 hour drying time between each.
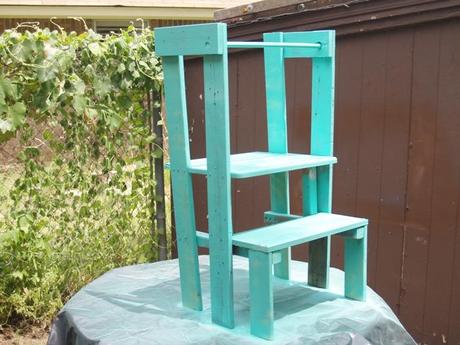
After only 1 coat of paint…..
***Some of our pieces were irregular because we reused salvaged wood instead of having brand new pieces. ***
I hope this works for you as well as it worked for us – our grandson loves his Helping Stand and now I feel secure letting him help – and the Son-in-Law enjoys sitting on it to play “zoo” at Rocket’s table because he did not enjoy the floor much!
