 If you’ve been shooting a compound bow for any length of time, you’ve probably heard about tuning your bow. Tuning is an important part of getting the best performance out of your bow and arrows, but it can be incredibly confusing for a beginner. On top of that, there are several different ways you can tune your bow, and everyone has their opinions on which ways are the best.
In this article we hope to lay out a few different tuning options, so that you can experiment for yourself and get your bow shooting the best it possibly can.
Before we get into the specifics of how to tune a compound bow, there are a few things you should know. Taking some time to do your homework on compound bow tuning before you start will save you a lot of time and frustration while you are learning to tune.
About Compound Bow Tuning
What Is Compound Bow Tuning?
Tuning a compound bow (or any bow) is a process where you adjust your bow and arrows to get them to “match” each other as well as they can. When your bow and arrows are matched up they will shoot as straight and as accurately as they can, without an erratic arrow flight. Your bow will also be quieter.
The biggest benefit to getting your compound bow in tune is that it will be more forgiving of any errors in your shooting form. Every archer makes errors, especially in high-pressure situations like hunting or shooting an important tournament. A well tuned bow will help correct your bad shots, and make sure your good shots will all land in the middle.
Should I Tune My Bow?
Even though tuning has many benefits, not every archer should spend time on tuning. If you’re still very new to archery, your time is probably best spent practicing and working on your shooting form.
When you buy a bow from a bow shop they will do a basic set up and match your bow with some arrows. This basic set up will work great for beginners, and you should only worry about tuning when you start to nail down your shooting form and shoot more accurately.
What Do I Need to Tune My Bow?
You might be wondering what you need to tune. If you go to an archery shop they should have everything you need, but many people don’t have access to an archery shop and are tuning their bow on their own. If that’s the case, you don’t need very much equipment to successfully tune your compound bow.
The most important thing you need (besides your bow and a set of arrows) is a safe place to shoot, both at a very close distance and all the distances you need to sight in your bow sight.
Next is a way to paper tune. This will be covered more in the paper tuning step down below, but all you need is something to hold a piece of paper up so you can shoot through it.
Finally, you’ll need the small tools like hex keys and screwdrivers to make adjustments to your bow, the arrow rest, and the sights.
A bow press can be incredibly helpful when tuning a compound bow, but chances are if you’re not tuning your bow at an archery shop you won’t have access to one. That’s ok, there’s still a lot you can do to get your bow to shoot better without one.

How to Tune Your Compound Bow
We’re finally ready to tune, and we’ve written a step-by-step guide so you can learn how to tune your bow and start shooting more accurately than ever. As stated before, this guide will only cover compound bow tuning. You can use these steps for either a target or hunting bow, but broadhead tuning will not be covered in this article.
One last thing to keep in mind is that as you’re tuning you may want to revisit previous steps to double check that changes you made are still working.
If at any point you feel like you may have messed something up, or that your bow is shooting badly and you can’t figure out why, the best course of action is to take it to an archery shop with a bow technician. Tuning a bow is a learning process, and it never hurts to get help from a professional.
Step 1: Initial Bow Setup
The first step to tuning is checking that your bow is set up well. Check and make sure your bow string and cables aren’t frayed or damaged, your peep sight is installed securely (look for serving string wrapped around the peep and bow string), and nothing else on your bow appears to be damaged or cracked.
If you have a bow that is already a few years old, it could be a good idea to run a cotton ball over the limbs to check for cracks in the limbs. The cotton ball will catch on tiny fractures and cracks you might not be able to see otherwise.
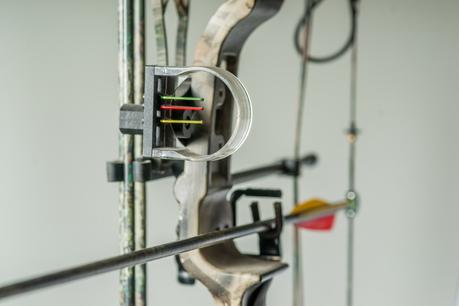
Now is the time to install all the accessories you want to use on your compound bow. This includes your arrow rest, any stabilizers, bow sight, wrist sling, and a bow mounted quiver if you plan on using one.
You want to install the accessories before you start tuning. If you install them after tuning you may find that they change how the bow shoots, meaning your tune won’t be good anymore and you’ll need to redo it.
Step 2: Cam Timing
This step will be different based on what kind of bow you have, and may require a bow press. If you have a single cam bow, you generally do not have to worry about cam timing. If you have a dual cam bow, this step is important because paper tuning will be nearly impossible with cams that are not in time with each other.
The cams on your bow will each have a straw stop, which is the part of your cam that stops your draw at your draw length. You want both of your cams to hit the draw stops at the same time, so they are in sync with each other. If they are out of time, it can cause erratic arrow flight and make it nearly impossible to paper tune.
To check your timing, draw your bow back and have a friend watch your cams to see if they are hitting the draw stops at the same time. You could also use a draw board, a device that will draw your bow for you, if you have access to one. If your cams are out of time and need adjustment, put your bow in a bow press and put a half twist or twist in the cable attached to the cam that hits the draw stop first.
Make a small adjustment, and then take your bow off the press and check the timing again. Continue this process until you get the timing correct and both cams are hitting the draw stops at the same time.
Step 3: Peep Alignment
The first step of actual tuning is to get your peep in a good alignment. You look through your peep sight into your bow sight, and the peep sight keeps you aligned so that you’re always looking through your sight at the same angle. Your peep sight can be set too high or low on your bow string, causing you to have to strain to look through it.
To test if your peep sight is in the right location, simply draw your bow back and anchor with your eyes closed. Without moving, open your eyes and see if you are looking through your peep sight. If you are, your peep is aligned and you’re good to move on to the next step. If you aren’t, it needs to be moved up or down on your bow string until you’re able to see through it using the eyes closed test.
You will probably need to use a bow press to be able to adjust the location of your peep sight. If you don’t have access to one, any bow technician should be able to adjust it for you. When it is in the most comfortable and natural position for you, don’t forget to have it tied into your bow string so that it won’t move at an inopportune moment.
Step 4: Set the Center Shot and Nocking Point
Now it’s time to set the center shot and initial nock placement for your bow. Some archers use a laser center shot tool, but you don’t need one to set your center shot. WIth your arrow rest installed, set one of your arrows on it and nock it on the string. You can either eyeball this, (you’ll be able to check and adjust it in later steps) or use a bow square.
If you have a bow square, set it on your arrow rest like it’s an arrow and clip it to your string. From here, use nocking point thread or something similar to tie a small nocking point either level with your arrow rest, or slightly above. Which one you choose is personal preference, and doesn’t matter much because any errors can be fixed by adjusting the arrow rest later.
You’ll also want to tie on a string loop or d-loop at this point. Some compound archers shoot without one, but they are essential if you are shooting with a release aid. They’re easy enough to tie on around your nocking point with some string loop material and a lighter, but if you don’t have any experience working on compound bows you may be better off getting a bow technician to tie it onto your string for you.
To set your rough center shot, nock an arrow and adjust your arrow rest until your arrow is centered and aligned with your string. This is just a rough starting point, it will likely change when you start paper tuning.

Step 5: Paper Tune
Now we move from setup to actual bow tuning. Paper tuning is a simple process where you shoot an arrow through paper from a close distance, and make adjustments to your bow based on how your arrow tears through the paper.
The ultimate goal is to have your arrow punch a perfect “bullet hole” through the paper without a tear in any direction. This should eliminate most, if not all of your erratic arrow flight.
Every bow hop should have a paper tuning setup, but if you don’t have access to one they are simple to build. All you need is a target, and something that can hold your paper a few feet in front of the target. Some archers build a frame out of PVC to hold the paper.
Stand a couple yards away from the paper, and shoot an arrow through the paper. It may help to have a friend watch you shoot to make sure your arrow will go through the paper, it can be hard to tell on your own if your arrow is pointed at such a small, close target. Next, examine the tear your arrow made in the paper to see what adjustments you need to make to your bow.
If you have a tear above your arrow hole, you need to move your nocking point higher up your string, or adjust your arrow rest lower. Conversely, if you have a tear below your arrow hole you need to move your nocking point down your string, or raise your arrow rest.
If you have a tear to the left of your arrow hole, adjust your arrow rest to the left. If you have a tear to the right of your arrow hole, move your arrow rest to the right. If you have a tear that is diagonal to your arrow hole, address and fix the vertical tear first before focusing on the diagonal. Focusing on one at a time allows you to get one aspect of your tune perfect before moving on.
Step 6: Set Your Sight
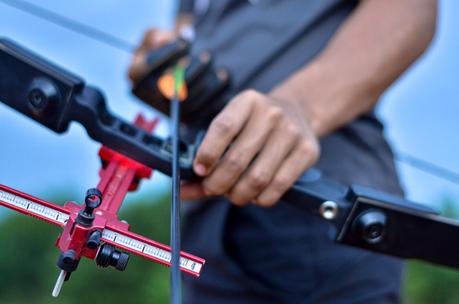
The next step to getting your compound bow tuned is to set your sight pins. To do this you’ll need to shoot somewhere with enough room to back up and sight in all your pins. For a detailed walkthrough of how to sight in your pins, check out our How to Sight in Your Compound Bow article.
Step 7: Walk Back Tune
The final step in compound bow tuning is walk back tuning, which will help you fine tune the position of your arrow rest. Place a vertical line down the center of your target, with tape or paper and a marker. Mark an aiming spot at the top of your target, and start at the distance of your closest sight pin.
Shoot an arrow at your aiming dot, and then move back five to ten yards away from the target. Shoot at the dot again while still using your closest sight pin.
The arrow should land further down your vertical line. Continue moving further away from the target and shooting with your closest sight pin until you have a line of at least four or five arrows down your target. You should see a pattern of them either being in a straight line, or going diagonally from one side to the other.
If your arrows fell in a straight line down the target, you’re done. If they’re diagonal to one side, a small arrow rest adjustment will fix it. Adjust your arrow rest a very small amount to the right if your arrows fell diagonally to the left of your vertical line, and vice versa. Next, shoot your line again to see if your adjustment worked, or if it still needs to be adjusted more.
There wasn’t room in this guide to cover every possible way you could tune a compound bow, but these are the methods and steps we believe are the easiest for a beginner archer, or an archer looking to work on their own equipment for the first time.
With all of that out of the way, you’re done! Your compound bow should be shooting better than ever, and ready for your next tournament or hunt.

