Consider the following point which makes you come here :-
- You use some ads showing networks like Google Adsense, Infolinks etc for serving ads, but you also like to recive direct ads from brands, agencies and other Direct advertisers.
- You have partnered with multiple CPM ads agencies like Buysellads, Google Adsense, Tribal Fusion but would only like to show those ads which will pay you more.
- You are using AdSense ads but with low CPM instead of that you want to show in house ads which will show your thinks or your ads, post , images etc.
- You like to show ads based on some criteria like ads to the Visitors of India will be shown one set of ads while to U.S visitors you will show others ads etc.
Google DFP is the perfect solution for any of the above scenario. DFP is a free ad server which help you sell your ad space more effectively and help you maximizing the revenue you generate.
With the Help of DFP you can run any type of Ads like banner ads, text ads, flash ads, video ads etc.It requires only one tool Google Ad Manager which need not required any installation just it need is an Active Google AdSense account.
How To Sell Your Advertising Space With DFP ?
Follow this simple step by step guide :-1. Create Ad units

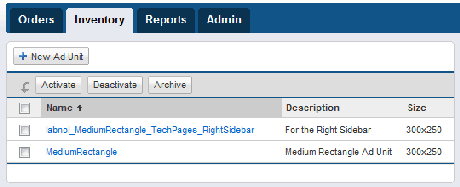
We had to tell DFP all the ads space we are providing on our webpage. For this we would take the example of most popular blog Digital Inspiration own by Amit agarwal. He has created an ads of size 350 x 250 rectangle. This is standard size but you can choose your own custom.
Go to DFP > Inventory > Ad units> New ad Units. Give a description which will help you identify it next time.You may check the option of Maximize revenue of unsold and remnant inventory with AdSense. in case when Google offers more revenue when there is no direct ads to show.
Note :- Google adsense doesn't allow to open ads in new window but if you are using DFP then you can allow to open Google ads in new window.
2. Define Placement

If you have more than one ads in your web or blog then advertiser may want to show one or more ad units You can group this ads space with defining the placement of these ads that can be targeted by Advertisers.
Go to Inventory Tab > Placement > New Placements and add your ad space placement. Now check the option "Offer this Placement to Advertisers" through adwords to attract more advertisers. You have to carefully fill the Adsense section because whatever you fill it will be visible to Advertisers.
3. Create An Order

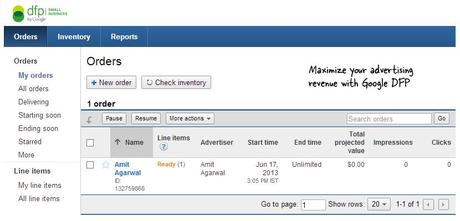
Now as you have created an Ad inventory now its time to get orders. The advertiser will specify where he wants to place the ads, what kind of ads and what will he pay for it.
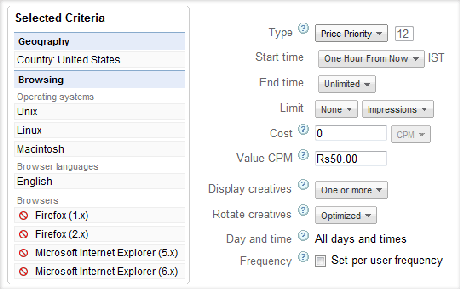
Go to DFP > Order > New Order. Create a company for advertiser and fill order details under " New Line Items" Set the type Price priority if you want to show only highest paying ads to the visitors and then add targeting criteria.
4. Upload Ad Creative

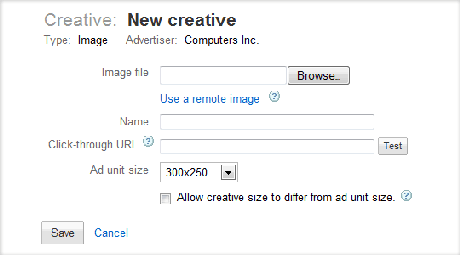
Now upload the ad creative to your blog or web to be displayed. You can upload a image saying advertise here.
Go to DFP > Line items and select "line items" that you have created in previous steps. Click on ad creative or either upload a image or an text ad like you see that Google Adsense.
5. Get The Add Tags To your Website
Click inventory tab in DFP dashboard and choose "generate tags" select the ad unit you have created and then click on generate tags. Use Google Publisher Tags option from drop down menu and ad this code to your website Google DFP will begin showing this ads in 15 to 20 minutes.
If you have any problem you can ask in comments below. If you like this post then please share it and subscribe our newsletter.
