When you purchase a domain from Godaddy.com, they assign DNS Records (A record and CNAME record) to the domain. You will use these records to set-up your new website. If you're blogging using Blogger, the default A record and CNAME records provided by Godaddy.com cannot be used so you will have to change it or delete it and create a new one.
Here are the steps on how to setup a custom domain for your Blogger blog with Godaddy.com for the first time:
1. Sign-in to your Blogger account, expand Settings and click Basic.
2. Under Publishing > Blog Address section, click "+ Setup a 3rd party URL for your blog"

3. Enter the domain name you just purchased from Godaddy.com and make sure that the www prefix is included. Do not hit the Save button just yet. You need to configure the A and CNAME Records on your Godaddy account first before clicking that Save button.

4. Open a new browser window and sign-in to your Godaddy account.
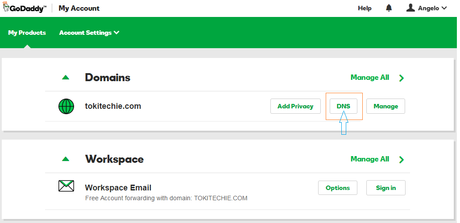
5. Under My Products > Domains, choose the domain name and click DNS button.
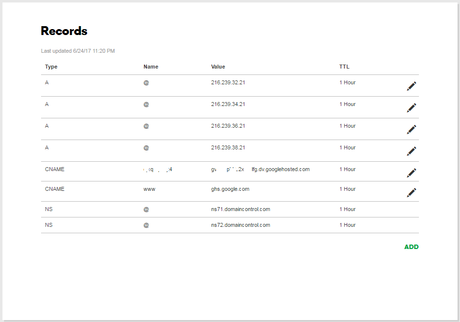
6. Under the DNS Management > Records, delete the all A records and CNAME records leaving only the two (2) NS records.
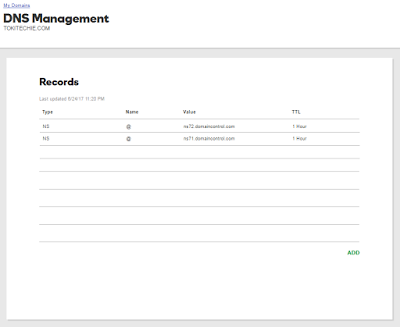 Click image to enlarge
7. Now, you need to create four (4) A records using the following IP addresses:
Click image to enlarge
7. Now, you need to create four (4) A records using the following IP addresses:216.239.32.21 216.239.34.21 216.239.36.21 216.239.38.21
To create an A record, click the ADD button,
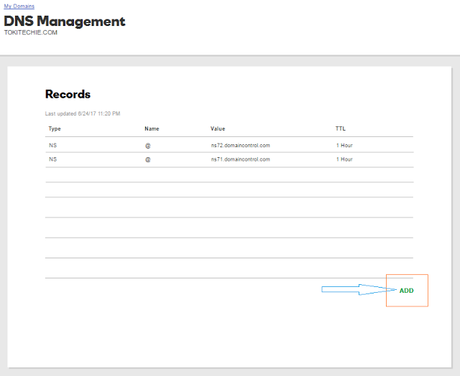
select Record Type A,
 and put values to "Host" and "Points to" one by one until you finish creating 4 A records.
Host "@" and Points to "216.239.32.21" Host "@" and Points to "216.239.34.21" Host "@" and Points to "216.239.36.21" Host "@" and Points to "216.239.38.21"

8. Now, create CNAME records. To do that, you need to go back to your blogger account on the last page where you left it and the click the Save button. After clicking the save button, you will get an Error message. To fix that error, you need to verify ownership of the domain by creating two CNAME records on your Godaddy account using the values generated from your Blogger account.
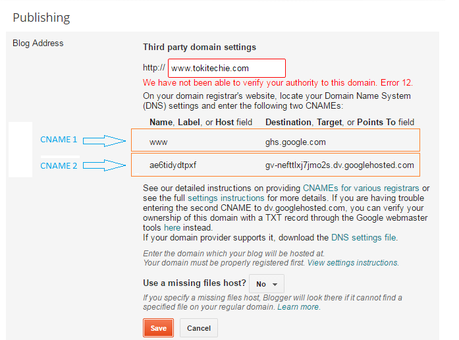


 9. After creating the 2 CNAMEs and 4 A records, click Finish and Save Changes once again. Go back to Blogger and you should now be able to save the third party domain setting without error.
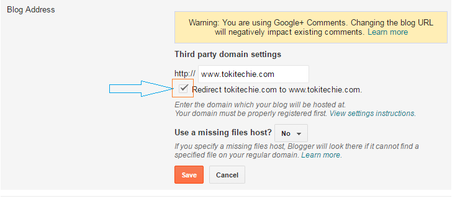
 10. For the final step, click on the "Edit" link next to the blog address and tick the redirection option and save the settings once again.

That's it! I hope having a new domain name inspires you to write more blog articles for your readers :) :) :)
Note: The changes to the DNS settings for A and CNAME records can take up to 48 hours to update so if it doesn't work right away, just wait for the settings to take effect by checking back after a few hours. In my case, the changes took effect at once so I was able to immediately browse the web pages of my blog using the new domain name I just purchased from Godaddy!.

