 Installing iOS 11 on your iDevice is a bit risky but an exciting procedure; the steps are very simple and uncomplicated. But what if you suddenly want to go back to iOS 10 for whatever reasons? Maybe you're annoyed by the common issues of beta software which I mentioned on my previous post and your patience just gave in or you are simply done testing it and decided to just wait for the final release. How do you downgrade? Would it be as simple as connecting to the internet and downloading the updates just like what you did when you installed iOS 11 or do you need to do it in a different way? I believe you're reading this post right now because you want to know how to downgrade your iDevice running iOS 11 Public Beta version to the most recent final public version of iOS 10. You're on the right site because I am going to show you the steps on how to downgrade your iOS 11 Public Beta to iOS 10.3.2 [10.3.2 is the up-to-date public version of iOS 10 as of the date of writing this post]. To do it, here are the important things you need to prepare before you proceed to the steps:
- Latest version of iTunes on your PC or Mac.
- Final version of iOS 10.3.2 ipsw specific to your device's model and version. Download it from Apple Beta Software Program website.
- Original data transfer cable from Apple
- Your iOS device running iOS 11 Beta with battery charge level of at least 50% to avoid uninterrupted installation and bootloop/white screen
- Make sure you're signed out from iCloud as we all know iCloud's main purpose: you can't install/re-install an iOS on an iDevice without signing out of iCloud. To sign out of iCloud, tap Settings > tap Apple ID Banner at the top screen > scroll to the bottom screen > tap Sign-out.
I. Connect your iDevice to your PC or Mac using the original data cable supplied by Apple. Ensure that when you connected your iOS device running iOS 11, the iTunes launches.
II. Put your device to Recovery Mode (or DFU Mode). To do this,
- Hold down the Home Button and the Power Button at the same time for about 10 seconds. If you're using iPhone 7 or 7 Plus which doesn't have clickable home button, Press and hold the Volume Down Button and the Power Button at the same time for 10 seconds.
- Release the Power Button leaving the Home Button [or Volume Button of the iPhone 7 or 7 Plus] still pressed for 3 seconds.
- The device will turn into Recovery Mode and iTunes will notify you that it detected your iDevice in Recovery Mode.
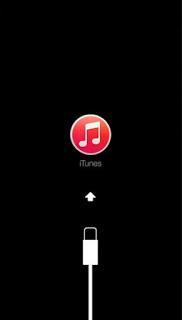
- If you see the image below shows up on your iDevice's screen, you've successfully entered the Recovery/DFU Mode and you're good to go to the next step.

 IV. Wait for the ipsw to be completely installed on your device. It will take a few minutes to finish as the size of iOS 10.3.2 is more than 2 GB.
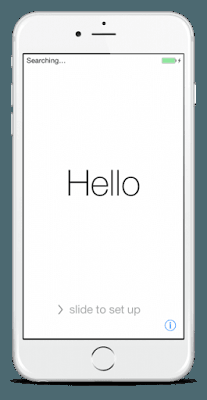
V. After the complete installation of iOS 10.3.2 ipsw, you will see the familiar Hello! screen which means that you have successfully downgraded your iDevice to iOS 10.3.2. You just need to set-up your iDevice again, but this time running iOS 10.3.2. You can set-up the device as a new iPhone or iPad or you can set-up using the back-up of your iOS 10.3.2. I believe you backed-up your iDevice prior to upgrading to iOS 11 so you have those back-up now that you went back to iOS 10.3.2.


