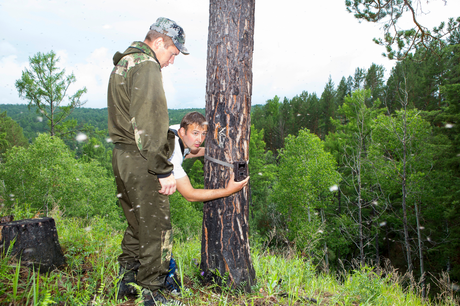
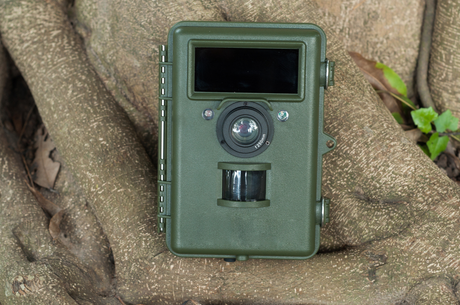
For most of the U.S. deer season is still months away but early tinges of Whitetail Fever are already starting to crop up. It may not be time to drag out the bow yet but that doesn’t mean we can’t start doing some solid recon and planning our attack with good trail camera placement strategies.

Pre-Season and Opening Week Strategies
Most areas of the country kick off bow season around the end of August or beginning of September. By this time the deer are nice and meaty from good spring and summer forage but will still be looking to stock up on calories from available late summer crops.
Your best bet for camera placement in the later summer months will still be near summer food and water sources. Grain crops should still be a viable food source so aim for the edges of fields, even harvested fields and clear cuts will offer plenty of forage for deer.
Since deer don’t move as much at this time of year, watering holes should be frequent gathering spots and are prime locations to survey deer population. If foliage is still thick, consider hanging cameras lower, around three to four feet. There is a chance of the camera spooking the deer but you have your shot and the deer are not likely to be frightened off a food or water source for long.
Summer / Fall Transition Strategies
As the leaves start to change, so should your camera placement. This time signals a change in food sources. Deer will search wider for the food and minerals they need. If baiting is legal in your area, consider setting up a salt lick.
Hanging or block type licks are often enough but there are a lot of benefits to setting up a ground lick with loose salts. Pick a likely spot near travel routes and mix in a couple of pounds of salt into loosened soil then scatter about a pound over top. This should get deer to pause plenty long enough to get a clear picture.
If you cannot bait in your area, look for the next likely food source. This will commonly be acorns or other nuts but any wild fruit trees such as apple may still be appealing. Take advantage of predictable behavior and set up near their forage spots. This can be one of the easiest times of the year to predict deer locations.
As fall sets in, hang your cameras higher. Generally, five feet to as much as seven feet, and angle them downward to get the best shots. Most of the densest leaf cover has fallen and higher placement provides a better angle and less chance of alarming deer
Pre-Rut Strategies
When deer start roaming, especially as they get closer to rut, it’s a great time to use game trails to catch a good snapshot of the local population. This works from early fall months into December as deer, especially bucks, become more active in their search for food and mating potential.
Deer move quickly on trails at this time of year and having your camera trigger too late is a common problem. The best way to avoid this is to set your cameras toward the direction the deer travel most frequently. Since they will be moving mostly at night, facing a camera towards areas that deer use for cover is the best bet. Face the camera around 45 degrees to the trail to get the best angle while still having adequate time to catch a shot before they pass by.
You can also get deer to pause by manipulating their prey instincts. You can scent a trail by just scraping up some loose earth or leaves with your boot. That can be enough to get a deer to pause long enough for the camera. This technique is best used with multiple cameras along a trail to ensure you get a good angle and accurate population count.
Camera Placement Considerations
Get in the habit of checking your cameras at the same time of day and avoid checking them when deer are most active. This will allow the deer to acclimate to your schedule and will cause less disruption to their normal activity. Avoid leaving too much scent around when placing or checking cameras.
Sunlight can wreak havoc on your camera exposure and turn a great shot into a blurry mess. Whenever possible face your cameras to the north, even if it means picking a different location. South is your second best bet but not in the latter months of fall when the sun sits lower on the horizon, especially after fall time change. Unless the camera is in a heavily covered area, avoid facing them east or west altogether.
Be cautious of your background. If you are after a trophy buck, picking an area cluttered with sticks and bushes can make it difficult to see a deer’s antlers. Deer do tend to show up better against a more solid backdrop but only if it’s some distance from the camera. Dense backgrounds close to the camera can make pictures muddled and hard to see. This is especially true for pictures taken when deer are walking.
Camera Maintenance and Settings

No matter the time of year, your success will be dependent on how well you keep your cameras working for you. Always get the best batteries you can, especially as temperatures get colder and batteries deplete faster. Lithium batteries are the best bang for the buck unless your camera accepts an external power source. A six-volt external battery is capable of powering a camera for up to a month in optimum conditions.
The same is true of SD cards. It does not good to have a camera powered for a month if you run out of storage after a week. Get quality SD cards and pay attention to how many pictures it can hold. Everything should be noted on the packaging but leave a good margin of error and change your cards out early and often.
Know your camera’s settings. If you are hanging your camera low, avoid using a burst setting that keeps the IR on for longer and may startle deer. When hanging higher than the deer’s head, burst mode gets great shots and helps to ensure you get the best photo of the deer without alerting them. Use video sparingly and preferably only in places where the deer won’t be standing still. Deer aren’t supposed to be able to sense the IR but how many shots have you seen with a deer staring straight at the camera.
Consider each camera’s location when setting sensitivity. Areas that have a lot of vegetation close to your camera can cause it to trigger as it moves in the wind. Setting your sensitivity high should be reserved for open areas. If you are using bait, it’s probably best to set the sensitivity lower no matter how open the terrain. This should help avoid shots of all the small critters that clog up SD cards with useless shots.
Trail cams are a flooded market, all are not equal. You can make just about any camera suit your purpose as long as you understand the camera you are using. This is not the place to talk too much about selection or features but you should at least look for a camera that has a large detection range and fast trigger speed. The camera you choose may be the key to your success in the coming months. Make sure you get extra memory cards for your specific model and stock up on batteries. It may cost more up front, but rechargeable batteries are a great investment!
Conclusion
By far the best thing about developing a strategy for camera placement and spending time scouting is observing the interaction of deer in your area and getting to know their habitat. If you hunt the same land year after year you will begin to form a picture of the deer’s habits in your ecosystem. This is what made early hunters so effective. If you understand the animal and environment, their behavior becomes predictable and predictable prey is easy prey.
Remember cameras aren’t for finding deer, you can do that by tracks, spore, and other sign. Cameras are for finding the BEST deer. Best wishes for another successful deer season!

