
So if you all recall I recently scored the raddest t-shirt ever from the thrift store. It is the Wicked Witch of the West, wearing a chain, and a pinky ring, and throwing up west side. At first I thought maybe it was kind of silly, but then I realized it was actually pretty insanely awesome, and I couldn’t pass it up. When I came home and got ready to cut it up a bit, my roomie had a vintage tee that was also in dire need of a make-over.
I decided to document the process since I know that everyone has got a cool t-shirt in their closet that they only use to sleep in, but would really like a cuter way to wear it out of the house.
My Rule: if you find a sick shirt that is 2x too big and cut like a boxy ugly square, buy it. You can re-do that bad boy into something cute in 5 minutes or less.
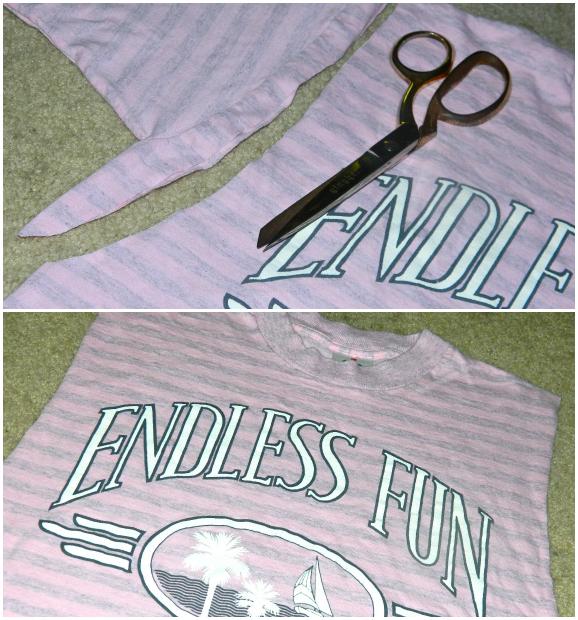
+ Step 1: I think a t-shirt will always look better with the sleeves cut off. Sometimes you can cut them high, and sometimes you can cut them low (always looks cute when worn with a cute lacy bra). It’s up to you. When you cut the first sleeve off, use the excess as a guide for the other side. Makes things even.
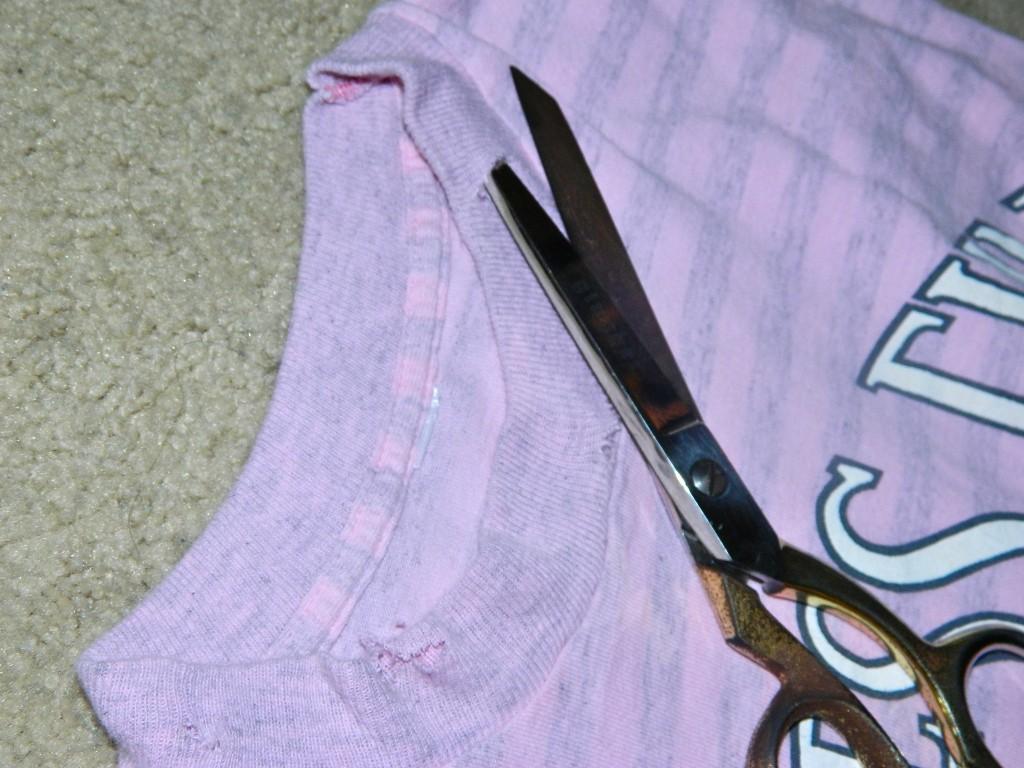
+ Step 2: Using the tip of your scissors, destroy the collar. Just poke and drag. I personally like this worn out look, but you can also cut off the collar all together if you’d like. A lot of this is personal preference. Play around, get creative.
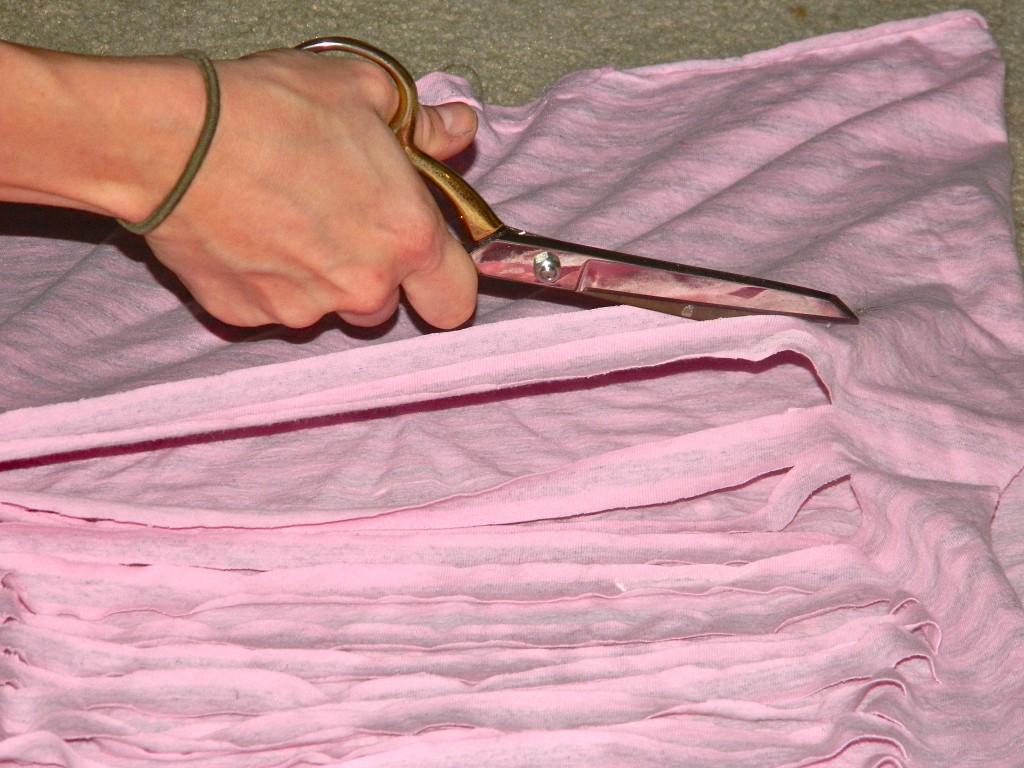
Step 3: On the back of your shirt start cutting strips horizontally. They can be as wide as you want (I like mine pretty close to the hems), and they should be places about 1″ apart.
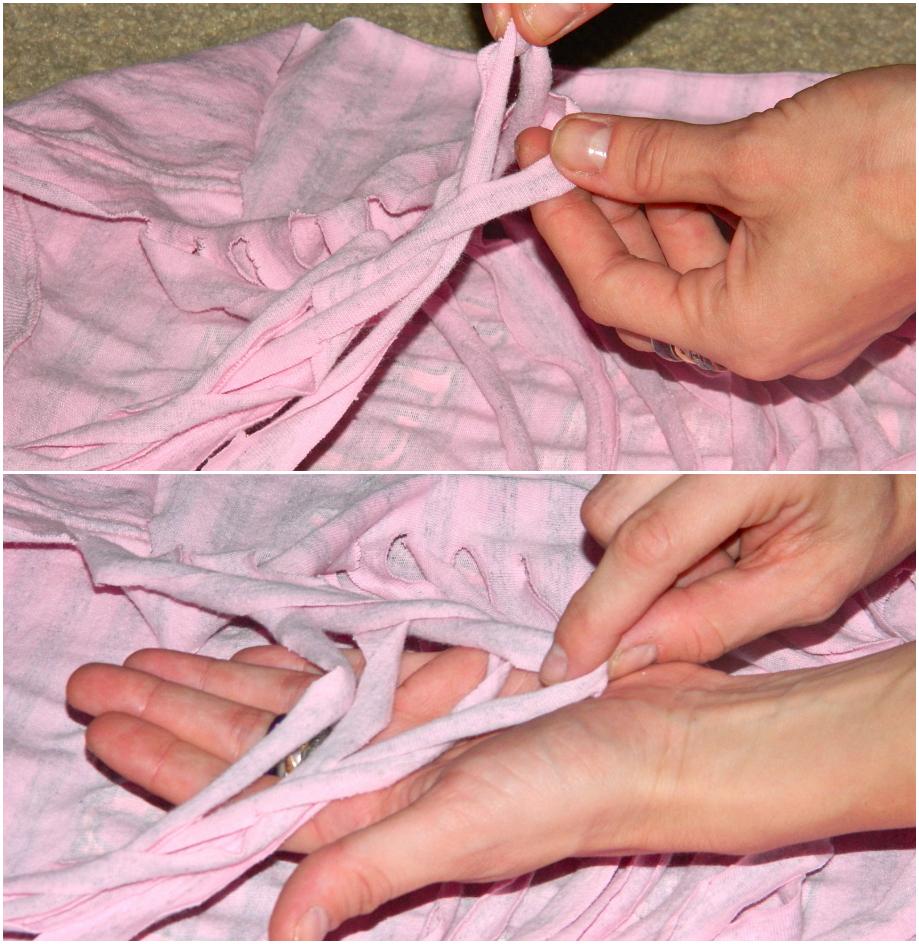
Step 4: Now for the easy part that looks harder than it is. Starting with the first piece at the top, pull it under the back of the next piece, not letting go of the loop. Once you pull it through you will still have your loop, pull the bottom piece through it from underneath, continue all the way down. Try it out, it will make more sense & once you get the hang of it, it’ll take like 2 minutes tops.
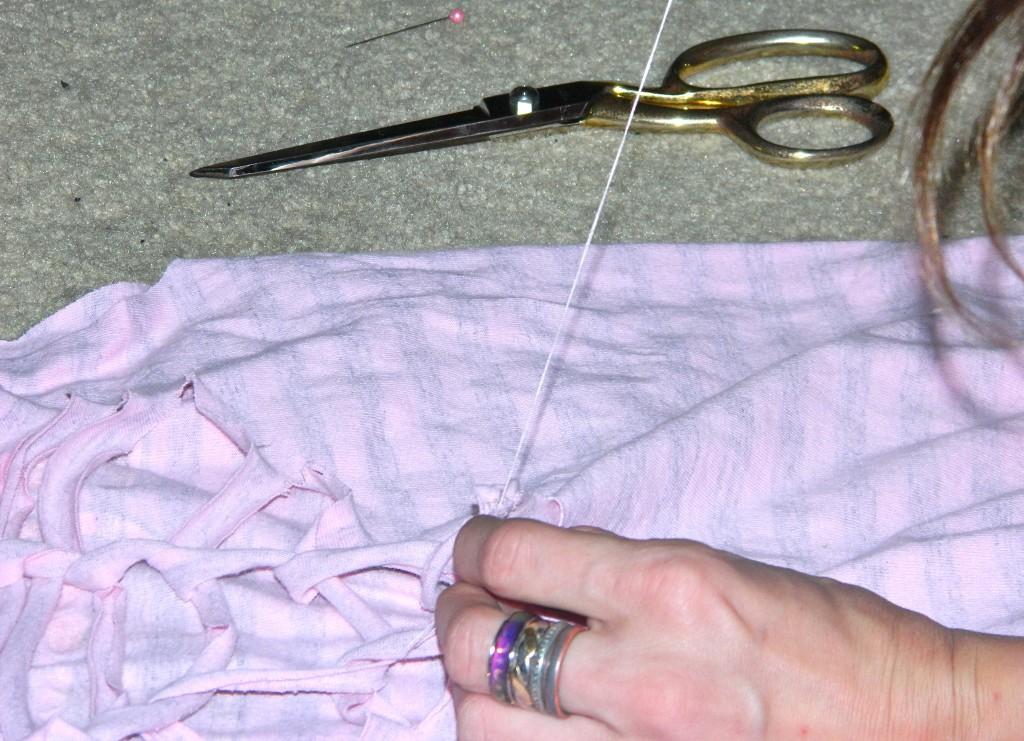
Step 5: Sew the last two pieces together so that the “braid” doesn’t come undone.
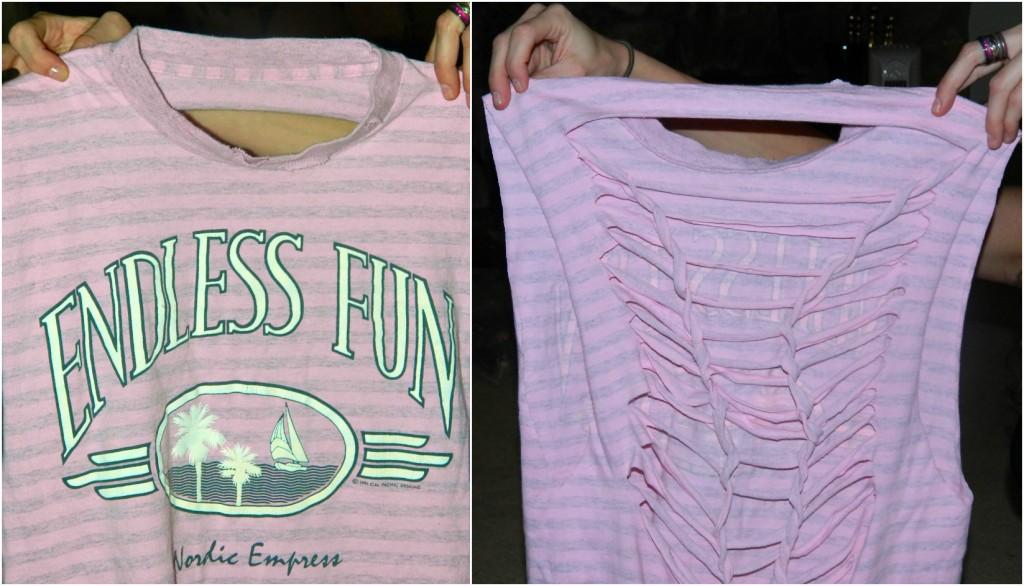
Front // Back

… and she loved it!!

As for my witch tee, I kept it simple by cutting off the sleeves & destroying the collar a tad. It really didn’t need much more.
For More DIY T-Shirt Ideas check out these posts:
+ Braided Back Tank
+ Wire Wrapped Racerback
+ Galaxy Print Tank
+ Cropped & Shoulderless
+ Fringe Tee


