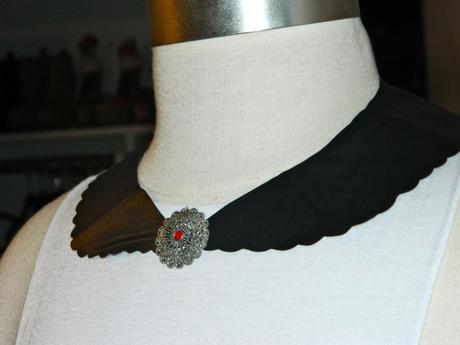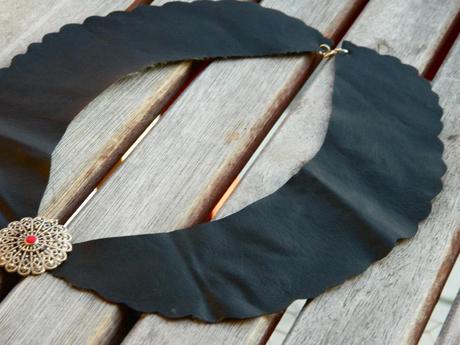
Peter Pan collars are all the rage right now, and I have been eyeing a few. Although the ones for sale have been rather cute (this or and this one especially), I wanted to test out making my own before spending the money on buying one! I had some leather fabric laying around from a previous project, so I was good to go when it came to supplies, plus the leather added the perfect amount of edginess to this somewhat girly piece. This was one of my easier, and more successful, DIY projects that I can’t wait to sport with a pair of shredded shorts, a high neck tank (seen above), and a bright colored blazer.

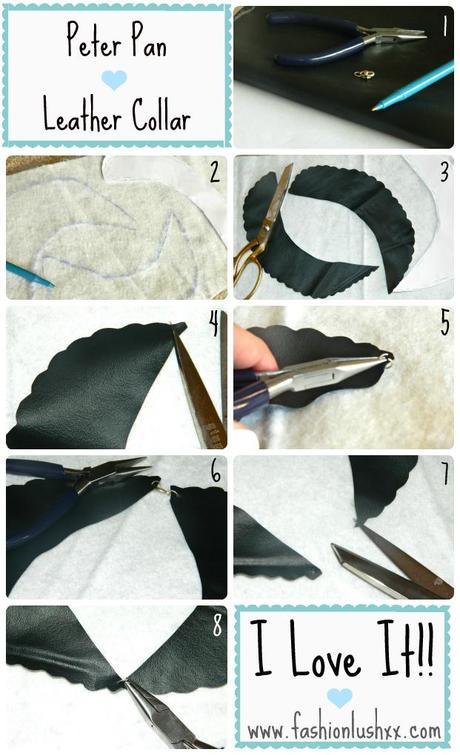
- Step 1: Gather your supplies. All you need is some leather fabric (fake works just fine), a pair of scissors, 2 jump rings, 1 clasp, flat nose pliers, and a pen. If you have a cute brooch, that is an optional added touch.
- Step 2: Trace a pattern onto the back side of your leather with some sort of pen that shows up on your fabric. You can either do this free hand, which is what I did, or you can print out a pattern here.
- Step 3: Next you need to cut out your leather. I decided to cut my edges with a scallop pattern. You can either do this freehand (which is what I did, again), or you can purchase scalloped scissors. Up to you.
- Step 4: Using the tip of a pair of scissors, poke a hole in the top corner of your leather with your scissors on both sides.
- Step 5: Attach a jump ring to one side of the collar, through the hole you just made.
- Step 6: Add a clasp to the other side, now you will have the back closure for your collar.
- Step 7: Next, do the same thing you did in step 4, poke a holes at the front end of the collar.
- Step 8: Lastly connect your collar in the front with one jump ring.
** I added a brooch to my collar by sewing it to the jump ring (which means I can remove it), this is optional- yet totally cute **

Do you love it? Cause I sure do!


