Online shopping is a minor addiction of mine, one that I am constantly trying to avoid succumbing to. The other day I was doing just that, when I came across this adorable cropped, tie-dye, shoulderless top. I was going to purchase it considering it was only $11.80 from Forever 21, but I figured it’d be more fun to recreate it. I love projects, and since I had majority of the supplies on hand, it cost me nothing. This project was super easy & pretty fun… I mean who doesn’t love the nostalgia that comes with tie-dying? The only issue, my hands are dyed a bit yellow, so it kind of looks like I have jaundice. Hoping it washes off sooner rather than later. Not a good look for me.

Here is how it is done…

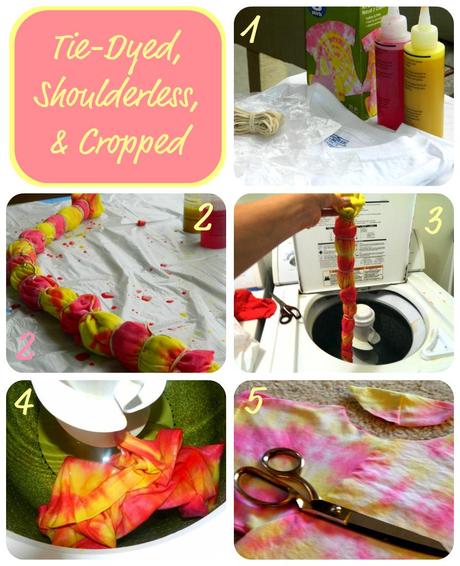
- Gather your Supplies: Plain white t-shirt, tie-dye kit (I used this ONE), and scissors. That’s it!
- Begin Tie Dying: Your tie-dye kit will come with full instructions. Basically you need to start by dampening your t-shirt & folding it in accordance with the design you will want. Here are some different tie-dye folding techniques.
- Rinse it: Fill your washer up with cold water and rinse out your shirt (using your gloved hands- this is where I ended up with yellow tinged hands).
- Wash it: Run the washer’s full cycle & throw your shirt in the dryer. Run your washing machine empty to clean out any residue, or your next load may have a little bit more color than you’d like.
- Cut it up: Using this tutorial, cut out the shoulders of your newly dyed top. Now pick a length you like, and just chop it. I chose a little longer crop top, but you can go shorter or longer, depending on preference!

I’d love to see any of your guys’ tie-dye creations, so please, share them with me on my Facebook page!


COMMENTS ( 1 )
posted on 03 January at 14:54
Article writing is also a excitement, if you be familiar with after that you can write or else it is complicated to write.