
Here is the answer to,
"How do I Compost
with Worms
for Free?"
Worms turn zero nutrient material into powerful, nutrient RICH compost, fast! When I dish kitchen scraps, newspaper, and dead leaves to my composting worms, I dish a pinch of coffee grounds --as an appetizer. "It doesn't have to be delicious to be nutritious," says Ms. Frizzle. She is a mastermind in nature based education, animated.
Here is how to assemble a free worm house.
Start by collecting a few things to re-use and re-new:
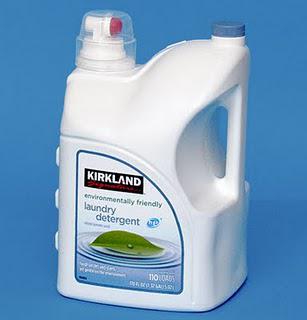
one laundry detergent container,
cardboard from a paper towel rolls,
newspaper, dryer lint, a pinch of
coffee grounds, and
decaying plants (kitchen and yard waste.)
 Create the worm house, before you get worms.
Red Wriggler Worms compost FAST, and they are ready to eat/tunnel upon arrival. Look into your local composting organizations and nurseries to locate a source for composting worms. Start with 10-20 red-wriggler pets - find local worms. Or, if you know someone with a worm composting unit, friends can likely spare ten or so worms for you to get started. Call Christy at 805-870-5AIR or email her with questions at [email protected]With a healthy batch of red-wriggler worms, you can unload a small batch of "black gold" (ready to use concentrated compost) in 2 months.
1st Choose a large piece of household trash to convert into a worm house.
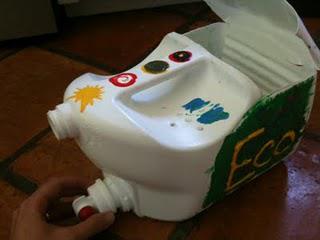 A large laundry detergent container is a great choice. This large size (186 oz.) container is ideal. The screw top becomes a peek hole and exhaust valve. The spout allows an extremely moist worm house to produce compost tea.
2nd Prepare the house - 1 person vermi (worm) compost unit.
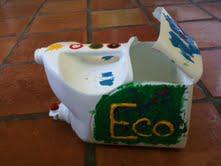
*Set the container up-right, so your drainage spout points down.
After decorating your worm house(any paint can be used; paint on the outside, only.) Drill or puncture 10 or more air holes along each side. Then, with a strategic cut, you create an opening for your hand to go in and out.
3rd Create Layers of Internal Structure - Worm Bedding.
1st Floor
{teaspoon of sand, dirt, crushed egg shells or coffee grounds}
2nd Floor
{moist browns - newspaper,dead leaves, cardboard, lint or hair}
3rd Floor
{greens - finely cut vegetables and fruits}
4th Floor
{moist browns - newspaper, dead leaves, cardboard, lint, or hair}
Mezzanine
{worms hang out - misting and mingling occurs}
Event Hall {dry browns - newspaper,dead leaves, cardboard, lint or hair}
Roof
{moist sheet of newspaper}
1st Floor - Add a teaspoon of grit to help worms digest bedding and food (sand, coffee grounds, dirt, crushed egg shells.) Worms have gizzards instead of stomachs, so they need rocks/grit to process their food.
2nd Floor - Mix in a soft and moist bedding layer. Bedding is eaten, as worms tunnel. Worms will compost this low-nutrient bedding material into high nutrient compost! For quick composting, pre-soak, very small pieces of cardboard, shredded newspaper, dryer lint and/or dead leaves. If you pre-soak bedding, and use a blender or food processor to cut the bedding, then worms will create compost 100X faster. If you do not pre-soak bedding, then worms may dry out and die.
3rd Floor - Bury a couple of teaspoons
 of kitchen waste each week. The smaller the pieces, the faster the worms will create compost. What do worms eat?
4th Floor - Add another layer of soft and moist bedding. For quick composting, pre-soak, very small pieces of cardboard, shredded newspaper, dryer lint and/or dead leaves. If you do not pre-soak bedding, then worms may dry out and die.
Mezzanine - Add red-wriggler worms here, and moisture is critical. Find local red-wriggler composting worms.
At the Mezzanine level, misting will prove most beneficial. Sprinkle water with your fingers; as the rain would nourish the soil. Or, use a spray bottle ($1) filled with water. Or, buy an outdoor mister. An outdoor misting
 hose attachment can be purchased at your local Do-It center for $5, if you want to pamper your worms with a beautiful mist.
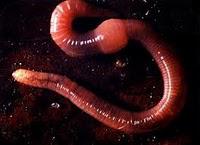
Mingling will happen here. Worms often get together in this layer of upper bedding. It is shocking how quickly your worms will multiply. To bypass baby and teenager worms, who need up to 6 weeks to begin reproduction. Check the worms, as you put them into the house. Adult worms will have a visible bump in the middle of their body.
Event Hall - Add a layer of dry bedding on top to keep pests away from your worm house. Events can be inviting and posh; choose whom you want on the guest list! Refresh this dry bedding with a handful of fresh dry bedding after a few weeks, and allow spiders, frogs and lizards to establish an ecosystem. Your worms and you will not be bugged by gnats or fruit flies.
Occasionally, the Event Hall hosts a seedling's birth. Seeds sprout and grow easily inside your worm house. You can transfer them into a shaded spot in a garden to mature.
Roof - Cover witha moist single layer of folded newspaper.
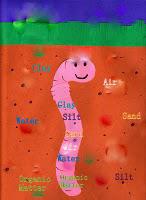
No need to wear gloves! Worm casting (poop) is comprised of ingredients found in soil: sand, silt, clay, air, water, and organic matter (decaying plant material). You may use your bare hands to move the composting material and worms around inside their house. Encouraged, the worms will work hard for you. Decomposition of plants has a mild odor that you are not likely to notice. If you smell any odor, feed fruits and/or veggies to the worms less than once a week.
In 4 to 8 weeks, this compost will be ready to use.
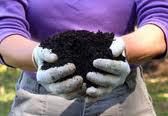
Harvest compost for favorite plants or landscaping projects. This compost should be mixed with ordinary dirt to be ready to root and to fertilize. Your "Black Gold," is condensed nutrients easily absorbed in a blend: dirt, compost, water, and dead leaves.
Let the worms squirm away from the compost that is ready to harvest. Feed the worms only in one spot of their house, and wait a couple of weeks. Most of the worms will be in the food pile. Or, use a sifter to separate the compost. Place handfuls from the house onto a hand held colander or sand sifter, holding the holes just above a prepared container. A container filled with fresh bedding or dirt and a few bites of kitchen waste is a great moving truck for the worms. Worms will squirm down through the sifter to the lower container to keep out of the sunlight. On top of the sifter, you will have ready to use compost.
If your worms multiply too rapidly for this free unit, give away some worms and start again. Or build a bigger worm compost unit.
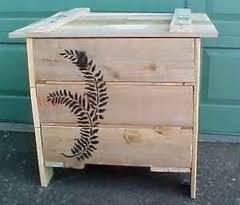
Or buy a worm factory (check your local town hall to see if these units are subsidized.) Thousand Oaks Residents are lucky! They have a beautiful Public Works department and supportive staff. They can purchase a Worm Factory for less than half of its original cost at City Hall, so call the environmental hotline Call 805-449-SAVE
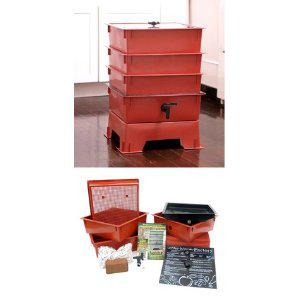
Multi level composting with worms is easy and provides huge benefits. This worm factory is a dependable worming unit. Additional trays can be purchased, so there is almost no limit to the number of worms that can compost in this unit.
Worm Composting is a speedy way to reduce your carbon foot print. Ditching your waste {50 % browns from the yard/50 % greens from the kitchen}
 balances carbon/nitrogen in a moisture rich compost unit or pile. Composting will reduce your carbon footprint in your local landfill by 30%.
If you would rather start vermicomposting on a micro-scale with 2 adult worms, you may enjoy a Beginner's Guide to worm-composting.
 Eco-worm is a workshop based resource on worm composting. Call Christy at 805-870-5AIR or email her with questions at [email protected]
