A very popular t-shirt customization tactic is taking a photo and putting it on a t-shirt. People love shirts with pictures their pets, kids, friends and favorite places – and why not? A personal photo is one of the most unique things you can put on a shirt.
So what do you need to know about using photos to ensure a quality print? We’re going to clear some of that up right now.
Consider the Dimensions: in the Fibers.com Customization Engine you can easily upload a photo to place on your custom t-shirt, but it’s got to be large enough to print and small enough to upload into our system. This is usually less than 2700 by 2700 pixels and 200 DPI. Most photo programs have a resizing feature which will allow you to make a file smaller if need be. If your file is really small it will turn out blurry and a warning will pop up on the side of the design tool. If this is the case it’s best to find a new photo.
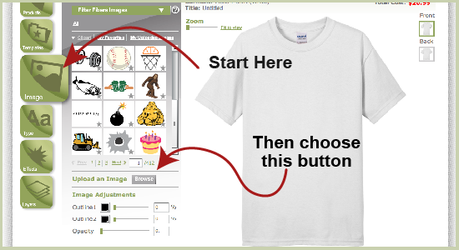
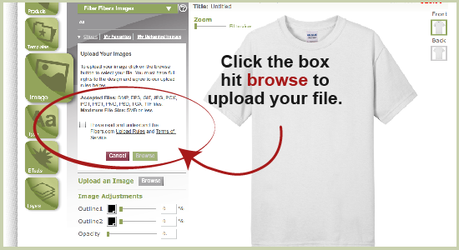
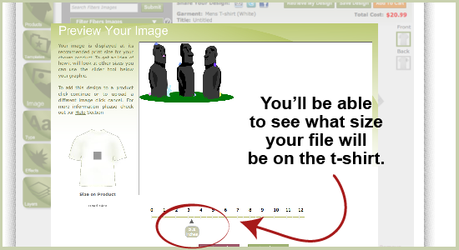
Once you’ve got your file – follow these steps.
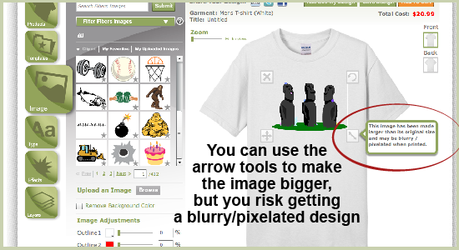
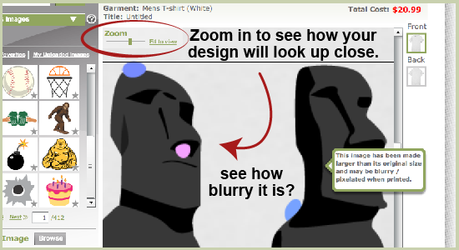
So that original photo is too small. I either need to find a bigger version, pick a different photo all together or live with a blurry t-shirt design. (Just tell everyone it’s because they need glasses). But this won’t happen to you because you know you need a nice high quality file to get a crisp clear print.
Once you get just the right file the rest is easy. Use the scale tools to re-size it. Use the alignment tools along the bottom to center your image and use the type tool to add any desired text. Save your design and check out and in 5-7 business days you’ll be wearing a unique personalized shirt!
