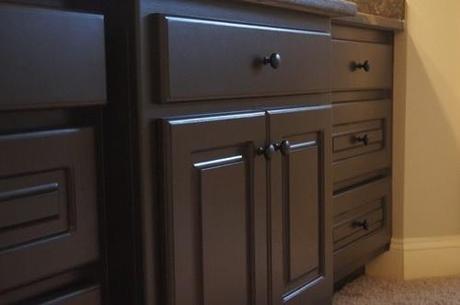
Restaining your bathrooms cabinets is a pain-free way to update your bathroom. All that’s required is a few simple tools and the wood stain of your choice. You must sand down the cabinet so that the new finish can be applied directly to the wood surface.
You will be surprised to see how big of a difference this simple project can have! Sometimes you’re vanity just need a quick face-lift to have it feeling young again. The best part, you don’t have to reinstall your vanity or take apart any plumbing. This update can be done without removing anything but a few knobs and handles! Did I mention it’s under $60?

Source: Pinterest.com
How to Restain Bathroom Cabinets
Before you Get Started: Supplies
- Screwdriver
- Painters Paper
- Paint Brush (various sizes)
- Sander
- Corner Sander (optional)
- Sandpaper 180 grit and 220 grit
- Dust Mask
- Lint-Free Rags
- Wood Stain
Step 1: Prep Your Work Area
To begin, you will need to clear off your work space. Remove anything from the countertop and anything items that may be hanging on your walls. Protect the surrounding area by placing painters paper (or painters plastic) around the edges of your vanity. Basically anywhere you don’t want stain/paint to get.
Run a protective sheet along the edges of the walls to make sure that the rest of your bathroom isn’t affected by your project. Don’t forget to cover the floors. If you have one, use a tarp because it will be less inclined to tear or rip when you are working on top of it.
Step 2:
Remove all of the hardware from your panels and drawers. If you have a toilet paper holder attached to your vanity, remove it as well. This will allow you to stain all of the areas surrounding your hardware. If you’re lazy and try to stain around hardware and accessories, the end result will look tacky and distasteful.

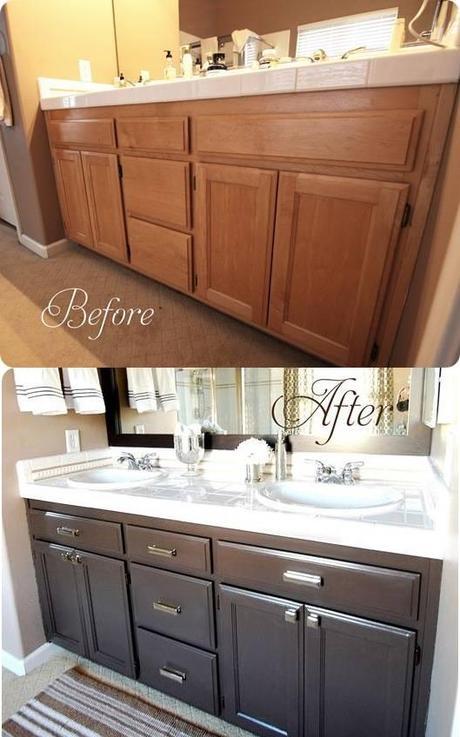
Before and After Bathroom Cabinet via Censational Girl. Great job Kate!
Step 3: Sanding
Sanding is the most important part of the whole process! It take the longest and it will dictate the overall finish of your stain. Any blemishes in the surface will show when you finish the stain so be sure to do a good job. Likewise, if you fail to remove all of the existing paint/stain, this could prevent the new stain from adhering correctly to your cabinets. This could lead to chipping, pealing, and cracking. Take your time and make sure that you do a good job.
Use 180 grit sand paper the first time to remove the more obvious parts and then go over everything with 220 grit sand paper to smoothen everything out so that it’s smooth to the touch. For those hard to get areas, you can just do it by hand or use a corner sander if you have one.
A Word of Caution: Make sure that you wear your dust mask when sanding! Dust particles can be inhaled and disrupt ones breathing system. Safety goggles are also a good idea to protect your eyes. When you are satisfied with the surface, dry rag to remove any remaining dust particles from your vanity. Some people use a damp cloth. If you choose this method, remember that you will need to allow your vanity to dry before applying new stain or paint.
Step 4: Time to Stain
Now for the fun part. The trick to staining is knowing that stain gets darker as you apply more coats. If you want a lighter more natural finish, you may want to only do 1 or 2 stains. If you desire a dark and rich finish, continue adding multiple layers until you reach the desired finish.
There are hundreds of stains out there but you can find most of the supplies needed by visiting your local Home Depot. You can take a look at some of these unique vanities to get an idea of color schemes and styles that you may want to mirror your vanity after. If you are looking for a glossy and more modern finish, you can add a lacquer finish to your vanity to make it pop!
When restaining bathroom cabinets, it is imperative that stain is applied evenly. When you are done with each coat, inspect for any light spots or dark areas. You can apply a few strokes of stain to help blend the entire facade of the panel.
Step 5: Finishing Touch
When you are satisfied with your finish, remove the tape and painters paper that you used to protect your bathroom with. Sometimes, you will find spots that need a quick touch up. Use a fine tip paint brush to add stain to help make those areas become less obvious.
Finally, it’s time to reinstall your hardware and let it all come together. Frankly, I’d recommend replacing your hardware and accessories with a new set. Replacing your hardware offers plenty of bang for your buck. You can choose from brushed nickel, bronze, chrome, and oil rubbed bronze. Browse Tradewinds Imports for bathroom faucets.

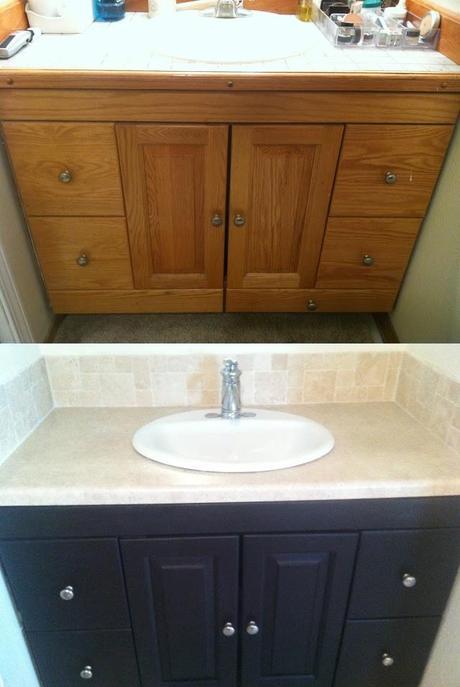
Before and After Espresso Stain Bathroom Cabinets by Brenda Kraft at FreshRedesign.
About the Author
Cheryl Khan is an interior designer and a contributing member to the Tradewinds Imports Blog. She enjoys writing about home decor, DIY projects, and home improvement ideas.
