Lifestyle Magazine

Tulle Hair Bow Clips

By Saumya Shiohare @myriadmusings1

Follow on Bloglovin
When the voguish side of my brain ceases function and decides to go dormant for a short while ( hence lack of #ootd posts), the creative side of it takes over and comes to the forefront........after all a periodical break to the most used part is essential in balancing the equilibrium , am I right ?
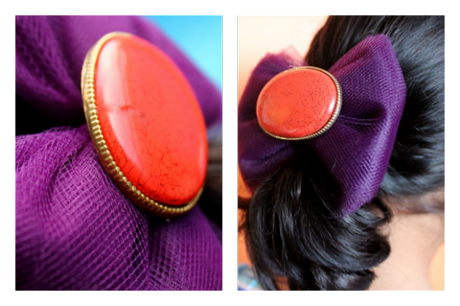
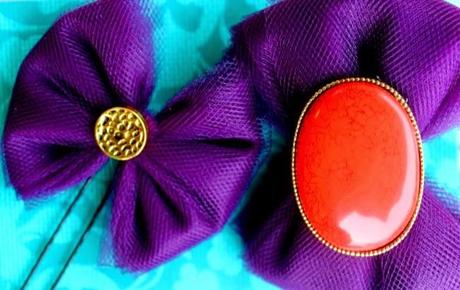
When this switch happens, I get crafty and can spend hours browsing through pinterest for DIY inspirations. So when I stumbled upon this, I leaped into action right away and rest is history. The sweet part - "I had all the tools at home, so there was $0 spent making this....literally !" I ended up making 2 hair bow clips and later realized that these could be used as gift wrap toppers and other decorative purposes as well.
P.S- thanks to my three year old for modelling these. Was bit of a challenge to keep her still but we managed....so a big shout out to my lil model !!!
TULLE HAIR BOW CLIPS TULLE HAIR BOW CLIPS TULLE HAIR BOW CLIPSTULLE HAIR BOW CLIPS


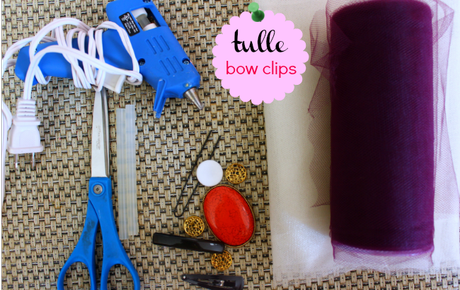
You'll need:-

Tulle rolls - I had this eggplant color handy, so I used these. 
pair of scissors
glue
assortment of clips, booby pins and ornate buttons and embellishments. 

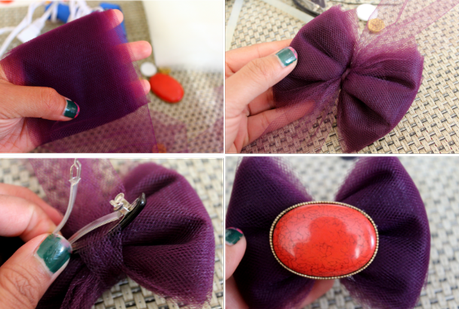
1) Cut a foot long strip of the tulle,  that will be used later as the tie. 
2) Start rolling the tulle around your fingers. I rolled around 20 times for the fuller bow. For a smaller bow keep the fingers close together and a little looser for a bigger bow.
3) Now carefully slide out the roll, lay it on the foot long strip ( from step 1) and tie a knot.
4) Grab the clip/headband  you wish to use, slide the strip through the clip, crisscrossing the two ends of the strip. This will help in keeping the clip/ pin together. Now make the final knot and cut the extra  strip. 
5) Glue the button/ embellishment and voila !

Hope you enjoyed this easy 5 minute DIY !

Have a great day and thanks for stopping by.
XO
post signature

Back to Featured Articles on Logo Paperblog