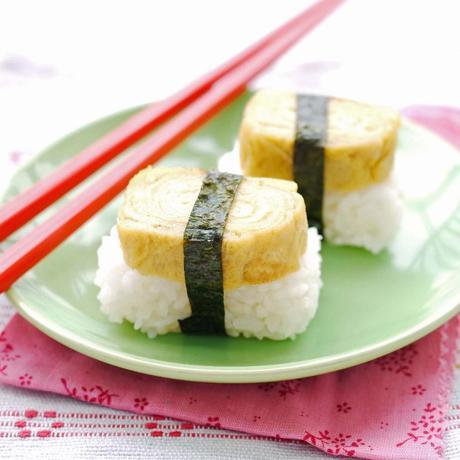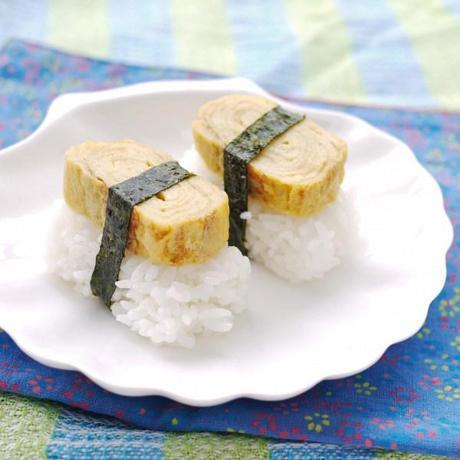
So these may not be the best looking tamago nigiri around. But they are my very first attempt at sushi making.
And i must say, i am in awe at how much attention and care the Japanese put to their food. I am not talking only about the arts of making sushi. This general devotion to handling and presenting food is also displayed in Japanese cakes, most of which scream both class and elegance.
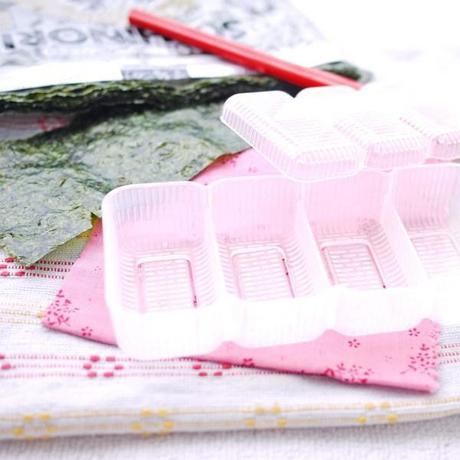
Each of this sushi, or rather, nigiri (the specific term used for the rectangular shaped sushi), is molded using a nigiri mold.

The rice was pushed into the mold to take its signature Nigiri shape. The sweet egg omelet (tamagoyaki), is then topped onto the molded sushi and finally a belt of nori is used to secure the egg and the rice together.
These steps sound easy peasy when described, but in truth, i was tearing at my hair trying to assemble them together.
Just by the slightest touch, my fingers would take away some of the rice from the molded nigiris, mishapping them along the way.

I then remembered how an uncle used to go to the rice cooker when he had to seal envelopes, and didn’t have any glue on hands (No, i am not making this up). And the thing is, you cant really free yourself of sticky rice just by wiping your hands on a kitchen towel, there will definitely be some bits left, which leave your fingers semi sticky. You had to go with the soap and water route to get really clean hands. Which i did, and which i was glad i did, cause working with semi wet hands was the way to go! Rice don’t stick to wet hands! Win!

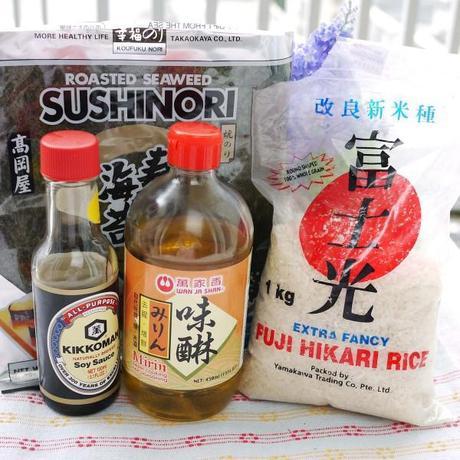
Here are the things i’ve used for this tamago nigiris. Nori sheet, soy sauce, mirin and Japanese rice.It’s a pretty short list.
So go on, get yourself wet and join the fun in sushi making!
Tamago Recipe
(Taken from Momofuku for 2)
* Pls do go to her website for step by step pictures on how to roll the omelette
3 eggs
1 tablespoon mirin
1 tablespoon sugar
1 teaspoon light soy sauce
Crack your eggs and lightly mix them. You don’t want to incorporate air into them so the best way is to use chopsticks: stir them gently without whipping, but make sure that the eggs and yolks are completely homogeneous. Add the mirin, sugar and soy and gently mix in.
Use a paper towel to evenly spread a bit of oil in your pan. Heat it on medium low heat, then add the eggs so they cover the bottom of the pan.
After 2-3 minutes, the egg will start to cook and solidify. The eggs don’t need to be entirely cooked, in fact, they should be a tiny bit moist on top so that the egg sticks to itself. Using chopsticks or a spatula, fold the egg over onto itself twice, like how you would fold a letter into thirds. Don’t flip the eggs, just push them to the end of the pan.
Use your oily paper towel to spread a tiny bit more oil in the pan and add a bit more of the eggs. Lift up the log of already cooked eggs so that the raw eggs are touching them. When the new layer of egg is almost cooked, fold the eggs over onto themselves again. Repeat until all the eggs are used. (You might want to keep stirring the egg mixture as most of the sugar in it didnt dissolve into the egg and would collect on the bottom)
Wrap in saran wrap and using a sushi mat, press the tamago into a rectangle shape. (I skipped this step, and as a result, my tamagoyaki werent perfectly rectangular)
Let cool completely, slice and enjoy!
Sushi Rice
Taken from Noobcook
*Click on the link for step by step Pictures
- 1 cup of Japanese short-grain rice
- water to cook the rice (usually in the ratio of 1 cup rice: 1 1/4 cups of water)
Vinegar Mixture A (if not using ready-made seasoned rice vinegar)
- 2 tbsp Japanese rice vinegar
- 1/2 tbsp caster sugar (adjust to taste)
- pinch of salt (adjust to taste)
Rinse the rice in several changes of water till the water runs clear. The first few changes of water will likely be quite cloudy (skip this step if you are using pre-washed rice). Drain the rice in a colander for roughly 30 minutes (I skipped this). Draining the rice is believed to improve the texture and appearance of the cooked rice, but I usually skip this step if I’m pressed for time.
Measure and add water for cooking the rice.
Cook the rice using a rice cooker or simmer over the stove top (I used the rice cooker. Rice was ready in less than half hour).
While waiting for the rice to cook, prepare vinegar mixture by mixing the ingredients in (A) in a small, non-aluminum saucepan over low heat until the sugar dissolves. You may also use a microwave oven and heat using low power for about a minute. The idea is to warm the vinegar just enough to dissolve the sugar, not to boil the mixture. I often use the short cut method of using seasoned rice vinegar (shown above) which has already been mixed with sugar & salt, and can be used straight from the bottle. .
Transfer the cooked rice (while it is still hot) to a hangiri or wide bowl. Pour prepared vinegar mixture over the rice. Stir the rice (gentle slicing action) using a rice paddle with one hand, while fanning the rice with a paper fan on the other hand. Do so until the rice has cooled to room temperature. Fanning the rice gets rid of excess moisture and gives the rice grains a glossy look.
Cover the bowl of rice with a damp slotted cloth (dim sum cloth is perfect for this role) to keep the rice fresh and moist. Use the rice as soon as possible, preferably within a few hours. If you refrigerate the rice, it will turn hard and dry.
Advertisement
