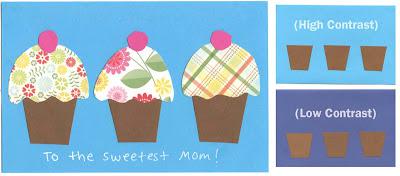
 Cindy Littlefield posted this great cupcake card here first, but I needed to simplify it so it could be made in one class session. I also plan talk about contrast with students, so the background paper they choose has the most impact for their cupcake art.
1. I found all my paper supplies at Joann Fabrics. If you wait for sales, you can get some nice scrapbook paper without spending a ton of money. Students will start with three small rectangles of brown paper that they cut into identical cupcake bottoms.
2. Keeping the lesson about contrast in mind, they choose a background paper and fold it in half to make a card. The bottoms are centered and glued down.
3. Working with an array of scrapbook paper, they choose three swatches that look nice together. A top is cut from one, then traced and cut for the other two so all three look the same. All are glued down.
4. Small cherry circles are cut and glued on top of each.
5. A pencil crayon, crayon or gel pen may be used to write a message. I used my white Sharpie Poster paint marker.
