My kids love crackers.
All kinds of crackers. Rice crackers. Cheddar crackers. Graham crackers. Water crackers. Sweet or savory. They just love crackers.
But they especially adore Annie’s Cheddar Bunnies. Every time we are in the store, they ask for these dang bunnies.
And they’re fine.
They’re actually pretty wholesome.
They’re organic.
There’s no artificial flavor or color.
They’re made with cheese from milk from cows that aren’t treated with growth hormones.
And it’s totally easy to pick up a box from the store and not stress about it.
So I don’t feel terrible giving them Cheddar Bunnies.
But every time we get a box of Cheddar Bunnies, it’s another box and foil lining that end up in the landfill.
So as we strive to live a bit more sustainably and responsibly and all that, I get a little bit bummed out every time one of those boxes makes it into the trash.
Plus, we’ve got this sourdough start staring at me from its perch on the back of our stove.
And I’ll be honest … since the Cowboy is out of town these days on a job, I’ve been remiss in my sourdough duties. Sure, we make sourdough pancakes or waffles once or twice a week.. I made English Muffins once. And I feed it every other day to keep it going. But mostly it’s just sitting there because there’s no one in the house making bread.
And that stinks.
So I started making crackers.
Sourdough crackers.
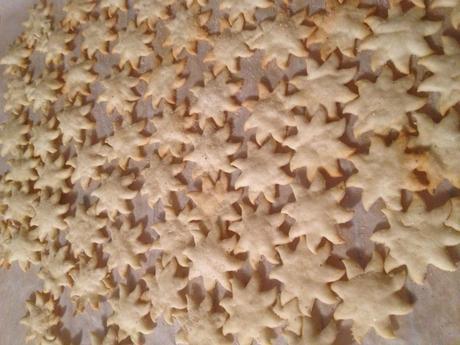
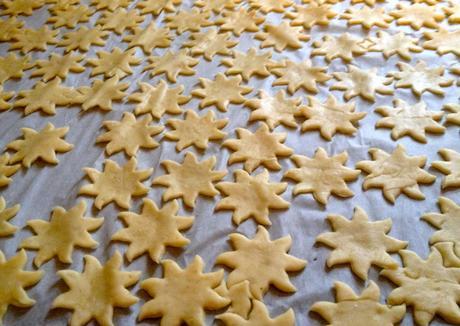
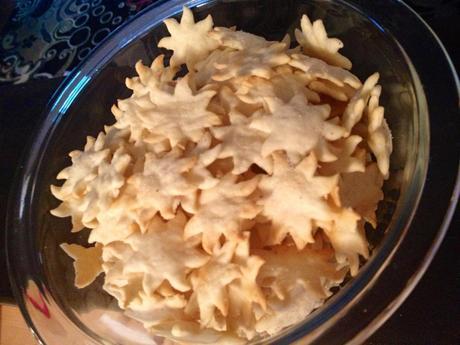
Sunny sourdough crackers.

And the kiddos don’t seem to mind that we haven’t bought Bunnies since we started making our own.
A big upside: they are super simple to make. Just a few ingredients that are probably already in your pantry, a food processor fitted with a pastry blade, some parchment, a rolling pin and a cookie sheet. And one batch equals roughly the same yield as a box of Cheddar Bunnies, so one batch a week and we’re good to go.
INGREDIENTS:
- 1 cup sourdough start (check out this post to learn how to make your own start … or if you live in the Bozeman area, email me and I’ll share some of ours)
- 1/3 cup melted pasture butter
- 1 cup plus 2 tablespoons all purpose flour
- 1/4 teaspoon aluminum free baking powder
- 1/4 teaspoon sea salt
- 1/4 teaspoon onion powder
- 1/4 teaspoon garlic powder
- sea salt and pepper to taste
DIRECTIONS:
Combine the sourdough start and melted butter in the bowl of a food processor fitted with a pastry blade. Add all purpose flour and let the food processor run until it forms a ball of dough.
Knead the ball until it’s smooth (which only takes a few kneads) and put it into a non-reactive bowl (glass or stainless steel or enamel) and cover with a clean cloth. Set in a warm spot in your kitchen for at least 8-12 hours. NOTE: It’s okay to leave it longer, but know that the longer you leave the dough to rest the more “sour” the crackers.)
When you’re ready to make the crackers, preheat the oven to 350 degrees.
Gently break apart your dough ball and add the baking powder, salt, onion and garlic powder and knead to incorporate the dry ingredients into your dough.
Divide the ball into halves or thirds and on a piece of parchment paper big enough for your cookie sheet roll the dough as thin as you can make it (like … 1/8 of an inch thin … really really thin). The thinner the dough, the crispier the crackers. And don’t worry, they puff up a little when they bake.
At this point, you can either cut the dough into small squares with a sharp knife … or … if you are like me and trying to replace the cuteness of a cheddar bunny for two toddlers, you can use a very small cookie cutter in whatever shape strikes your fancy. (We have a set of 1-inch to 1.5-inch butterflies, sun and flowers that I use).

Give the crackers a bit of space between each one … just so the edges crisp up a bit. Sprinkle with a little sea salt and some pepper. (I gently press the crackers with my hands to get that last bit of salt and pepper “set” onto the cracker.)
Bake for 10 minutes.
Check the crackers and if they’re not crisp yet, let them bake for another minute or two. They firm up a bit more on the cooling rack (cooling takes all of 3 minutes), but if they aren’t mostly crisp out of the oven they won’t really ever be crisp crisp. And nobody likes a limp cracker.

Store in an airtight container after cooled completely.
These taste just like pepper water crackers and our kids LOVE them. I’ve also added some grated cheese into the dough on occasion to make them more cheddar-bunny-like (I’ll share that recipe at another time … I’ve just never taken photos. And for the cheesy crackers, we use the butterfly shapes!)
Makes about a quart of crackers.
NOTE: Want to change the flavor and make ‘em more grown-up like? Instead of salt and pepper before baking, try a bit of Herbs de Provence and a bit of sea salt. Or Taco Seasoning. Maybe eliminate the salt and add your favorite Cajun spice mix. The options are endless!
And that’s one less box in the trash heap!
xo,
Jeanne
