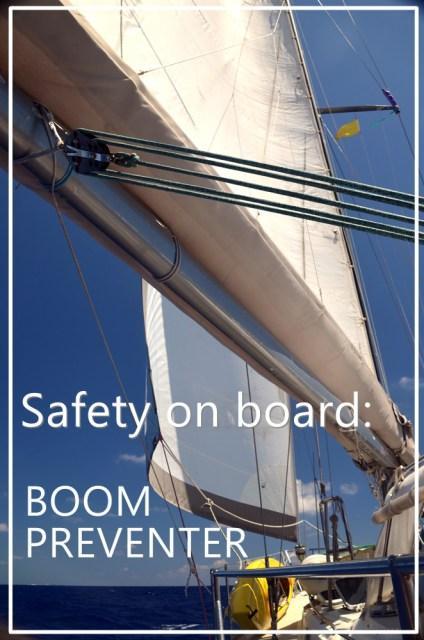
Boom preventer. Boom brake. Whatever you do, whatever you call it, having a way to prevent or dampen the force of the boom to prevent accidents while sailing deep downwind is important. A lot of cruising IS downwind, so thinking through a smart setup is critical! I’ll never forget learning about a boat some miles ahead of us on the Pacific crossing where a crew sustained life-threatening injuries after a crash gybe. Even a planned, controlled gybe tends to give me the willies due to the tremendous force involved: a violent, unexpected gybe can cause significant damage.
The sliver of a new moon wil set before we pull up Totem’s anchor tonight. Ahead is a challenging passage, one we’re not sure how far we’ll take: hopefully, all the way to Puerto Rico, if all goes well (follow our progress at our tracking page on PredictWind). Breeze expected is all forward of the beam, so there’s no need for a preventer– but recently someone asked about our setup. Jamie wrote it up, I took a few pictures to illustrate.
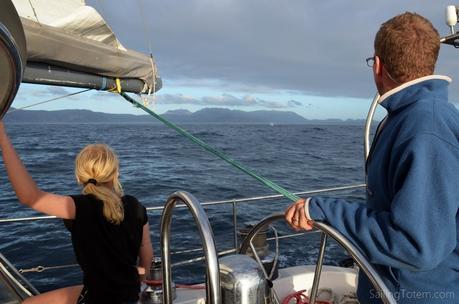
Whale-watching as we sail away from South Africa – preventer in place
- Simple approach
- Side decks left uncluttered
- No specialized/dedicated gear purchase necessary
- Puts loads at points able to withstand them (mast/vang/midpoint of boom not intended for the shock loading involved- outboard end of boom is much better)
- Quickly/easily released from the cockpit if necessary
Totem’s setup: Component Parts
- 1 x boom lanyard – Dyneema single braid, with ¼” (6mm) diameter.
- 2 x preventer lines – polyester double braid, diameter depends on sail area (Totem uses 1/2”). Polyester gives a little stretch, but not too much. Length depends on preventer block location and center or aft cockpit. Lines should be long enough that preventer set on one side can remain in place through a gybe.
- 2 x Preventer blocks or low friction rings – we have blocks, but low friction rings are a great choice: they are more robust and lower cost.
Concept
A preventer must bear considerable loads; in the worst scenario, shock loads that will cause a weak link to fail. For this reason it’s safer to secure the preventer to the aft end of the boom. A middle boom attachment point is more likely to break the boom in an extreme situation.
End of boom attachment can make setup awkward/hazardous or require fixed preventer lines that will cross the deck and get in the way. This preventer setup splits the preventer line into two sections. One line is the boom lanyard; and the others are the preventer lines (1 on each side of the boat). The lines are out of the way when stowed and easy to deploy.
Boom Lanyard
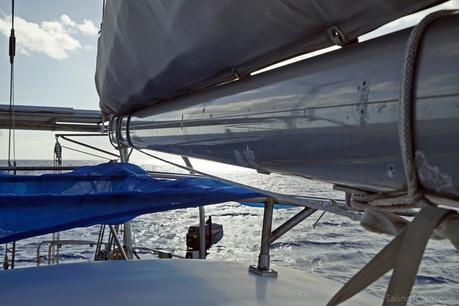
The boom lanyard is shown above as the line running below the boom. The aft end is spliced around the boom. The forward end has an eye splice to secure to the boom when not in use, as shown, and to use as an attachment point to the preventer lines. When stowed, it’s important to keep the boom lanyard tight along the boom because a drooping line can catch on something or someone.
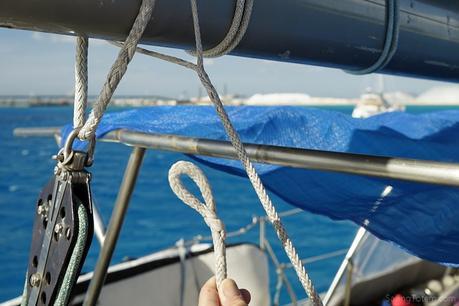
Eye splice at the forward end of the lanyard…and around boom on the aft end
This shows one end of the boom lanyard spliced around the boom and the eye splice in the other end. Boom lanyard length should be set as follows:
- Easy to secure to the vang attachment when not in use.
- Easily reaches the side deck when the boom is out, so it’s safe tying to the preventer line.
- Another use for this line is to secure the boom from swinging back and forth when not sailing.
Preventer Lines
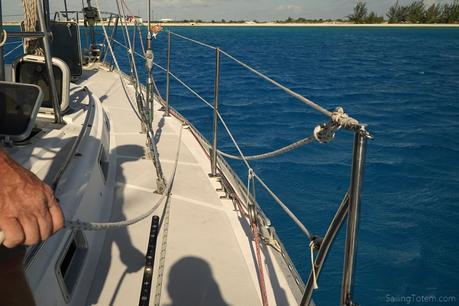
This view down Totem’s side deck shows one preventer line, stowed and ready for use. Things to note, besides those lovely clear side decks:
- One end of the preventer line is secured to the lifeline. The other end leads back to the cockpit and is coiled and ready for use.
- Fair leads are important! Note that one side of the preventer line runs outside of the lifelines. The other side runs aft along the deck and is NOT fair in this picture. You’ll see that in a later picture I reran this side to go between shrouds so it doesn’t chafe.
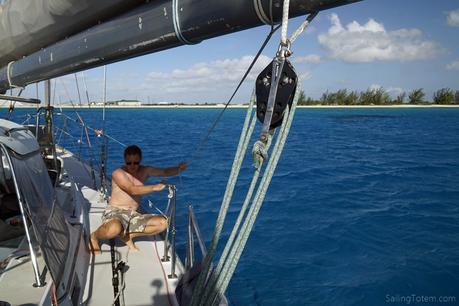
- The next picture shows me (Jamie) getting ready to connect the boom lanyard and preventer lines together. Note that I am pulling the boom outward for the picture; normally I would be sitting in an easier and safer position when underway. (Behan: you bet he would, or I’d be unhappy about it!)
Secured to the toe rail with a Dyneema loop is the preventer line turning block. Friction is not an issue with the preventer, so consider a low friction ring instead.
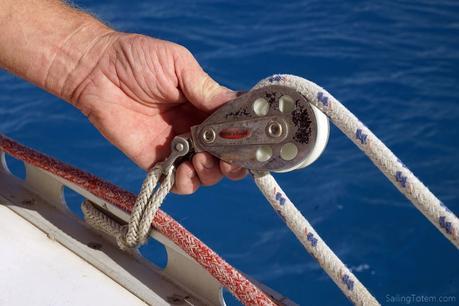
Location matters:
- Setting the block too far forward increases preventer line length and is hard to run fair.
- Setting the block too far aft makes a bad angle when the boom is all the way out.
Our blocks are set about 2 feet forward of the forward lower shrouds, a position that gives a fair lead and good angle to secure the boom.
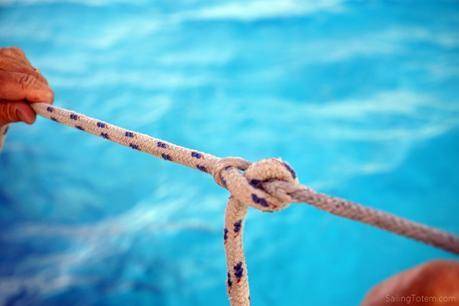
Above is a snapshot of the boom lanyard and preventer line, tied together and ready to use. Do not use a shackle! The knot is much gentler should it hit something or someone. This is especially true when you do gybe (by choice). Simply ease the preventer line to allow the boom to swing over.
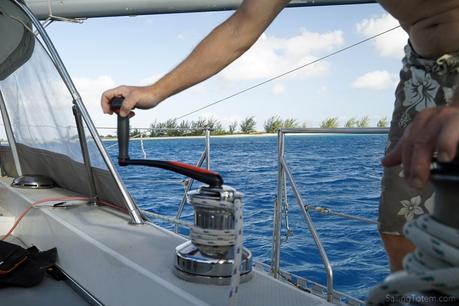
The other end of the preventer line, ideally, goes on a self-tailing cockpit winch: ours goes to one of Totem’s spiffy Andersen secondaries. This approach makes a quick release easy if needed. If you don’t have an open winch here, you can cleat the line. Either way, be sure to coil the end of the line, and keep it clear to run freely in case you need to quickly release the preventer.
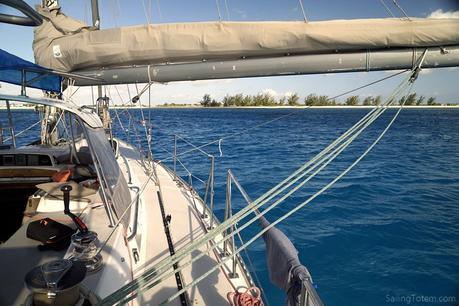
Here’s the completed setup, much as it can be from our Bahamian anchorage! Notice how the preventer lead has been moved to run fair between the shrouds.
Boom brakes
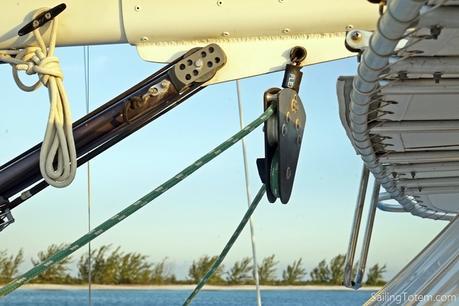
For some boats, a brake makes sense. These don’t prevent the boom from crossing over, but dampen the movement. We’re not fans of this on Totem because it would place tripping-hazard lines on the side deck. But for other boats, other layouts, they’re a great option: the setup at our friend’s boat Akira, anchored a few boatlengths away, is a great example of this. Keeping it all on the coachroof means there’s no dangerous deck clutter, and they can handle it right from the cockpit.
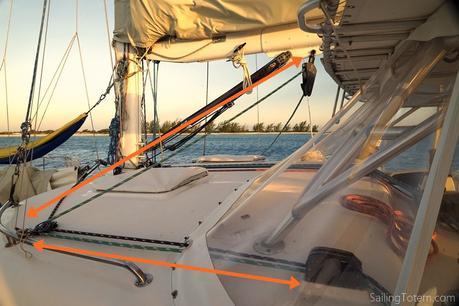
I’m looking forward to having a passage that requires setting up the preventer, not this upwind stuff! But for now, will tackle the upwind days ahead by cooking up a storm, checking and re-checking all stowage, and loading books on the kindle from our hometown library.
Sundowners on Akira after a tough day of preventer demo setup!. OK, actually- it just took a few minutes, slowed only by paparazzi involvement.
With thanks to Bonnie, for the question and for the kind donation to our cruising kitty!

