R is for Raffia
What is it?
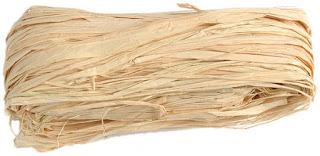 Raffia material comes from a plant form which is a type of palm.
These kinds of plants are found in Africa, and Madagascar.
Further info here WIKIPEDIA
Raffia is a material I started using in my printmaking several years ago......it probably was a logical 'follow-on' from having previously used cotton string.
I do wish people would use cotton string or hemp string, as they used to, in the old days BEFORE people felt that they couldn't wrap something up or 'package' it, without using too much plastic sellotape or similar.
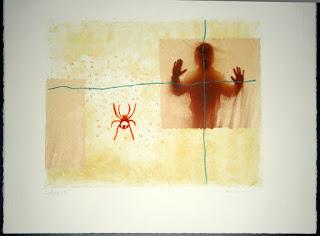
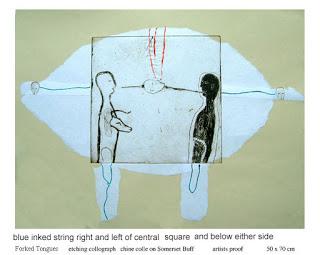 This piece titled "Forked Tongues" is comprised of a photopolymer steel plate made at EPW (Edinburgh Print Workshop) in Union Street. It was not 'etched' just developed. Printed onto buff Somerset paper with two tiny little collagraph heads either side of the central square plate. In addition I placed blue inked string right, left and below both the figures.
 The red ink was added with a cotton bud after the print had been through the press. I did all of this under the supervision of my dear friend Birna Matthiasdottir, who was living in Edinburgh at the time. I used to go to visit her occasionally from London and we would invariably go to either EPW or to Fife Dunfermline Printmakers Workshop (now my local open access printmakers workshop) to do some printmaking. The plate size is about 30 x 30 cm (12 x 12 inches).
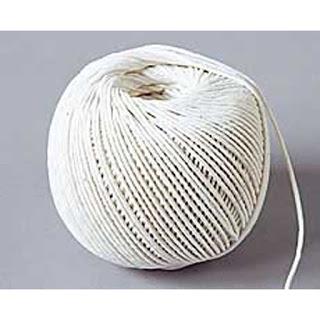
By the way when I say COTTON STRING this is the kind of thing I am talking about.
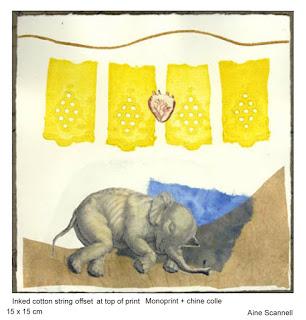
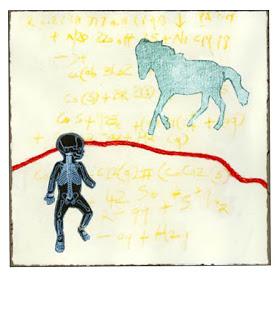 This image which is from a series of prints called "Elemental Traces". It was created using a drypoint for the background yellow coloured algebraic 'math' along with chine colle and some red inked cotton string offset.
It measures 15 x 15 cm (6 x 6 inches).
If you are going to try using inked string in your printmaking here are some tips
TEST
Do a TEST of a piece of inked string onto the same paper you plan to do your final proper finished print on.
This is important because it might be that you think the inked up string will have a certain 'weight' of intensity to it but the test might make you realize that you perhaps need to add some 'extender', or to add something to your ink to make it darker.
 A). Measure your string as in, set it out, on the press bed along with your 'plates'. I sometimes will make a "print layout plan" so that I remember where to put things. Bear in mind the 'reversal factor' when doing this. This 'print plan' can always be covered over with some tissue paper before the actual finished inked string and inked plates are placed 'in-position'.
 Use an ordinary bristle brush (best it is somewhat stiff) and put the ink out on a plate that will be big enough for you to apply the inked brush onto the string (not too much ink - its easier to add more if needed) . I usually just use any plastic plate that's nearby in the studio. Then apply the ink back and front and when you have 'covered the entire string, it takes a little while - don't rush it or you may well regret it.
WIPING INK FROM STRING
You need rubber gloves on if you dont already have them. Using phone book pages, place the string in between the paper sheets, hold the paper enclosed string vertically and rub back and forward, between your hands, to remove some ink. Then using recycled tissue paper do the same.
KNOWING WHEN STRING IS INKED SUFFICIENTLY
By placing the finished inked string onto a piece of kitchen paper, it shouldn't leave ink where it has been placed. That way you know it won't "squelch" and ooze ink, when it is rolled through the press. If there is ink visible onto the kitchen roll - then do another 'tissue paper wipe'.
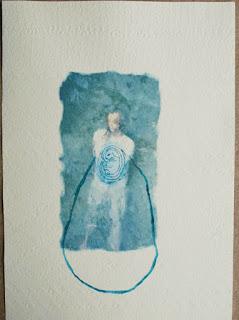
LEFT: If you look closely you can see that on the left that the ink has 'blobbed' somewhat. So that gives you an idea of what 'going wrong' looks like. However in this instance as I only had the one print (pigment inkjet) with aran textile embossing, I thought - well its borderline and allowed it the b.a.t. seal of approval.
 USING RAFFIA
I think I have given enough examples of using string in your printmaking as a strategy to designate a linear 'element' .
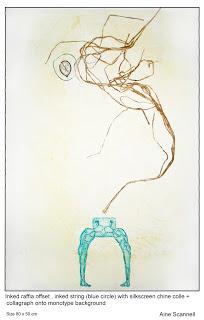
OK ...so then one time I thought I would use some raffia in my printmaking. After adding about 20% extender, I inked it back and front using a bristle brush again. This again was with oil based inks.
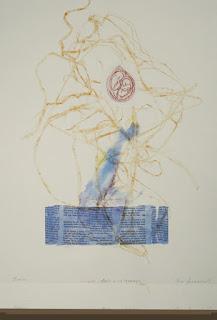
I made sure I gave it sufficient wiping although not being as vigorous with the wiping. Obviously the raffia is flat so you are making sure you get the ink 'wiped' both sides. I mean you do have to add ink to both sides in case it 'flips' as it goes through the press. You have to appreciate that there is of course an element of chance using this, but the effects are lovely so I think its worth the effort.
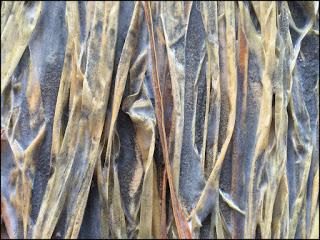
OK so now we are thinking about using raffia as a material for platemaking. What you can see here is an image of a close up view of a collagraph plate with raffia, carborundum powder and varnishes on a birch plywood base board
- this is from the very excellent website of an artist by the name of Sinclair Ashman.(link below)
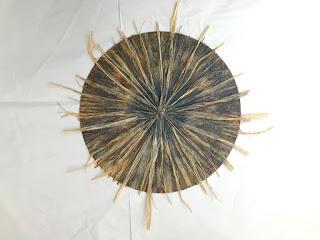 I discovered his printmaking activities several years back and I remember how enjoyable it was to encounter a printmaker who is an 'explorer' when it comes to the creation of his prints.
 They are collagraph in the main and he gets up to all sorts where his platemaking is concerned. Check out Sinclair Ashmans website - it will be an inspiring experience.
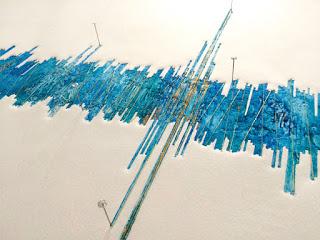 This is an angled view, of a piece of artwork titled “Moment“, that Sinclair made for an exhibition organised through the PMC, Print Makers Council.
I used to be a member of the PMC when I was living in London. In fact I was on the committee for about 6 or 7 years.
As an artists run organisation there were many exhibition proposals to be created and submitted to various galleries and institutions. We also had to sit through the 'selection process', for the various exhibitions that we presented. Sometimes we would also organize printmaking demonstrations as part of the 'accompanying program'. Occasionally we would have the opportunity to participate in international exhibitions the most unusual of these being in Belize. As far as I am aware this is the first PMC exhibition in Ireland, which was held at the Farmleigh Gallery Dublin.
It was held in Dublin to celebrate centenary of the foundation of the Republic of Ireland, in 2016. Sinclairs blue print, "Moment", is quite a large piece measuring approximately 100 cm wide.
