Whether you’re prepping your house for sale or just taking pictures of your bathroom for memories sake, the bathroom presents several obstacles that make it very difficult to photograph. Not only can size be an inhibiting factor, the many reflective surfaces in your bathroom can make it a frustrating process all together.
These tips can be helpful for Real Estate Agents, Interior Designers, and Home Stagers. Try using some of these tricks and see how well the photographs of your bathroom come out in your next project. It’s guaranteed that your bathroom will look ten times better. Lights, camera, action!

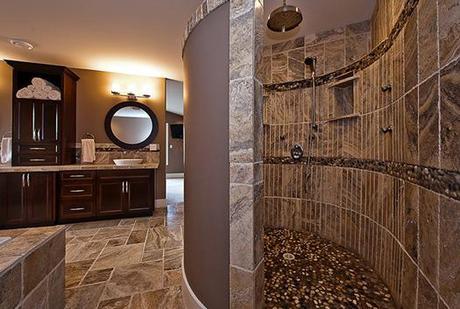
Wilson Residence Custom Home by © Alair Homes.
How to Photograph Your Bathroom Like a Pro
Common Problems When Photographing the Bathroom:
- Small bathrooms don’t allow adequate lighting and expansive angles are difficult to locate.
- Reflective surfaces make taking pictures of the bathroom a real nightmare.
1. Dealing with Glares and Reflections
Reflections can be caused by sunlight pouring in from a window. You can soften the light by adding a thin sheet of tracing paper over the window to reduce the amount of glare and shine created by the mirror and other reflective surfaces like quartz and granite countertops. This is also a good reason to point your flashgun (see #7) at the ceiling as opposed to being directly pointed at the focal point in the room.
2. Finding Your Good side
Find the best angle to photograph from. Try to capture more of the key features of the bathroom from this angle. (Thermostatic shower controls, LED faucets, tile work, etc.)
[READ: Expert Tips to Make a Small Bathroom Look Bigger]
3. Tripod Height
Changing the height of your tripod can greatly affect the appearance of your bathroom. A sharp angle can even distort the dimensions of the room and make things appear odd and out of place. What you can do is start by placing your tripod at a height of 4′ 8″ and work from there depending on the layout of your bathroom.

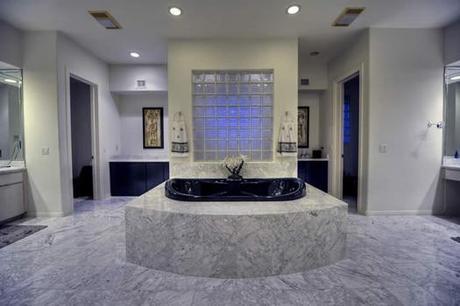
Contemporary Luxury Bathroom by © Fratantoni Luxury Estates.
4. Finding Your Center
Identify the focal point of the bathroom whether it be a luxurious rain shower head or a clawfoot tub, center the picture around this point.
5. No Selfie Zone
Make sure that you don’t show up in the mirror. We are not shooting selfies here.
6. Exposure Length
Try setting your camera to long exposure to resolve any issues created by poor lighting. If you’re shooting in a bathroom with bright colors like white or other neutral tones, you can shorten the exposure length so you don’t get the “ghost” effect in certain areas.
7. Use a Flashgun
Although it’s best to use as much natural lighting as much as possible, sometimes there are instances where you need extra lighting to get rid of dark shadows. Use a flashgun and aim it toward the ceiling to add ambient lighting. This creates a more natural look rather than appearing to look like a blaring flash of light.
8. Panorama Images
Sometimes it can be hard to highlight all the key features of the bathroom. What you can do is stitch together a panoramic photo of the room. This is a more advanced technique that requires you to use a software program like Canon’s Photostitch. Keep the camera in the same place and rotate the angle of the camera slightly to take 3 or 4 pictures. These photo’s will be “stitched” together to form a panoramic image that will make your bathroom look much larger than you would have ever imagined.
Last but not least, please make sure the seat is down.
Related Topics:
- Bathroom Trends to Look Out for in 2015
- How to Get the Designer Look for Less – Bathroom Tips
- How Much Can a bathroom Remodel Add to Property Value?
- Expert Tips to Make a Small Bathroom Look Bigger
- Tricks of the Trade: Photographing Small Bathrooms
About the Author
Cheryl Khan is a designer and writer at TradewindsImports, an online specialty site dedicated to retailing fine bathroom furnishings. She has extensive knowledge about all the finer details that go into planning the perfect bath renovation project and is an expert on all things bathroom! Send her your bathroom Q’s on twitter @SuperInteriors!
