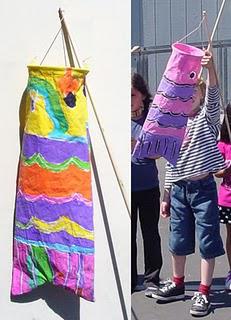
 I found this project at “That Artist Woman” blog, and love how it made very batik-looking fabric, which usually takes hot wax and expensive dyes. This uses washable Elmer’s glue and just acrylic paint, which makes it totally safe for kids. Thanks so much for idea Gail!
SESSION ONE
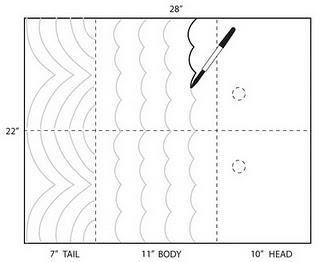 1. I gave each student a white posterboard (22" x 28") that already had the sections shown above drawn in pencil. They students were to draw their own eyes, scales, etc. in pencil, and then trace everything with a thick black marker.
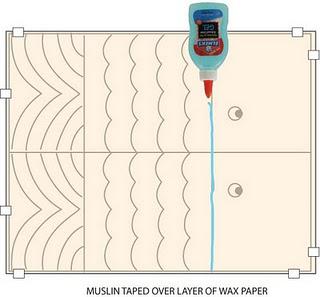 2. IMPORTANT: You need to tape a layer of wax paper over the posterboard, and then place your matching size rectangle of muslin on top. If you don’t, the fabric may end up really sticking to the poster. The cheap kind of muslin ($2/yard) is all that is needed. The black lines should show through the wax paper and muslin. Each student uses a bottle of Elmer’s Washable Glue Gel to trace all the lines. This needs to dry for at least a day or more until the glue sets up.
SESSION TWO
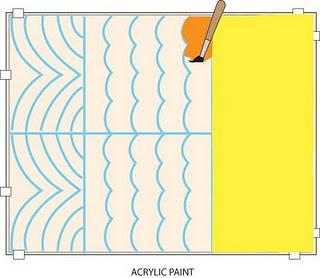 3. Using just the cheapest acrylic paints possible, have the students paint their fish in whatever colors they desire, making sure to paint over all the glue lines. Layering of paint works well too. Let the dry completely.
4. I removed the muslin from each board, and soaked in hot water for about 15 minutes. A little bit of soap and hand scrubbing removed the top layer of paint and all the glue, which kind of just turned to jelly. Smooth out and hang dry.
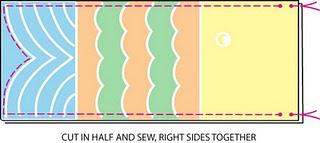 5. Fold the fabric in half lengthwise and cut. With right sides together, stitch all around, leaving a 1/2" opening, 1/2" down from the top on each side. Trim seam and turn right side out.
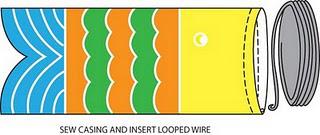 6. Fold over an inch of fabric on the open end and stitch to make a 1" casing. Using 16 gauge wire (or less), and a needlenose pliers, make a small loop on one end of the wire. Slip it into the inside seam opening, and continue feeding it in until it makes a complete circle. Overlap the ends about a 1/4" and cut. Slip cut end of wire into loop and wrap around with the pliers to secure.
7. For final assembly, hook one paper clip around the wire in each of the two seam openings. Take an 18" length of string and tie each end to a paper clip. I used 1/2" dowels for my sticks, and notched a groove in one end so that the string would not slide off. Find the center of the tied string, and make a slip knot over the rod. Hang your fish in a windy spot and enjoy!
