As I'm sure you already know, May is Deck Safety Month, so it's a good time to talk about deck inspections. Is your own deck safe? Now is the time to check. If you're going to have a party or a large gathering, you better be sure. The best way to be sure is to pack as many people on to your deck at one time as you possibly can, and have them bounce up and down all at once. If your deck doesn't collapse, it's safe.

Ok, that's a joke. Seriously, the best way to know about your deck is to have it professionally inspected. As I've said before, building a deck and replacing a water heater are two of the most common projects that get royally screwed up by DIYers on a regular basis. If you're not keen on hiring a home inspector or carpenter to check out your deck, there are still a few basic things that you can look for yourself.
Improper attachment to the house
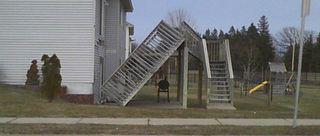
The most common reason for deck collapses is improper attachment at the house. That's what happened with the deck pictured above. If the deck is supported by the house, it should be attached with bolts, lag screws, SDS screws, or some other similar method. The photo below shows proper attachment with lag screws, which I've circled in black. This is the most common deck ledgerboard attachment method. If you look at the deck attachment to your house and all you see are nails or small screws, you have a problem.

Improper flashing at the house
There should always be flashing installed above the top of the ledgerboard - that piece of wood that attaches the deck to the house. The purpose of the flashing is to keep water from leaking in behind the deck at the house and causing rot. Here in Minnesota, painted galvanized steel is pretty much the standard way to flash the ledgerboard.
To determine if the ledgerboard is flashed, just take a peek underneath the deck. If you can see a piece of metal sticking out over the edge of the ledgerboard from underneath, you know that flashing is present. This doesn't mean it was installed properly, but you should at least feel a little bit better knowing it's there. If installed properly, this flashing will extend up underneath the siding. The photo below shows what you should see if the flashing is properly installed; I drew a black rectangle around it.

If there is no flashing present, there will be a much higher chance for water instrusion and rotting.
Improper joist hanger installation

- Missing nails. Nails are supposed to be installed in every hole.
- Improper joist hanger nails. I find improper joist hanger nails on almost every deck. If you can see a little "10" on the head of the nail, it's probably the wrong nail. Click the link above for more details on this defect.
- Screws used instead of nails. Screws don't have nearly the shear strength of nails, and they're not an acceptable substitute. Well, there's one screw I know of that's an acceptable substitute, but I've never actually see it installed. Joist hanger screw
- Altered joist hangers. Joist hangers shouldn't be bent or cut.
Rot
Get a screwdriver and poke around your deck looking for rot. The area that usually rots first is the place where two deck boards butt up against each other over a joist. Pay special attention to that location. If your deck doesn't have the aforementioned ledgerboard flashing, you should also pay special attention to the place where the deck connects to the house. The video below shows me inspecting a rotted deck in Minnesota last year.
Improper stairway attachment
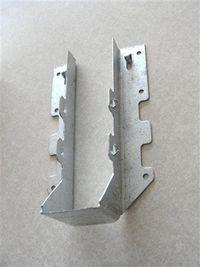
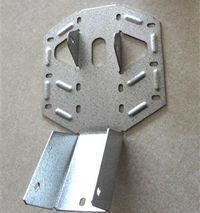
The best way to attach a stairway stringer to a deck is to use a metal bracket that's designed just for this purpose. The photo below left shows a proper bracket for a stairway stringer. This bracket isn't the only way to properly attach a stairway stringer, but it's probably the best way. The photo below right shows an improper installation; they used a joist hanger bracket, and only managed to get a couple nails in the entire bracket. Not cool, and not uncommon.


Guardrail problems
Guardrails should be strong. If you can push on the top of your guardrail and it moves a couple inches, it's not strong enough; guardrails should be able to withstand 200 lbs of pressure along the top rail in any direction. While this may seem like a lot, just think about a group of people leaning against a guardrail while heavyset guy who's had three too many mint juleps falls against the guardrail. If a guardrail is supported only with 2x2 balusters, it's probably way too weak and should be reinforced. You can read more about this topic at my blog about guardrail requirements.
Also, the current requirement for guardrails is that the balusters be spaced so that a 4" sphere can't pass through. This is a requirement so little kids don't get their heads stuck. Common sense also tells you that you don't want horizontal balusters that little kids can climb like a ladder, but there's nothing in the building code that prohibits this design.
That makes up my list of the most common deck defects that you can look for yourself. This isn't a comprehensive list, but it's a great starting point. If you'd like a comprehensive but much less user-friendly list of things to look for while conducting your own deck inspection, you can download a deck inspection checklist from the North American Deck and Railing Association.
Reuben Saltzman, Structure Tech Home Inspections - Email- Minnesota Deck Inspections

