Hair & Beauty Magazine

How to Wing Liner - 4 Steps with Diagrams!

By Makeupchicliterarygeek @DoriaJM
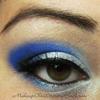
I wear winged liner on a fairly frequent basis and have for years. Sometimes I create small wings, sometimes I create larger wings--it really depends on my mood! I know lots of people seem to struggle with creating wings so I've created diagrams to show you how I do it. It's only 4 steps and it's pretty simple! I use gel or liquid liner and a nice sharp-edged, stiff angled liner brush, but I've also used a rounded, flat liner brush and straight-edged liner brush with the same success. I've used cheap brushes and expensive brushes. I find it really is a personal choice. Find what works for you! This same process could also be used with a pencil, I just personally prefer pencils for tight-lining and gel/liquid for lining in general.
Here we go...
How to Wing Liner - 4 Steps with Diagrams!
 Voila!
Did you give it a try? How'd it work for you? 
I know some people gently pull the outer corner area of their eye with their ring finger (which is the weakest finger so generally the best to use around your eyes) to flatten/straighten the skin out a bit when lining, just make sure you're gentle!
It may take some practice, but once you do it enough times you'll be able to do it in your sleep ;)
Back to Featured Articles on Logo Paperblog