Disclaimer: Living the Dream uses demographic data, email opt-ins, display advertising, and affiliate links to operate this site. Please review our Terms and Conditions for more information and our Privacy Policy.
So you're thinking it is time to start a travel blog. We want to be the first to welcome you!
There are a number of services out there to help you on your blogging journey, and almost every blogger has their favorite method to get started.
In this one we wanted to share the easiest way to get started blogging (on the right foot, that is) which can be completed in four simple steps!
Note: This post is purely the steps you would take to start a travel blog, including buying a domain, securing a server, and installing wordpress / a theme. It does not dive into how to be successful blogging. If you would like to go into the weeds, check out our 10,000 word guide to start a travel blog!Step 1: Buy a Domain and Server on Bluehost

The first thing you'll need to do when starting a travel blog is to buy a domain and grab server space. Many companies exist to offer both of these, but the easiest (to us at least) is through Bluehost as they offer domain and server space together in a quick check-out option.
Before buying, however, take a long thought on your intended niche and the content you wish to publish, as this could directly influence naming your travel blog. Be too generic and people may not recognize your name and content easily. Be too specific and you may lock yourself into a specific content style that may not be relevant in three or five years' time.
Check for your ideal domain name below:
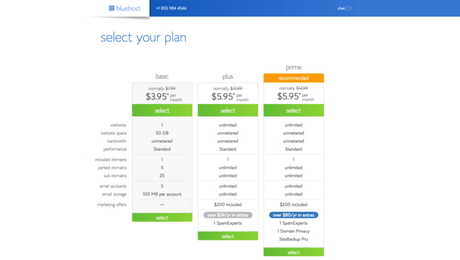
After you select a domain, you'll need to purchase server space as well.
A server is basically the hardware and interface that your website is installed on and is remotely managed (to some degree) by a 3rd party company. For new bloggers with low budgets, Bluehost offers some of the cheapest hosting around (lowest price often about $50/year depending on sales) with little, if any, bells and whistles beyond what is needed to get your site online.
For those who wish to use WordPress (recommended), purchasing your own server space is highly recommended.
Basic services on Bluehost are good for most websites with limited plug-ins and traffic up to about 10,000 page views a month. Once you get near this figure the basic server slows down and detracts from the user experience and may require an upgrade to a premium account.
Once you get to 25,000 page views a month, we recommend displaying ads via a premium ad network (we use Mediavine) and then re-investing part of that revenue to a managed WordPress hosting service (we use Performance Foundry). These servers are often much faster, come with dedicated support, and are less DIY than servers like Bluehost- but tend to cost 10-20x more per month.
Step 2: Install WordPress

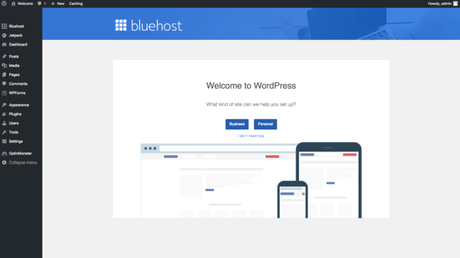
Once you get a server on Bluehost, installing WordPress is as simple as a few clicks via Bluehost's procedure. (Note that you may be prompted after sign-up to install WordPress as well.)
Step 3: Install a Custom Theme and Plug-Ins

To help differentiate your site, odds are good you'll want a custom theme. We love the themes at Elegant Themes as they are easy to use, somewhat light-weight in terms of server load (needed for entry level Bluehost accounts), and are cost effective (although by no means are the cheapest out there).
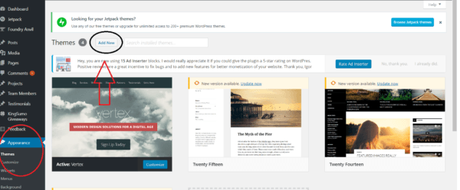
After purchasing a theme you can upload the complete zip file to your site under the sidebar link Appearance => Themes.

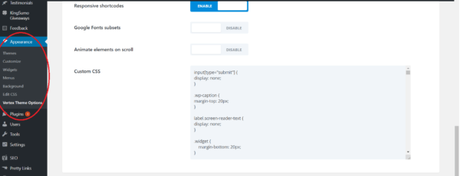
It is worth noting that most themes out of the box do not look like what their demo versions do, and require a fair bit of editing via CSS. Some themes (like most from Elegant Themes), have custom CSS boxes in the individual theme settings (generally under Appearance => [Theme Name Options]) where you can edit the aesthetic looks of your site without getting into the core code (editing core code is generally not recommended unless you're an expert).
We recommend reading a number of tutorials to learn how to edit CSS on your site as it is going to be one of the single most important skills to learn in order to customize the look of your site.
Beyond this, there are also a number of WordPress plug-ins you can install to help your site out as well. Note that plug-ins add load onto your server, and for budget servers like Bluehost we recommend to minimize your plug-ins. The list at the previous link include all the plug-ins we personally use, but please note we are on a premium server that can tolerate more load.
At a minimum, we like the following:
- Yoast SEO - An SEO tool that allows you to adjust your meta title and description for search / social media. (Free)
- Akismet Anti-Spam - Anti-spam software for comments. Likely comes automatically with install.
- WP External Links - Global link setting logic for internal and external links (open in same window, new window, etc).
While image optimization plug-ins also exist, we also recommend you edit your images and resize them prior to uploading to your server. This will minimize your total hard drive usage and also allow for faster loading files. We size ours at 600 pixels wide which is roughly the size of our content screen; however, we recommend resizing to a minimum of 1,000 pixels (if not 2,000 pixels) to provide options for using larger images in the future even if it is larger than your theme width.
Step 4: Go!
Once you install the above, it is time to get started on your blogging journey, defining your niche, illustrating your expertise, and getting readers.
Bloggers in the EU should read up a fair bit on privacy laws such as GDPR and install additional plug-ins, and depending on your theme you may need to pay for an RSS feed service to aid in submitting your site to Google Webmaster Tools for indexing (we like Feed Press - premium).
Early on, be sure to make the following pages as well (click to read ours):
Now that you're all set up, get to it!
If you are looking to take a deeper dive into how to start a successful blog, click the previous link to check out our 10,000 word guide with our full thoughts on the topic!
Or, if you have a bit of budget to spend and want more premium features, check out where we think you should spend your first $1,000 on your travel blog!
Looking to start a blog? Find a domain name and grab a server on Bluehost today!
If you are looking for tips, be sure to read our detailed guide on how to start a travel blog or our basic four-step guide on how to get started blogging!
Have an existing blog that is in need of an upgrade? Check out the following services we personally use on our sites!
If you are looking for tips, check out our Blog Your Trip series!
