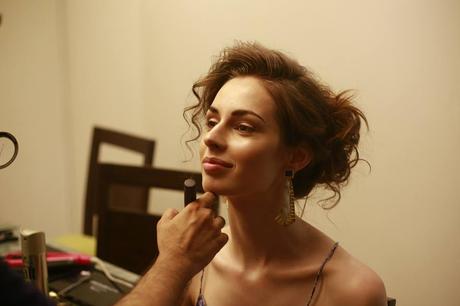
 (Shardul Navare Photography)
Have you ever looked white in photographs?Have you ever suffered from photo-malfunctions like looking extremely shiny or oily, darker than usual or anything of that sort?Have you ever go photo-conscious because your makeup does not make you look good?Has the camera flash brought out the 'ghost' in you?
If at least one of the answers is YES then you must read this article. Who said that one cannot look amazing in photographs? You do not really have to be a professional makeup artist to look good? Trust me, many makeup artists I know who do some amazing work LIVE, create disasters in photography makeup and then go through all the extra pain of retouching and photoshopping. Working with some really nice photographers who have an eye for some amazing natural looking photography, I can muster some guts to share a few tips that can make anyone look amazing in photographs. This could be beneficial if you are taking selfies, taking pics at events, take pics under flash or in broad daylight or anywhere else. Its a good article to know if you're a blogger, if you are a media professional, a celebrity, a model and mostly if you are that perfectionist human being albeit the gender who wants to look amazing and flawless in photographs without the malfunctions.
I would be highly elated if one could benefit out of this article and please do let me know in the comments whether it was. I would strictly prefer not mentioning any of the brands in this article as everyone has their own choices and brands they love. Its just about using the right products in the right places and that should solve the issue.
Please note that I am including the pictures of my work for better understanding and for better examples since I know what I am doing. Read further to know what you exactly need to be reading......
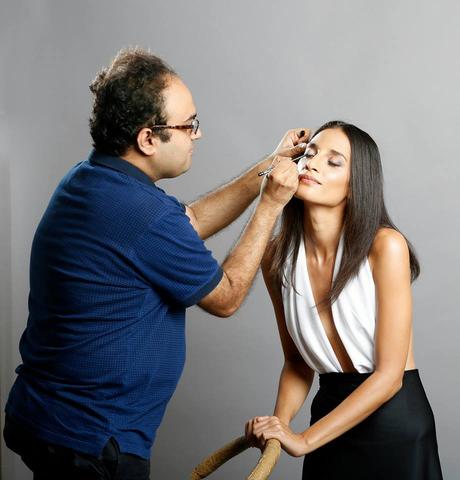 (Shardul Navare Photography)
Photographs are the memoirs we cherish of the past that has passed away and gone. Its upon us to make it special and be less ridiculed in the future on the little mistakes that look amplified in the pictures. Photography is really really high definition and digital these days and its so important to be updated about the technology and then be a better subject to be shot.
I am only going to talk about the 'makeup' aspect and I am sure the photographers, amateur, novice or professional would be able to know and understand the lighting conditions in a better way and thenc get a good picture. Now a days even mobile phones have advanced cameras and pick up flaws equally well and thence is the purpose of this article to make it easier for everyone to look good. Another aspect which is out of the scope of this article is on how to pose. That is very subjective and everyone knows which is their best side. So lets have a look.....
 (Aashka Goradia for gr8 magazine, Photography by Rahul Jhangiani.)Picture is subject to copyright. Kindly stay away from copyright infringements and plagiarism.
THE SKIN PREP
You're lucky if you have a clean and clear skin. Who does not want it? But if you don't have a clear skin its completely Ok. In life we go through several environmental aggression, raging and waning hormonal imbalances, food related issues and most importantly STRESS. This takes a heavy toll on our life style and body and the best mirror to portray all this is our SKIN. Skin is the mirror of the body and what skin shows is just a brief image of the damages our bodies go through.
When being photographed and if you take your face really seriously, then a gentle day to day cleansing, toning and moisturizing works wonders. Irrespective of the skin type, its so youthful and amazing to flood the skin with moisture and see the skin being plump and receiving. Trust me, its not at all difficult as it may look and anyone can do it.
I always prefer to thoroughly moisturize the skin with an oil free hydrating formula and literally marinate the skin for foundation application. A gentle massage on the face does help drain the lymphatics and facilitates better skin canvas prep. If you have a built up cellular debris or clogged pores, use an exfoliator which is gentle enough to slough off the unwanted debris so that the foundation gets a cleaner and more even surface to sit on. I love these baby wipes. They are so good to exfoliate on shoots and takes away that excess debris through the action of cleansing and the friction caused by the wipe.
Instead of a sunscreen in a foundation, its good to have a sunscreen in the moisturizer or a sunscreen in the primer as they tend to not only have a stable formula but also prevent flashbacks and other concerns.
I would include one more aspect in doing makeup for photography. If you tend to have oily skins and yet like that little dewy face (soft focus a la Marilyn Monroe) then its better to mimic or fake the glow rather than looking like a hideous oil slick. We come to that in sometime. In the skin prep, 2 extra precautions to take and keep oil at bay. Use oil free products if possible and use a mattifying primer if possible as it keeps the excess oil at bay. Also one more tip, do not splash too cold water on the face. They may reduce the pore size but the coolness and the alkaline pH of the water may just bruise the skin, cause broken capillaries and also rebound oiliness as its a measure to prevent skin from dehydration (yes! dehydration).
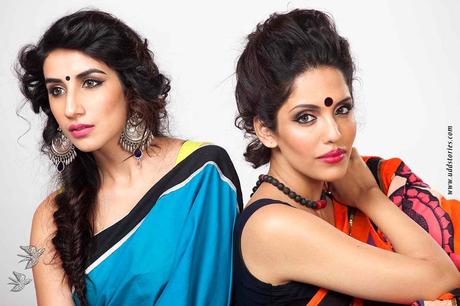 (Photography by Mohit Holani for Udd Campaign. The picture is HD)(Image may be liable for copyright. Please stay away from plagiarism or copyright infringement)
THE SKIN BASE
Getting the base perfect is the biggest challenge when it comes to photography. When it comes to foundations and all, we all get confused and tend to use wrong products which spells ghastly results and then develop a phobia. Btw please know that I always work under strong flash photography conditions and till now never got the foundation wrong, luckily. Here are a few tips to get the base correct.
- Always apply a makeup primer. It not only makes the foundation long lasting but also prevents the foundation from changing color, oxidizing, gives a better slip and coverage and importantly helps blurring minor imperfections on the face. The concept of a primer must have come from 'construction' work where a wall primer is applied before putting the color on. Primers diffuse the appearance of pores and gives a nice soft focus effect. The primer of my choice is something that is non comedogenic, oil free, mattifying and does not have iridescent particles. Irrespective of your skin type, a perfect primer will simply make your job easy.
- Respect your skin. If pimples, uneven skin tone, redness and other issues take up less than 30% of your skin surface area, then you don't have to mask your entire skin for the sake of that 30%. Respect the healthy skin, let it breathe and see how magical your pictures become.
- For the foundation, I always begin with a liquid foundation. I am saying what I do as its a personal preference. Liquid foundations are enriched with skin blurring spheres and since they are silicone enriched they create another layer of a perfecting primer to make things easy.
- Always choose a liquid foundation which a shade lighter than your exact skin tone. With the environment we live in ( I am talking about humid Mumbai per se) the foundations do tend to oxidize no matter what and plus a wrong liquid foundation (within a range) can be adjusted with a loose or compact powder over it.
- A sheer to medium to full coverage foundation is upon the need of your skin and trust me, even a tinted moisturizer looks good if you can conceal the imperfection well. Its a choice per se. If you like to flaunt a pimple or a pigmentation mark, then please go ahead and do it. Its about feeling liberated.
- The liquid foundation you choose should generally follow the following criteria.
- It should be oil free, non comedogenic, non acnegenic, allergy tested.
- It should be long wearing and long lasting.
- Hopefully not oxidize when applied for a longer time.
- Has less SPF less than 15 or almost no SPF and this is perfect for preventing any flashbacks or whiteness.
- Drug store brands vs department brands. Choose what suits you. Just that department brands have a wider selection of colors and undertones. Nothing special about the quality and some may be infused with skin care benefits.
- I like to layer the concealer over the foundation. The concealer I prefer is a liquid one or a cream one, generally oil free so that it does not settle in lines, more of a HD so that it does not look heavy and I use a dome shaped brush to blend it so that it blurs and does not look like a concealer that is applied.
- For powders, I choose a messy translucent powder over a compact powder. This gives an even coverage, does not look heavy or cakey as a compact, plus compact powders have oils to bind the pigments together which can be a problem when it comes to setting the product. Now there are companies which make oil free compacts and sheer blotting powders which are good enough for touch ups. Ideally the first powder should be a translucent one.
- HD and White colored powders have become a talk of being scary and making people look white. I disagree to this as I have used them and never faced a problem even in the strongest light. In fact they are invisible and yet mattifying. The trick is to apply them very very sparingly and to apply with a thin brush and then either use a fan brush to sway away excess powder or use a makeup setting spray to blur of the powdery-ness of it.
- Powdering the under eyes is important to keep the concealer at bay and a peach toned loose powder does micro corrections to blur away the imperfections. Also applying the powder in circular motions helps putting the concealer in a better position refraining it from cracking.
- Lets do some contouring and shading of the face. You may be blessed with the best bone structure ever, but a little contouring does not hurt. What is this contour powder? Its not a bronzer. Its a specially formulated powder with cooler greyish tones to mimic the natural shadows of the face and bring out the best in someone. Btw did you know that a liquid foundation can create a smooth flat 2 D effect so to add dimensions one needs contouring. I love foundations, oil free creme compacts and specially made contour powders to shade the face. Its not so compulsory though.
- When it comes to photography its best to keep the face looking matte. Unless you like the dewy skin which I do, I have certain parameters to achieve it. Well a matte skin looks quite lively these days as the finishes of generic foundations and powders is more satiny and velvety rather than being flat. Thanks to the micronized talc particles and advanced technologies.
- For highlighters I used cream ones on dry skins and mineral powders and shimmers on oily skins but very very sparingly with a small fan brush or eyeshadow brush and use it only in the areas of the face where light would naturally bounce. Highly reflective powders can mimic an oil slick which can be scary on cameras.
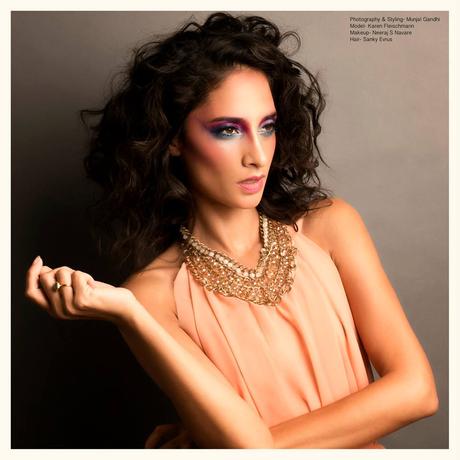 (Photography by Munjal Gandhi)
THE COLOR BURST
Applying the right colors will make you look amazing and this can go to any extent. Choose what flatters you the most or else stay safe by sticking to natural flesh tones that will simply enhance the complexion and not hamper your look. Some tips -
EYE MAKEUP
- For eye makeup, always start with a primer. It holds the pigments together, eye makeup stays put and you require way less product than you would normally do.
- The eyeshadows that are for sculpting should preferably be matte or satin in finish. The eyeshadows that are to highlight should be soft shimmers. Stay away from frosted and glittery eyeshadows as they will just make things go wrong. Glitters show as white colored dandruff looking particles on the face so be careful. I prefer a blended smokey looking eye rather that sharp edges. But that's my style and preference.
- The eye liner and eye pencil has to normally be a black or black brown, near the perimeter of the eye (lash line) and intense in pigment. Its good to blend and soften the harsh lines. Stay way from attention drawing shiny liners as they can be very unflattering in photography especially flash one.
- I love mascaras and darker the mascara the better it looks. This goes with curling lashes and then applying layers till you get the perfect finish.
- For brows, I like natural looking brows with enhanced shapes and then I also love putting matte powders in gray tones so that the brows don't look abysmally red.
- My love for eye makeup and false lashes can be seen in this video shot by my nephew and an amazing boy Shardul Navare.
CHEEKS AND LIPS
- I have my own set of preferences. I like to put a matte contour, sometimes a transitional bronzer and then highlight. Then add an amazing flush of a matte blush to bring everything together. The best blushes for photography are rosy pink, soft peach, tawny, earth colors and browns and plums that are devoid of any obvious shimmer.
- Lipsticks are one of the crucial steps in photography. A matte however bright or natural looks and photographs much better than a shine. They look better when it comes to bouncing the light as per required which can be done by applying a vinyl finish gloss just on the center of the lip. Works for me.
- Generally I choose nude and flesh tones in lipsticks or else they go dramatically bright with matte reds and pinks. The only 2 dark colors that I have are chocolate brown and wine and they are used as a color mixing lipstick than on their own.
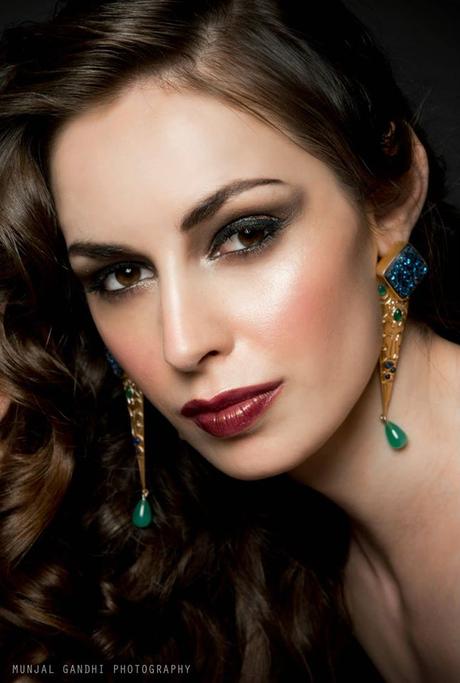 \(Photography by Munjal Gandhi)
MAKEUP FOR MEN
I do not have many men reading my blog but just in case anyone does, then use the steps that are easy for you. This means, opt for a sheer foundation, some spot concealing and the tiniest amount of powder and you are done. With guys, opt for colors that are exactly the color of skin or a shade darker as it photographs better.
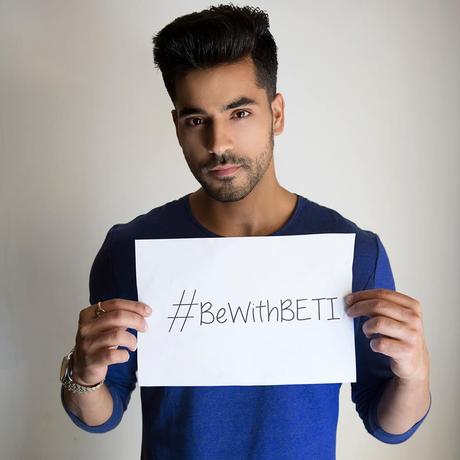 (Gautam Gulati by Rahul Jhangiani Photography. Image is subject to copyright. Kindly do not be a victim of copyright infringement or plagiarism)
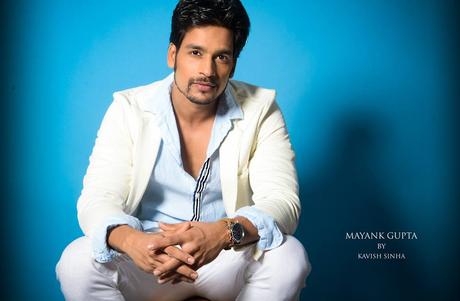 (Mayank Gupta Photographed by Kaveesh Sinha).
To conclude,
Life is all about having fun and photographs are those memories that you created while having fun. Its an image that is captured and passed on to others and is a receipt of one nice memory of yours. So lets make them look amazing. This article is just a small attempt from a professionally functioning makeup artist like me to help anyone who needs it. This makeup is not only friendly for photography but also for some one who wants to look the best on a daily basis. At the end its all about enjoying the process of makeup rather than restricting yourself.
Do let me know in the comments if you have any queries that I may not have discussed here. Do read, share and support.
Till then,
Ciao

Please do not copy any pictures or content of Beauty Traveller without prior permission. Thanks for reading my blog. I don't give 100% on the authenticity of the content here and it is subject to change without prior notice. Please read the disclaimer for any questions. The work and the images in this article are my works with other photographers where I have given my professional makeup services. These pictures are subjected to copyright. Kindly email me on neerajnavare(at)yahoo(dot)com to remove in case of copyright disputes. I request my readers and other websites - personal or commercial to not use these images and they may be liable for copyright infringement or plagiarism.Thanks a lot for reading my blog. Do subscribe, follow and support. Thanks.
