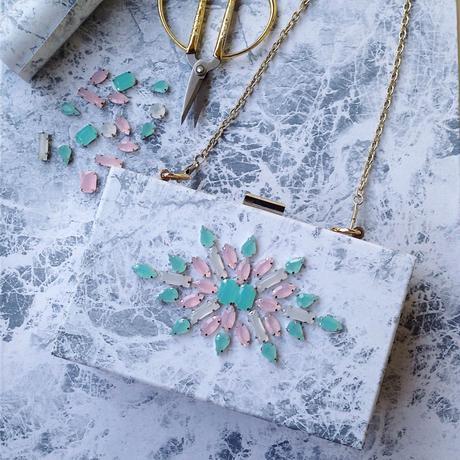
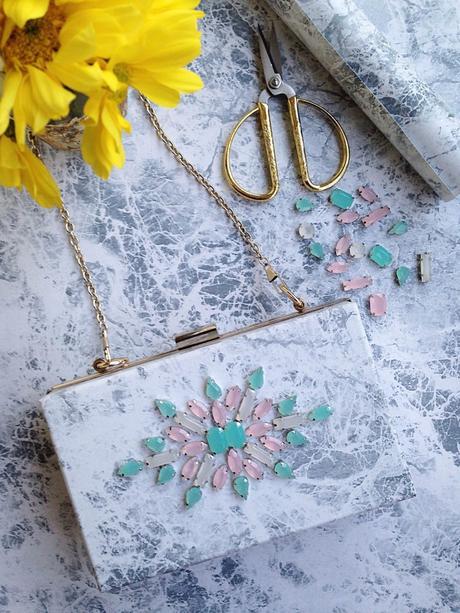
Imagine my delight when I was able to find marble contact paper (i.e. read the Marble Flatlay DIY) for cheap at only RM5.30! I had an itch to revamp my previous DIY acrylic box clutch from 2014 (a DIY post which I only posted on the blog in 2015...my procrastination is epic). So after taking inspiration from luxury brands Balenciaga, Rebecca Minkoff, Mecque and the more affordable Country Road, DIY-ing my own Marble Minaudi è re Clutch seemed like the almost obvious next marble DIY! I mean, why would I spend RM5470 on a marble clutch when I can make it for less than RM100? Yep, that's a total saving of more than RM5300! Excited? Read on below:
What you need:- 1 Acrylic clutch. DIYKL stocked clear acrylic clutches (in a DIY kit) over Christmas last year so email [email protected] if you would like one!
- Marble contact paper which you can find online on eBay, Amazon or Komonoya if you live in Kuala Lumpur, Malaysia
- Ruler
- Sharp knifeblade
- Pencil or pen (optional)
- Rhinestones (optional)
- E6000 glue (optional)
 How-To:
- You will need to stick on both sides of the clear clutch.
- Measure the contact paper from the top side of the clutch, across the middle, and right to the bottom of the clutch. It doesn't need to be perfectly measured (i.e. the lazy me talking), before you use a scissors to cut the desired shape.
- Alternative step to Step 2: Otherwise, you can take pen or pencil measurements of each side of the clutch which will consist of 4 parts, draw it onto the back of the contact paper, and then cut the precise shapes.
- If you are lazy like me and using Step 2, peel off the contact paper from its backing. Start sticking the contact paper from the top side of the clutch and not the bottom. Slowly use your ruler and smooth down the contact paper right until you reach the bottom of the clutch. Try to smooth out the bubbles that may occur under the contact paper.
- Now, you will need to stick the sides of the clutch. What I did was cut a straight line off each corner so that you can fold the contact paper inwards on all sides.
- Stick the sides down! You will notice excess contact paper, but don't worry. Use your knifeblade and slowly cut the excess paper off. Peel it off.
- Repeat Steps 1-6 for the other side of the clutch.
- (Optional) Design your own pattern onto the clutch. Here I used DIYKL pastel rhinestones (soon to be on the shop!) in Pantone 2016 colours and stuck them on using glue. Let dry for at least 24 hours.

Voila! This Marble Minaudi è re Clutch is beginning to be one of my favourite and easiest DIYs! I can't wait to take this beautiful clutch out. Why not try this out?

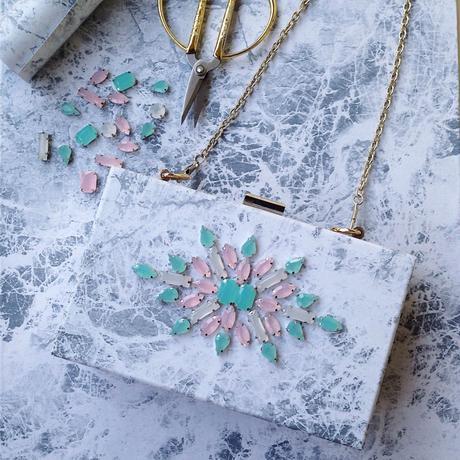
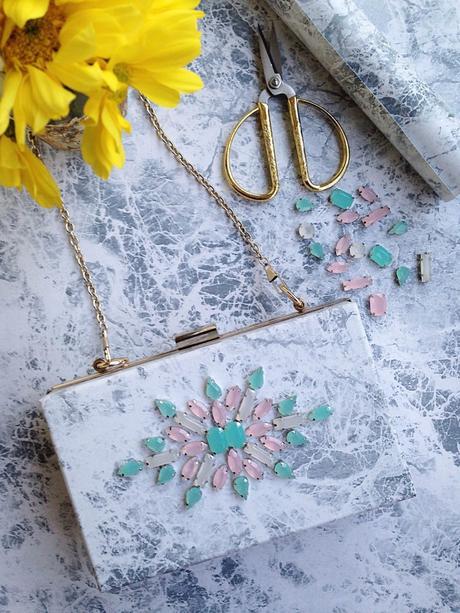
Imagine my delight when I was able to find marble contact paper (i.e. read the Marble Flatlay DIY) for cheap at only RM5.30! I had an itch to revamp my previous DIY acrylic box clutch from 2014 (a DIY post which I only posted on the blog in 2015...my procrastination is epic). So after taking inspiration from luxury brands Balenciaga, Rebecca Minkoff, Mecque and the more affordable Country Road, DIY-ing my own Marble Minaudi è re Clutch seemed like the almost obvious next marble DIY! I mean, why would I spend RM5470 on a marble clutch when I can make it for less than RM100? Yep, that's a total saving of more than RM5300! Excited? Read on below:
What you need:- 1 Acrylic clutch. DIYKL stocked clear acrylic clutches (in a DIY kit) over Christmas last year so email [email protected] if you would like one!
- Marble contact paper which you can find online on eBay, Amazon or Komonoya if you live in Kuala Lumpur, Malaysia
- Ruler
- Sharp knifeblade
- Pencil or pen (optional)
- Rhinestones (optional)
- E6000 glue (optional)

- You will need to stick on both sides of the clear clutch.
- Measure the contact paper from the top side of the clutch, across the middle, and right to the bottom of the clutch. It doesn't need to be perfectly measured (i.e. the lazy me talking), before you use a scissors to cut the desired shape.
- Alternative step to Step 2: Otherwise, you can take pen or pencil measurements of each side of the clutch which will consist of 4 parts, draw it onto the back of the contact paper, and then cut the precise shapes.
- If you are lazy like me and using Step 2, peel off the contact paper from its backing. Start sticking the contact paper from the top side of the clutch and not the bottom. Slowly use your ruler and smooth down the contact paper right until you reach the bottom of the clutch. Try to smooth out the bubbles that may occur under the contact paper.
- Now, you will need to stick the sides of the clutch. What I did was cut a straight line off each corner so that you can fold the contact paper inwards on all sides.
- Stick the sides down! You will notice excess contact paper, but don't worry. Use your knifeblade and slowly cut the excess paper off. Peel it off.
- Repeat Steps 1-6 for the other side of the clutch.
- (Optional) Design your own pattern onto the clutch. Here I used DIYKL pastel rhinestones (soon to be on the shop!) in Pantone 2016 colours and stuck them on using glue. Let dry for at least 24 hours.

Voila! This Marble Minaudi è re Clutch is beginning to be one of my favourite and easiest DIYs! I can't wait to take this beautiful clutch out. Why not try this out?

The Author
This blog is my creative outlet to create tutorials of my DIY projects. Creating something to call my own is always satisfying and is so much fun! Enjoy your stay here, leave a comment and thank you for dropping by!
I am also the Co-Founder of DIYKL (www.diykl.com) where I design DIY fashion kits!
Have a desire to ask me something? Do write to me at: [email protected]

