Hi Guys!
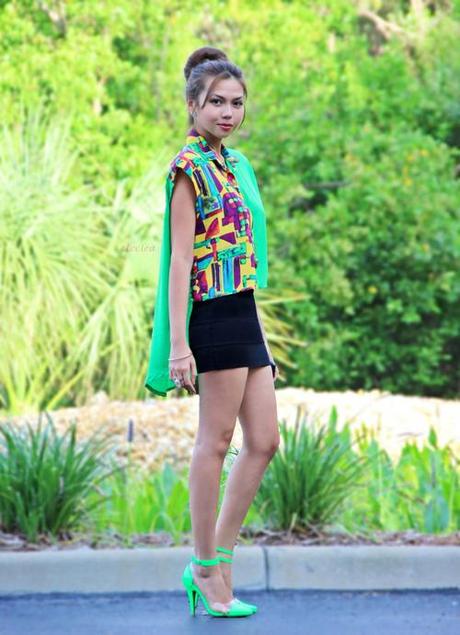
I actually don’t have a step by step photos for this DIY because I lost the data in my other camera, but I will try to explain it by words and hopefully I get to make another one of this top this month (will update this post once it’s done).

What I did:
1) Bought a thrifted vintage top with short sleeves (3 times larger than my usual size XL).
2) Cut the sleeves by following the sewn lines
3) Cut the sides of the blouse up to the top of my belly button (drawn a spot), then cut the front (horizontally) to create the that mullet look.
4) Sewn the edges of the area where I cut ( There are going to be frays, so I also bought a “fray check” from walmart to prevent further fraying on the fabric).
5) You’re all done! Pair it with a nice high waisted skirt/shorts/pants then you’re ready to go!
Here’s what I wore it with:

Bandage Skirt from Burlington for $4

I also wore a black bandeau inside.

Cross earrings for $2 from a garage sale (yes me and the fiance’ go to garage sales at least once a month ^_^).

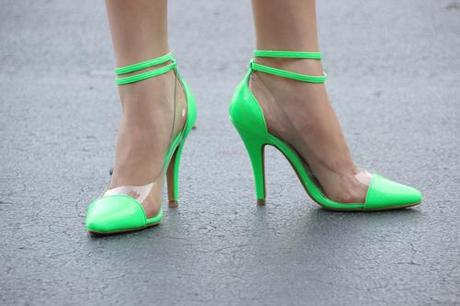
Shoe from Wild Rose.

Ring from Charlotte Russe

So, I hope y’all like this mini DIY project that I did, it took only 30 mins for me to make it depends how fast you sew since I did it all by hand (I’m still trying to figure out how to use my new sewing machine).
Until my next post! Have a good weekend <3
xoxo,
eteclea-sai
