Parts of a Baseball Cleat


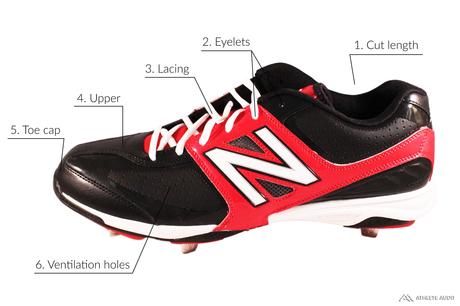
- Cut length – Cleats come in either low-cuts or mid-cuts. Low-cuts allow more mobility while mid-cuts offer more ankle support
- Eyelets – Holes on the eyestay keeps the laces in place
- Lacing – Laces are ubiquitous as they allow the most adjustment, although mid-tops may have ankle straps
- Upper – Very tough and rugged upper, most often made of leather or synthetic leather
- Toe cap – Prevents wear on the toe while running and pivoting
- Ventilation holes – Provides some breathability for when the heat gets high
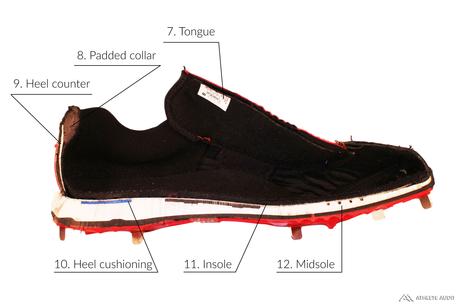
- Tongue – Thin but slightly padded for comfort
- Padded collar – For comfort and ankle support
- Heel counter – Plastic insert behind the heel that reinforces the heel cup and increases support; helps lock in the foot
- Heel cushioning – Some cleats may have additional heel cushioning for added comfort
- Insole – What your feet will rest on, provides comfort and orthotic support. Some may be removable
- Midsole – What lies between the insole and outsole, provides cushioning and is thicker in the heel for running
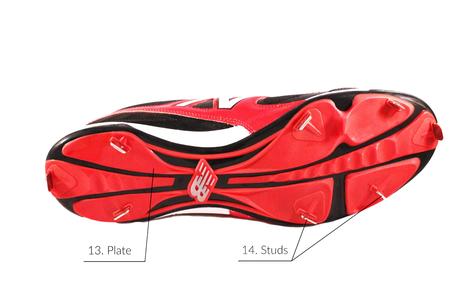
- Plate – Often made of a hard, durable TPU plastic, keeps studs in place and is highly resistant to wear from running on dirt
- Studs – Most cleats will use metal studs to help dig into the ground, although molded plastic studs are also used (more often in youth leagues)

