Yoga was practiced in India from the ancient times. During those times, yoga was a means to for achieving salvation and to be one with the Supreme Power. But now, with the hectic lifestyle and tension filled days, we practice yoga to stay healthy and fit physically as well as mentally and spiritually.
Yoga is an excellent way to nurture your body, mind and soul. It consists of warm up exercises, yoga asanas, pranayama and meditation. Yoga can be classified into beginner, intermediate and advanced.
Yoga Asanas for Beginners (with Pictures):
These poses are suitable for those who are new to yoga and include warm up exercises. These exercises help in making your body flexible and ready to do the next level of yoga asanas.
Dandasana:
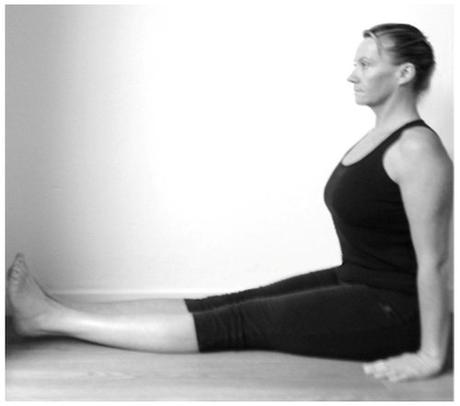
To do this asana, you have to sit on the floor and extend your legs in front of you without bending your knees. Roll your toes towards your body and try to stretch them. Make sure that your spine, hands and legs are straight. Next you have to place your hands on your sides with your palms touching the ground. Try to stretch your spine and body as much as it is possible for you, but do not overdo it. Remain in this position for 2 minutes and then you can relax.
Marjariasana:

Sit on Vajrasana pose and then place your hands on the ground, so that your palms and the elbows touch the ground. Your elbows should also touch your knees. Now get into tabletop position without moving your hands. Look upwards by tilting your head. As you do so, lower your back and push your stomach and naval region downwards. Try and raise your buttocks and stretch your body. Stay in this position for 30 seconds and then release.
Tadasana:
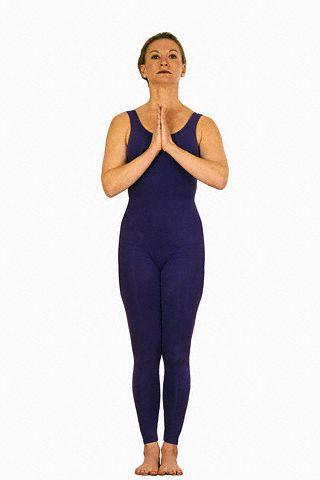
Stand straight with your feet slightly apart from each other. Balance your whole weight on your two legs. Raise your hands up and stretch them. As you do so, lift your body up so that you stand on your toes. Look straight and stay in this pose for 15 to 30 seconds and release. It can greatly improve your balancing skills.
Vajrasana:
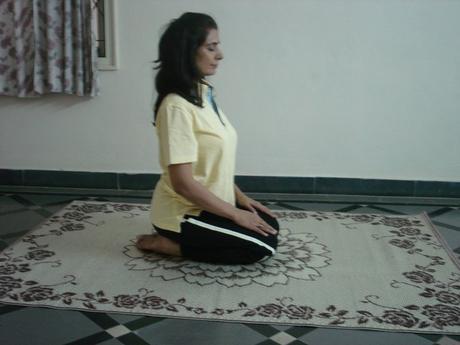
Kneel on the ground in such a way that the upper part of your feet touches the ground. Your knees, big toes and ankles must be on a straight line and touch the ground. Now place your palms on your knees and keep your spine straight. Look straight in front of you and then close your eyes. This position is apt for meditation and relaxing your body. Expand your chest and stay in this position for 2 to 5 minutes. Then relax your body.
Intermediate Yoga Poses (with Pictures):
Dhanurasana:
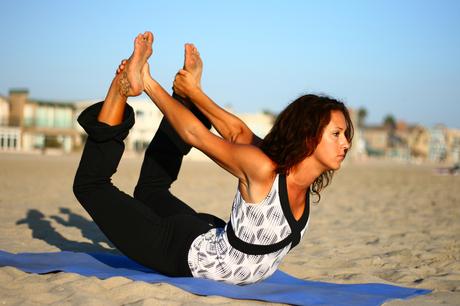
Lie on your belly and place your hands beside your body with the palms touching the ground. Lift your thighs and take your heels close to your buttocks. Stretch your chest in the upward direction and try to hold your feet with your hands. Stretch your spine as much as it is possible for you and within your capacity. Remain in this position for 15 to 20 seconds and release.
Gomukhasana:
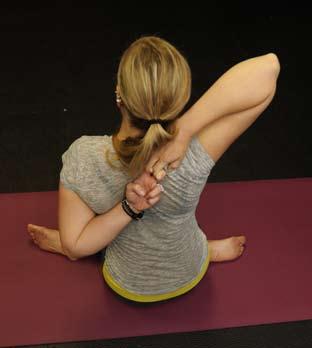
Sit in Dandasana pose and then place your feet on the ground by bending your knees. Slip your left foot under the right knee and place it on the outside of your right hip. Place your right knee on top of your left knee and move our right foot to the outside of your left hip. Next you have to bend your elbows and stretch then upwards. Place your right hand palm at your back, just below your neck. Lower your right hand and bend your elbow. Try and catch your left hand with your right hand from behind your back. Make sure that your back is kept straight. Remain for 10 to 15 seconds in this pose and release.
Matsyasana:
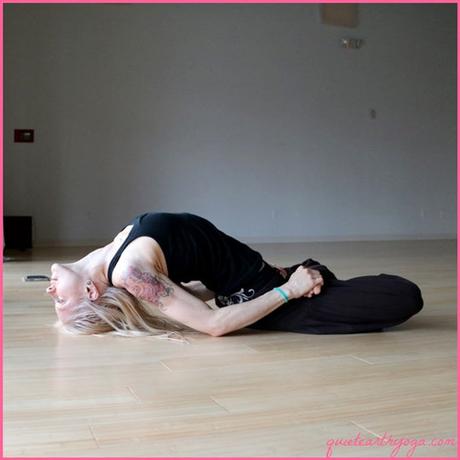
Lie on your back and keep your hands and legs straight. Bend your knees and place your feet on the floor. Next you have to lift your body from the chest in the upward direction. Place your palms below your buttocks and rest your buttocks on your palms. Place your hands and elbows on the floor beside your body and lift the upper part of your body up. Remain in this position for 10 to 15 seconds and then release.
Salabhasana:
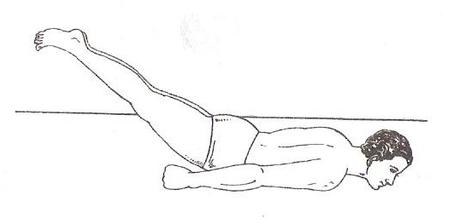
Lie on your belly and rest your chin on the ground. Your toes and knees also must touch the ground. Place your hands on the ground, underneath your hips, and lift your head slightly. Lift up your torso, thighs and legs from the floor, so that your body is balanced on your belly. Remain in this pose for 15 seconds and release.
Yoga Poses for Advanced Students (with Pictures):
Dwikonasana:
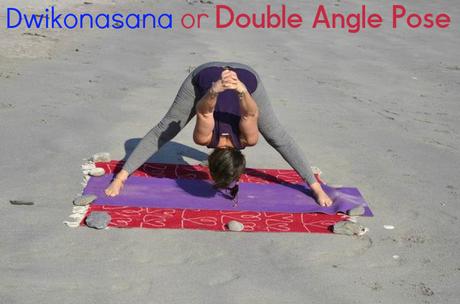
Stand on the floor straight and with your feet slightly apart from each other. Now take your arms behind your back and interlock your fingers. Exhale and then bend forward by bending your hips, so that your face and your back are parallel to the ground. Raise your hands behind your back and stretch them out in the upward direction. As you bend forward, try to bring your face close to your knees.
Mayurasana:
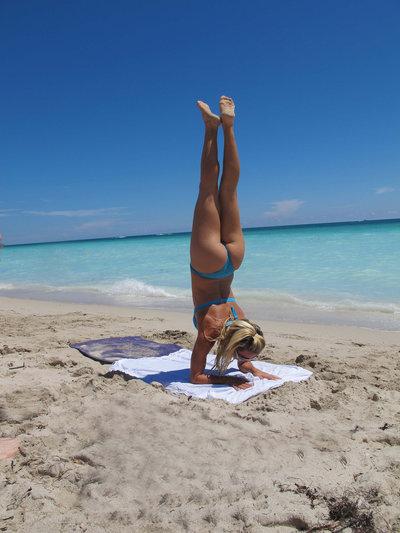
Sit on your heels by kneeling on the floor. Place your hands on the floor in such a way that your fingers point back towards your body and your thumbs point outwards. Lean forward and place your elbows in such way that they press against your belly and are at a suitable distance from each other. Make your knees straight and stretch your legs behind your torso. Lift your body so that it rests on your hands and the legs. Your body and legs must be parallel to each other. Stay in this pose for 10 seconds and then release.
Sarvangasana:
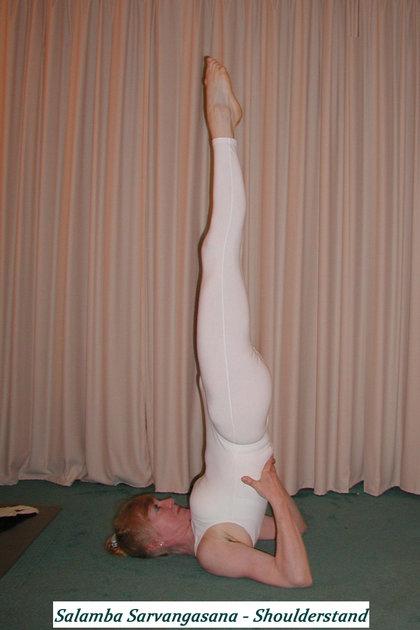
Lie straight on your back on the floor and place your hands on the sides of the body. Bend your knees to touch the ground with your feet. Now lift up your legs towards the ceiling. You can take support of your hands by placing the palms of your hands on your back. Stretch your body upwards as much as you can and try to bring your legs in straight alignment with your body. Stay in this pose for 10 to 15 seconds and then release.
Patangasana:
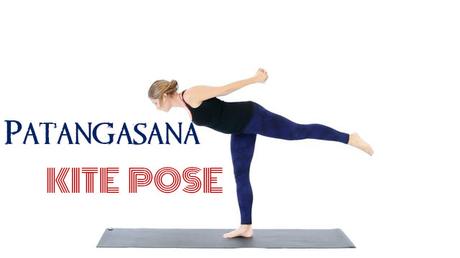
Stand straight on the floor and raise your arms sideways. Bring it to the shoulder and balance them. Inhale and exhale deeply. Now lower the upper part of your body till it is parallel to the ground. Stretch your body only as much as it is possible for you. Raise your left leg from behind slowly, till it is in straight line with the body. Balance your body in this pose for 20 seconds and release.

