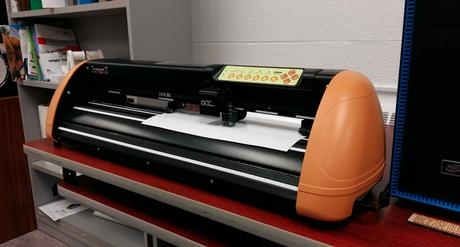
One of the most common problems associated with vinyl cutters involves producing poor cuts. This isn’t a surprise, however, since any mechanical device and can fail at any given time.
That said, you can easily troubleshoot your cutting machine, find the cause behind the ugly cuts, and fix it so that your machine continues running normally.
Our complete troubleshooting guide below will walk you through the most common cutting issues associated with vinyl cutting machines and how to fix them.
Main Reasons for Poor Cuts (and how to fix them):

No blade installed
As easy as it may sound, it’s possible for you to forget to put a blade in place. Lack of blade means no cuts will be made to your cut.
Solution: Simply put the blade in its slot, push it all the way down and lock it into place. And do a test cut to see if things will work. (You might want to consult your user manual on how to put on the blade)
Blade pressure
If you notice that your cutting machine isn’t cutting deep into the material or not even making any cuts, it could be something to do with the blade pressure. With less pressure, the blade will not be able to penetrate deep into your vinyl material, and will not be able to make any cuts.
Solution: The best fix for this issue is correctly setting the blade force/pressure for the specific type of material you’ll be cutting.
Incorrect blade depth
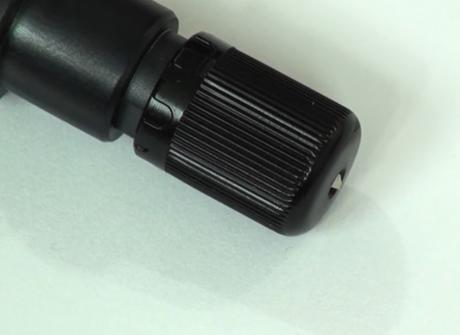
Incorrect blade length can lead to having too much of the blade exposed on your cutter’s blade holder. Most people think that setting the blade this way would lead to better cuts.

But the truth is, too much of exposed blade, you’ll make unnecessary mat cuts while dulling the blade faster than you can imagine. You might also experience cases tearing, crumpled corners, and incomplete cuts. Or the blade tip can extend into the mat and pull away the material from it, thus unstabilizing it and causing it to tear.
Solution: Decrease the blade depth. Adjust the depth according to the type of material you’re cutting for smoothing cutting experience.
Damaged, chipped or dull blade
As you already know, the cutting machine’s blade doesn’t last forever. How long it lasts will mainly depend on the frequency of use and the type of material you’re cutting with it.
Thicker materials like cardstock and chipboard will cause the blade to dull faster than vinyl. Cutting denser material can also cause the blade to get chipped or damaged.
A dull blade could be the culprit behind poor cuts like lines beginning to fade at the end, machine failing to cut your material.
Solution: If you suspect you have a damaged, chipped or dull blade, consider changing it to see if the problem will persist.
Check your cutting mat
Sometimes the reason why your cutter isn’t doing a good job might be because of your cutting mat. After you complete a project, the leftover paper bits or fibers stuck on your mat surface might interfere with the cutting surface. Or the mat might have become old and lost its sticking power.
Solution: You can try cleaning your cutting mat with a lint roller or baby wipes to see if it helps. If you think your mat is old enough (does it have any signs of tear and wear?), then you should consider replacing it.
Damaged cutting strip?
For beginners, cutting strip refers to the long, narrow piece situated right under your machine’s blade holder and runs across the machine bed width.
The main job of this strip is to prevent damages to the blade as well as the machine when you cut materials without a mat.
If you notice any gouges, nicks, or frayed areas on your cutting strip, you should take them seriously as they can cause cutting issues when working on your projects.
Solution: If the cutting strip is the problem, we advise you to replace it ASAP. Replacement strips are readily available and affordable. Replacing them is easy too.
Incorrect offset setting
Do you have issues with your cutter on how it works on the corners? If yes, you might want to check your blade offset settings. Round corners, bubbled corners, and cut shapes and letters that are still attached to your waste materials where the blade starts/stops on the shape are some indications of wrong offset.

Solution: Always ensure you adjust the offset value so that it’s 100% compatible with the cutter blade in use. You might also want to take time to understand what blade offset is all about (consult your user manual) if this concept sounds new to you.
Are you cutting the wrong material?
As you’re already aware, different vinyl materials have different cut settings. The cutting machines have different lists of the machines they can cut too.
Solution: Be sure to pick the correct medium from your cutting software’s list of materials an ensure you key in the right blade settings for the material.
The material is shifting during cutting
If the material you’re cutting is shifting slightly, it could also lead to poor cuts.
Instead of smoothly going in during cutting, the vinyl material, and mat shift and move around, your cutter will have a hard time making precision cuts. It’ll just cut here and there and produce ugly cut results.
Solution: You can try to solve this by cleaning your rubber wheels using a damp cloth to help remove all the dust and dirt, causing the wheels to lose their grip on the material you’re cutting.
You should also ensure that the pinch roller wheels stay in the correct location, with the grit roller bar directly below each other. They should also be evenly spread across your material.
And before attempting cutting, ensure you unroll enough vinyl to ensure your cutter doesn’t pull from the heavy roll, which can result in slippage.
Not cut lines on your design
Yes, if the imported SVG image you wish to cut doesn’t have any cut lines around it, your cutting machine will not know what to cut. And it’ll simply make no cuts.
Solution: Make sure you have the cut lines around your image before sending them to cutter. In Silhouette machines, these lines are indicated by thick red lines, and they help guide your cutter on where to pass its blades and make cuts.
The blade and blade holder are obstructed
This happens when a piece of scrap material, say vinyl or paper, gets stuck n your cutting blade.
Believe you me; this is sure to cause a hell of cutting issues. It can result in incomplete cuts, where some areas of your design are cut, and others get missed.
Solution: You simply remove any materials or lint stuck on your blade and blade holder to facilitate smooth cutting.
Speed of the cutter
Another reason why your machine cutter might be producing poor quality results might be the speed of the cutter.
Too high speed can cause partial cuts (i.e., the cutter blades to skip the vinyl material or fail to cut a solid line).
Another result of incorrect speed setting is the end point appearing offset from the start point.
Solution: We advise you to try lowering the cutting speed to see if the problem goes away. This is especially true if the design you’re working on a detailed design with small features or for designs that are mainly composed of straight lines.
When you start working on your project, simply start with the lower speed…and adjust gradually to a higher speed if you’re satisfied with the cutting results.
Blade holder not tracking correctly
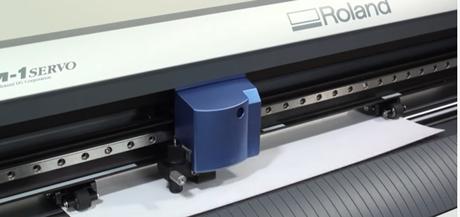
If you closely sturdy your machine carriage, you’ll notice a little box that holds the blade holder has two little wheels at the back. These wheels are supposed to be on the track…not to the side or front of the track. If the wheels go off track, maybe due to frequent use, cutting speed, etc., your project might suffer cutting issues.
Solution: If you notice your wheels are off tracks, you just need to manually adjust them. Try tilting or pivoting the carriage to get the wheels, one at a time, back on track. You might face some resistance at first, but things will eventually fall into place.
Pro TIP: Run Test Cuts!
The BEST way to avoid most of the frustrating cutting probe associated with cutting machines above is to perform test cuts before you can start working on your actual projects.
A test cut will help you unmask all the potential problems in advance—ensuring you don’t go through frustrations later on when working on a serious project.
When doing a test cut, use a small piece of the material you wish to cut and try all the settings (including the offset, speed, pressure, etc.). You can also experiment with different materials.
If your machine successfully finishes the test cut and the weeding process goes smoothly, it means your test cut was successful, and the machine is ready for use.
Final verdict
Poor cuts from your vinyl cutter can make you feel frustrated when working n your crafting projects. They can affect the outcome of your designs or even destroy them altogether.
By knowing how to diagnose your cutting machine, you can easily unmask what’s causing the cutting issues and fix it to ensure you continue enjoying smooth cutting.
Our complete troubleshooting guide above has just outlined some of the most common reasons why your vinyl cutting isn’t cutting correctly and how to fix them.
