Home Magazine
With tomorrow being Easter, I figured it would be a good time to repost this Easter Bunny post from 2 years ago! Happy Easter everyone!
Just who is the Easter Bunny?
This is a question I found myself asking as my girls had their picture taken with the Easter Bunny at the mall. Growing up Catholic, I of course know the religious meaning of the holiday - but where did the Easter Bunny originate?
Eastre was originally a Pagan festival to celebrate springtime. Eastre was a goddess worshipped by Anglo-Saxons through her earthly symbol - the rabbit. In Pre-Christian lore, the hare and rabbit were among the most fertile animals and therefore became symbols of new life during the spring.
The idea of the Easter Bunny was introduced to America by German settlers in the Pennsylvania Dutch area in the 1700's. This bunny was known as the "Oschter Haws" and was believed to lay colorful eggs. Children would make nests for the Oschter Haws to use to hold the eggs. In the 1800's the Germans created the first edible Easter bunnies made from sugar and pastry. By the 19th century in America the Easter Hare became known as the Easter Bunny who brought baskets filled with eggs, chocolate, candy and other small gifts.
Since the springtime festival coincided with the Christian belief of the resurrection of Jesus, the Easter Bunny eventually became an iconic symbol for our holiday.
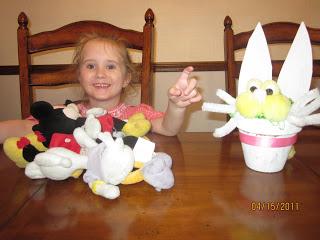
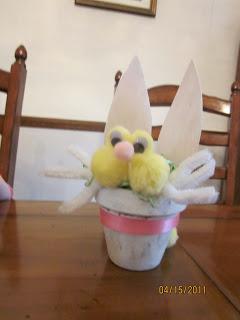
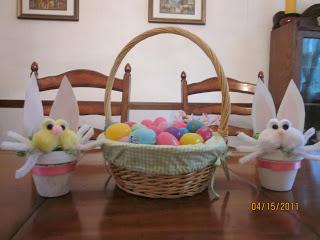
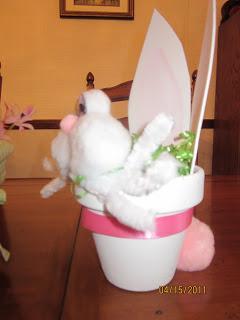
My 3 year old and I decided to make a simple bunny craft to decorate our table. The materials we used for this fun craft were small terra cotta flowerpots, craft paint, craft glue, pom poms, foam sheets, chenille pipe cleaners, silly eyes, Easter grass and ribbon.
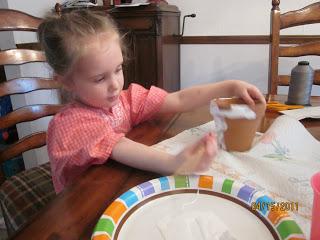
We began by painting the flowerpots white for the bunnies. While the paint was drying, I cut out ear shapes from the foam and then painted some pink in the middle ( Madailein decided her bunny would have all pink ears! ) We used the craft glue to stick the ears to the back of the flowerpots and the pom poms to form the face and tail. Glue the silly eyes in 2 small pom poms; cut the pipe cleaners for whiskers and fill the pot with the Easter grass. Final touch - a ribbon around the middle and Voila! you have a cute little Easter Bunny!
This was so simple to do with a toddler and only took us about 30 minutes from start to finish. Madailein is so proud of her bunny since she was able to do a good portion of it by herself.
Happy Hoppity Crafting!
Just who is the Easter Bunny?
This is a question I found myself asking as my girls had their picture taken with the Easter Bunny at the mall. Growing up Catholic, I of course know the religious meaning of the holiday - but where did the Easter Bunny originate?
Eastre was originally a Pagan festival to celebrate springtime. Eastre was a goddess worshipped by Anglo-Saxons through her earthly symbol - the rabbit. In Pre-Christian lore, the hare and rabbit were among the most fertile animals and therefore became symbols of new life during the spring.
The idea of the Easter Bunny was introduced to America by German settlers in the Pennsylvania Dutch area in the 1700's. This bunny was known as the "Oschter Haws" and was believed to lay colorful eggs. Children would make nests for the Oschter Haws to use to hold the eggs. In the 1800's the Germans created the first edible Easter bunnies made from sugar and pastry. By the 19th century in America the Easter Hare became known as the Easter Bunny who brought baskets filled with eggs, chocolate, candy and other small gifts.
Since the springtime festival coincided with the Christian belief of the resurrection of Jesus, the Easter Bunny eventually became an iconic symbol for our holiday.
My 3 year old and I decided to make a simple bunny craft to decorate our table. The materials we used for this fun craft were small terra cotta flowerpots, craft paint, craft glue, pom poms, foam sheets, chenille pipe cleaners, silly eyes, Easter grass and ribbon.
We began by painting the flowerpots white for the bunnies. While the paint was drying, I cut out ear shapes from the foam and then painted some pink in the middle ( Madailein decided her bunny would have all pink ears! ) We used the craft glue to stick the ears to the back of the flowerpots and the pom poms to form the face and tail. Glue the silly eyes in 2 small pom poms; cut the pipe cleaners for whiskers and fill the pot with the Easter grass. Final touch - a ribbon around the middle and Voila! you have a cute little Easter Bunny!
This was so simple to do with a toddler and only took us about 30 minutes from start to finish. Madailein is so proud of her bunny since she was able to do a good portion of it by herself.
Happy Hoppity Crafting!
Author's Latest Articles
-
Disney-Inspired Doll Tutu's
-
Yarn Wrapped Eggs
-
St. Patrick's Tulle Wreath
-
Art Ministry - Claude Monet