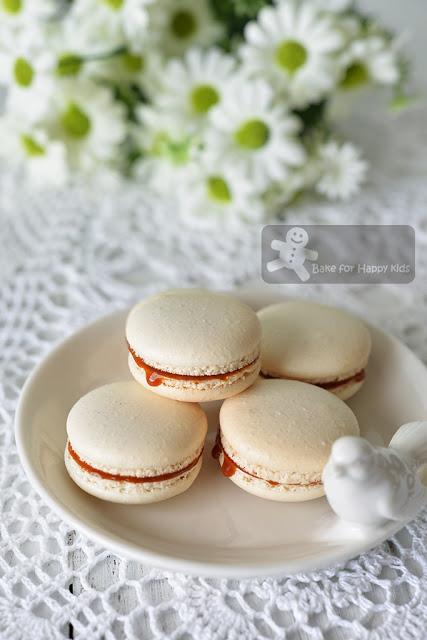
This time, my son has requested specifically for French macarons with salted caramel filling... And of course, I baked these macaron specially for him!

Vanilla French Macarons with Salted Caramel Filling
"Mum, can you bake macarons with salted caramel filling for me?"
"Yum! I love your idea! ... but why macarons with salted caramel filling?"
"I just thought of it and I know it will be very delicious!"
"Hmmm... ok!"
My son is right... These vanilla French macarons with salted caramel fillings are indeed very very very delicious. And I'm totally surprised and fascinated that these extra-sugar-loaded marcarons don't taste crazily sweet!
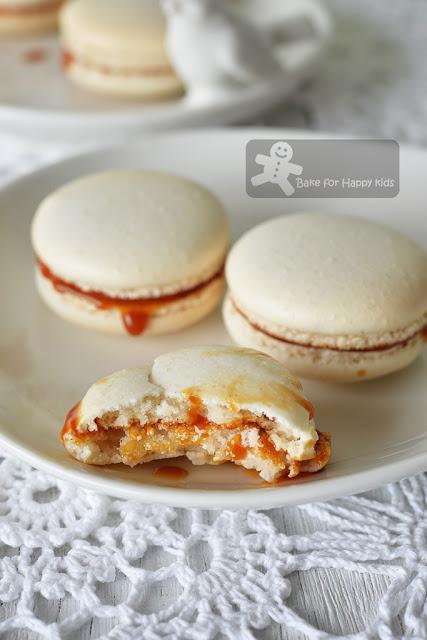
Unlike most typical macarons that are sandwiched with flavoured buttercream, these caramel filled macarons are like the lighter version of macarons with no voluminous creamy filling. In fact, the subtle bitterness of the caramel balance off the sweetness of the macaron shells resulting these macarons to be wonderfully just right, gooey and yummy.

Crispy. Chewy. Gooey. Sweet. Salty...Thanks to my son and his quirky idea, we were enjoying these wonderful macarons!
Any baking tips?
Yes but not a lot of blah blah blah... LOL!
For the macaron shells, I always like to use my "Always-Successful-Italian-Meringue Macaron" recipe that is adapted from here and here. The good thing about this recipe is that I don't have wait for hours for the macaron shells to dry enough to form a "skin" as these macarons will be nicely dried and settled within 15 to 20 mins after piping. However, it was a humid rainy day when I baked these macarons and so about 10% of the macarons cracked during baking! Ai ya! Susah lah! (means difficult in Malay language) Nevertheless, I won't complain as I still managed to yield 16 perfect looking macarons!
As we all know that baking macaron shells can be pretty fiddly, so please weigh the ingredients accurately and follow the recipe to the tee! No agak agak! No estimation, please!
For the salted caramel filling... Hmmm...
If I did a Google search for salted caramel macaron, I noticed that most recipes use salted caramel buttercream, not salted caramel only to fill the macaron. Some recipes do use salted caramel only as macaron filling but only a few?
Now... I know why!
If you are like me, making both salted caramel filling and macaron shells all within the same day, you will see the salted caramel even thoroughly chilled is pretty runny to sandwich the macaron shells.
Lesson learnt... If I'm baking these macarons again, I will cook the salted caramel first and at least one day ahead!
Once again, I have to say that I won't complain!!! I love my salted caramel macarons and even though the caramel is a little runny! LOL!
Here's a video showing how I baked these macarons.
Want something simple but adorable? Knowing that my son love white polar bears, I have transformed some of the macarons into these bear macarons. Without a doubt, my son is very happy :)

Beary cute macarons :)
Here are the recipes.
Salted Caramel filling that is adapted from here
Best to make this filling one day ahead.
This is the minimal amount that is required to cook a decent caramel and you will use only probably 1/4 of this amount to fill 18 macarons and will have heaps as leftover.
200g caster sugar
90g unsalted butter, cold in cubes120ml (1/2 cup) cream with 35% fat, at room temperature
1/2 tsp vanilla paste
1 tsp salt or fleur de sel
Place sugar in a small saucepan. Using medium heat, cook and stir sugar until the sugar melts and turns golden brown or 375°F/190°C as indicated by a candy thermometer.
Remove the pan from the heat and whisk in the butter. Be careful as it will bubble up and mixture is very hot!
When the butter is all melted, gradually add in the cream and stir to combine. Be careful as the sudden change of temperature and the water content will cause the caramel to split.
Stir in vanilla paste and fleur de sel or salt. Set aside to allow caramel to cool completely at room temperature. Chill caramel further in the fridge preferably overnight until it is thick and firm enough to pipe.
The Always-Successful-Italian-Meringue Macaron recipe that is adapted from here and hereMakes about 18 macaron or 36 shells
(number can vary depending on the sizes that you made)100g almond meal (ground almond)
100g icing sugar75g egg whites, divided into 2 portions
100g caster sugar
25ml water
colouring gel to add color into the macaron shells, optional
1/4 tsp vanilla paste, optional
Preheat the oven to 150°C NO fan forced with top and bottom heat.
Combine almond meal and icing sugar and sift them three times or more. Discard any large particles that is trapped in the sieve and set almond meal mixture aside. Using an electric mixer, beat one portion of egg whites at medium low speed at first for about 10 mins. While beating, combine water and caster sugar in a small saucepan. Place the saucepan over medium high heat and cook the sugar water syrup to 118°C but not over 125°C.
Increase the mixer speed and continue to beat the egg whites while pouring syrup into the egg whites slowly in a steady and fine stream. Continue beating until the meringue is glossy and near-stiff peaks. Allow the meringue to cool to about 40°C.
Place almond meal-icing sugar mixture in a mixing bowl and mix in the remaining portion of egg white to form a thick paste. At this stage, you can add vanilla paste and / or a drop or two of any flavouring or colouring that you desired in the almond mixture or you can do this later.
Fold in half of the cooled meringue first into the almond paste, scooping it up from the bottom of the bowl until the mixture is well-combined. Then, fold in the rest of the meringue into the almond mixture until the mixture is well-combined again.
Continue to mix in order to "deflate" some fluffiness of the meringue in the mixture and this step is usually referred as "Macaronner". In the book, I love Macarons by Hisako Ogita, it suggests scooping the batter from the bottom and turn it upside down for nothing more or less than 15 times but I like to gauge this stage by the look of the batter. I reckon it is ok when it looks firm and dripping slowly from a spoon or spatula. At this stage, you can also add a drop or two of any flavouring or colouring that you desired but you have to stir in the colouring and flavouring very carefully and gradually to avoid over-mixing the batter.
Attach a 1 cm tip (I used Wilton tip 1A) to the pastry bag. Place the pastry bag, tip down, inside a cup or container and pour the macaron batter into it.Pipe out the batter onto baking tray lined with silicon baking mat in circles and any shapes that you like. Gently tap the baking sheet firmly against flat surfaces to allow the batter to settle and rest at room temperature, uncovered for about 15-20 mins.
Bake for 13-15 mins or until thoroughly dried and slightly crisp. Do not over-bake or let the macarons turn brown. Allow macarons to cool on baking mat as they peel off easily only when they are completely cooled.
To assemble:Transfer caramel into a piping bag. Pipe a thin layer of caramel onto the macaron shells. Sandwich with another macaron shell. Press it slightly to secure. Allow macarons to rest overnight in the fridge and they will be the best to consume on the next day.Happy BakingPlease support me and like me at Facebook...

