I am going to explain the process of setting up a usb flash drive as virtual memory exclusively for XP users. I used the term 'exclusively' because this is a setup process for Windows XP. Higher version of windows including windows vista, windows 7 and windows 8 does not require this setup, as they already come equipped with Windows "ReadyBoost feature". I will also explain how to increase memory in higher version of windows using Windows ReadyBoost in my future posts. But now I will show the setup process in XP step by step:
1) Open Control Panel from your Start Menu.
2) Switch to 'classic' view if the view is set to 'category'
3) Double click on System to open System properties
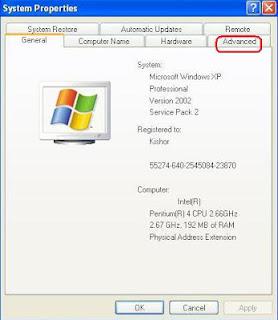
4) Click on the Advanced tab and under performance select settings
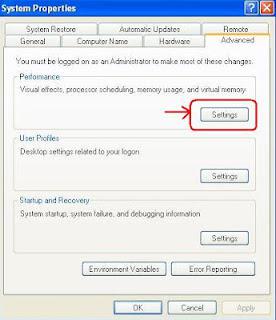
5) Next click the Advanced tab
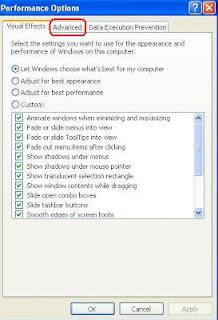
6) Click on the change button under Virtual Memory
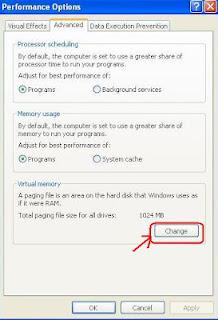
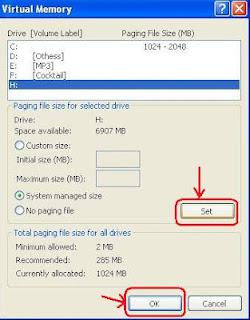
7) Now select your flash drive from the list as shown below. In this case I selected drive H: because it is my flash drive ( or removable drive). In your case it might be something else. Next if you want to set the size manually, select the custom size option and then set the Initial and Maximum size. But if you want the system to set the size, you can select the System managed size option. In this case, I've selected the System managed size. Whichever option you select, don't forget to press the Set button. When its done, exit by clicking on OK.
Now restart you computer for the changes to take effect. Cheers!!! now your system is boosted with some extra memory.

