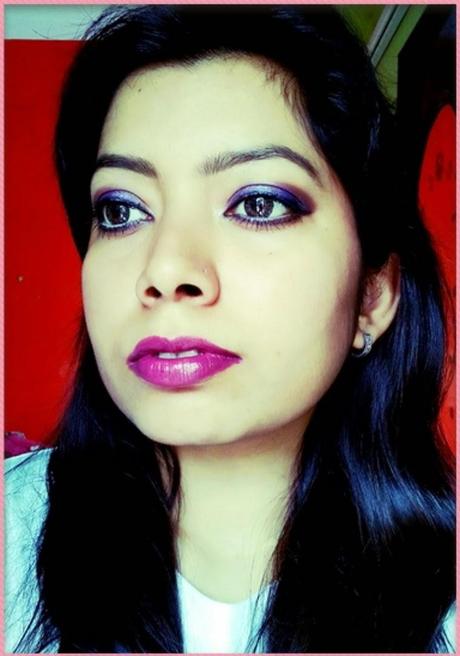
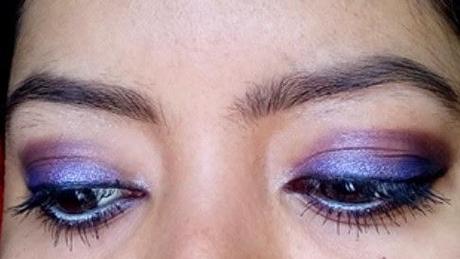
So on to the much-awaited long-delayed tutorial of the look that got me quite a few raves here and on Facebook. Here we go!
Products Used:
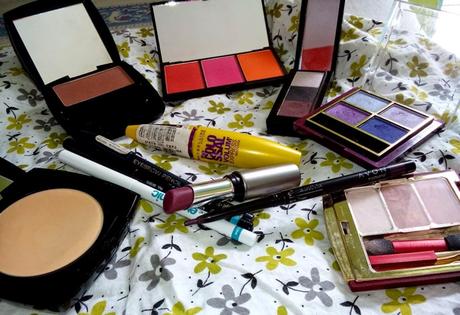
1. Biotique Bio-Seaweed Anti Fatigue Eye Gel (not pictured)
2. Just Herbs Fruity Firmskin Skin Radiance Cream (not pictured)
3. Biotique Bio-Redwood Naturally Tinted Moisturizer - Olive (not pictured)
4. Avon Ideal Luminous Pressed Powder - Medium Wheat
5. Avon True Color Powder Blush Molto Mocha
6. Sleek Blush - Squash ( middle shade in Sleek Blush-by-3 palette in Pumpkin)
7. Lakme Eyeconic Kajal - Black and White
8. Avon Glimmmersticks Eyeliner - Nocturnal
9. Lakme Eyecolor Quartet - Tropical Island
10. Lotus Herbals Maxlid Botanical Eyeshadow Palette - Rose Beach
11. Avon Eyeshadow palette - Onyx Luster
12. Maxfactor Eyebrow Pencil - Ebony
13. Maybelline Colossal Volume Express Mascara - Black
14. Lakme Absolute Matte Lipstick - Brilliant Kiss
Technique:
Face:1. Cleanse-tone-moisturise as per routine. Apply eye-gel to soothe the eyes.2. Prime your skin. You can use any regular primer, or if you have extremely sensitive skin like me, then just skip. The Just Herbs cream that I use is not only an excellent moisturiser, but wonderfully smoothens out the large pores on my cheeks and makes my base adhere better, making it last through a good 6 hours, so I don't feel the need for a separate primer. Just use a pea-sized amount for the face and neck.3. Apply a pea-sized dollop of Biotique Tinted Moisturizer with fingers and palms on the face and neck. Make sure it is properly blended and fully absorbed into the skin. In case of marks and pigmentation, apply a little bit more on those areas. My t-zone is a problem area so I follow this rule in place of a separate concealer.4. Dust some powder over the face and neck to set the base. Lightly dust some powder on the eyelids upto the browbone and on the under-eye area too.5. Lightly contour below the cheekbone and jawline using Avon blush in Molto Mocha - a dusty peach that's excellent as both blush and contour on my skintone.
Eyes:
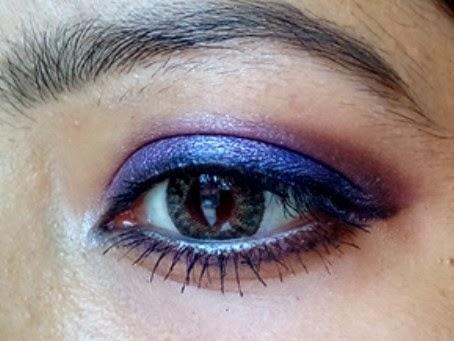
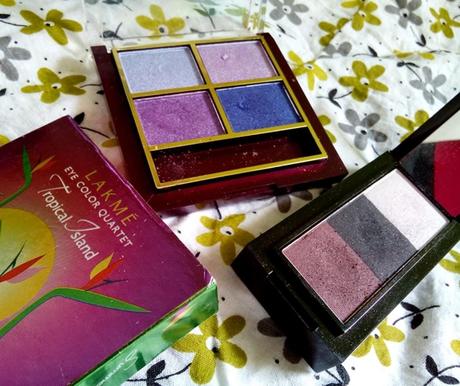
6. Take the black kajal, tightline the upper waterline and apply a thick line over the upper lashline. No need to be precise as we'll be smudging it anyways.7. Using a Q-tip, brush or finger (I just use my ring finger - no time to use and wash a thousand different tools and brushes!) smudge the kajal all over the eyelids, taking care to let it remain dark near the lashline and gradually lighten it towards the crease.8. Take a shimmery purple eyeshadow - bottom left shade in the Lakme quartet - and pat it onto the lids till just below the crease.9. On the outer corner of the lids lightly pat a shimmery navy shadow - bottom right shade in the Lakme quartet- in a V shape.10. Now take a matte plum eyeshadow (lowest shade in the Avon palette) on a fluffy blending brush and sweep it on the curve of your crease, starting from the point just above your eyeball till the outer edge of the lid. Now blend using @@@ and windshield-wiper motions so that the colours seamlessly melt into each-other without any visible harsh edges.11. Highlight the inner corner of the eyes with a pale lilac eyeshadow - top right shade in the Lakme quartet.12. Highlight the browbone using a pale shimmery champagne shade (bottom shade in the Lotus palette).13. Apply white kajal on the lower waterline.14. Apply purple eyeliner - Avon Nocturnal - on the lower lashline and darken the outer corner with the same matte plum eyeshadow that you used in the crease.15. Liberally coat both top and bottom lashes with mascara.
To finish:
16.Lightly run a dry cotton ball on the under-eye area after the eye make-up is done to clean up any fallout. Dust some powder lightly if needed..
17. Fill your brows and groom them into shape. Don't 'draw' artificial brows - just fill in any gaps which might be there with light, short strokes and comb them to blend.18. Apply a pink blush (Sleek Squash) with a light hand, sweeping upwards from the apples of your cheeks towards the temples.19. Apply a pinky-purple lipstick - Lakme Brilliant Kiss - on your lips.20. And we are done!
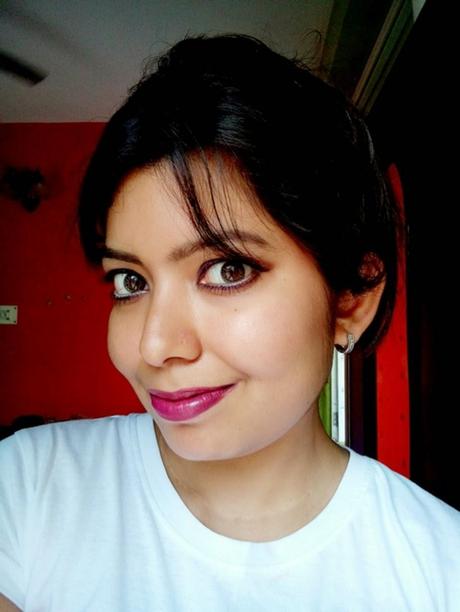
Hope you find the tutorial useful! Do try out the look sometime, as Purple - fancily called Radiant Orchid - is the IT color of the year, and I think this particular look is quite wearable. Let me know your feedback in the comments :)
