A little eye batting convinced the husband that making a trip to Ikea just a few days before Christmas was an excellent way to spend his time off :) As it turned out it was an excellent time to go to Ikea. All the malls around Ikea were teeming with people, lines to even get into the parking lots. Ikea though was eerily quiet, lots of room in the parking lot and I've never seen that store as empty of people as this time.
I only had two things I needed to get and had promised the husband to not prolong his suffering by looking at everything else while we were in there. So we were in and out in about 30 minutes, can you believe it?
My loot was two Lack tables, the cheapest ones, for $7.99 a piece.

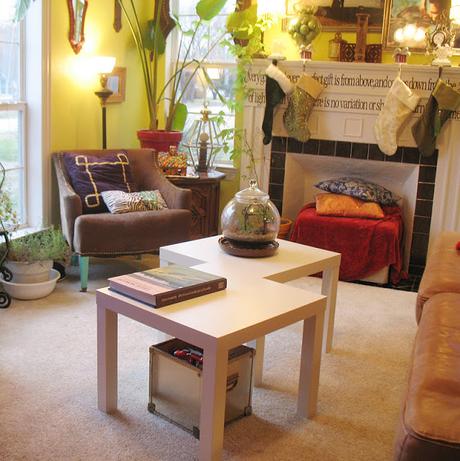
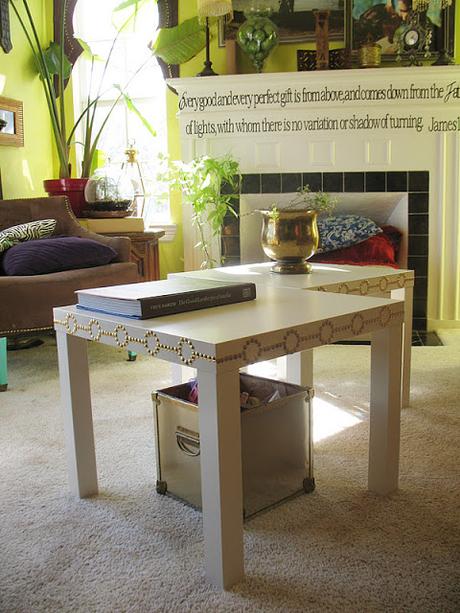
Here they are set up in our living room. It looks fresher already.
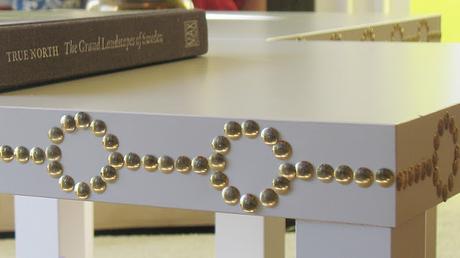
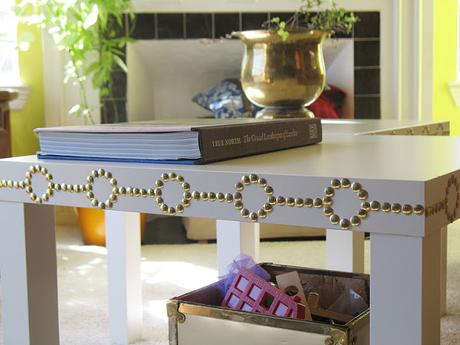
After lots and lots of hammering the bling was finally added.


It's thumb tacks, of course. It only cost me $3 extra for that lovely detail to the tables but to me they make all the difference. They play well with all the other brass and gold details I have going on in here.
Let me start by saying that this is by no means a new idea in the blog world. Before I started I got some info from these (here and here) two tutorials. Then I got 3 boxes of 300 tacks from the Dollar Tree and I would say I used about 800 tacks for this design.
The trick to get it even and uniform is to make a template. I have no pics of this part so I'll try to walk you through it. First I taped some copy paper together to cover one side of a table and cut out the exact shape of the side. The mouth of a baby food jar had the right size circle to fit nicely within the height of the side space. I spaced my 5 circles evenly across the width of the side and drew lines to connect the circles.
Since the tacks measure about 1/2 inch or 1 centimeter across I made marks every centimeter across the template. To make sure I liked the look I also went ahead and pierced all the holes with a tack at this point and inserted tacks into the paper for a test run. Looked great and got the husband approval so I took all the tacks out again and moved on to the tables.
Three snippets of scotch tape held my template in place on the table while I used that kind of push pin with a plastic head to make starter holes on my table. It was just easier to grip with my fingers while I was hammering away and the pin part was about the size of my gold thumb tacks. Then the template was removed unharmed and put aside while I went over this side of the table again, this time inserting the gold thumb tacks into the starter holes. You'll need some help from a hammer from time to time.
Repeat this process 7 more times. Finally done!
We now have two stylish coffee tables for the humble price of about $9.50 each which isn't bad at all. And they're so much easier to keep clean, the kids play, eat and whatever else kids do all over these tables daily. So far everything has wiped off without any problem at all. Mommy happy :)

