Honestly speaking these perfect chocolate melon pan were not easy to bake but NOT if you follow my recipe to the tee.I will tell you why...
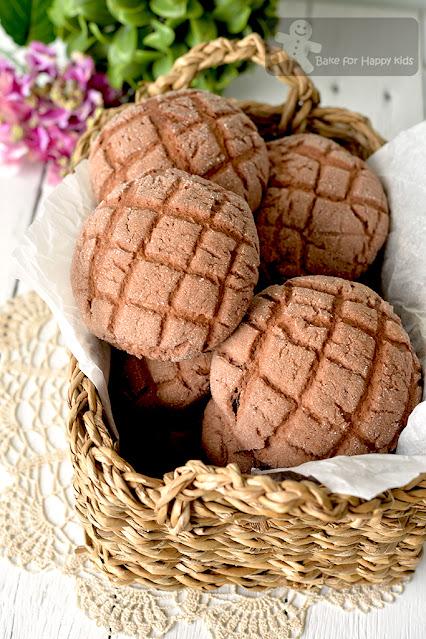
YES!!!I have managed to bake these Perfect Chocolate Melon Pan!
Remember I said at my previous Japanese Melon Pan post at HERE that the right composite of ingredients to make the melon topping is critical?If you are making the Melon Pan with chocolate, I would say that the composite of ingredients is EXTRA CRITICAL!!! LOL!Due to the fact that the melon pan are shaped with their toppings before the final proof, the cookie topping have to be stretchable. Otherwise, the topping will crack when the bread expand during proving and baking.Unfortunately, the addition of cocoa powder makes both cocoa melon topping and chocolate bread dough drier and tougher. Hence, it is important to add the right amount of cocoa powder into the right composite of both melon topping and chocolate bread ingredients so that the cocoa melon topping is stretchable enough and can cover the puffy well-risen chocolate bread dough.This is how I worked out which recipe to use and also the right amount of cocoa powder to add. First at here, I tried to add a reasonable amount of cocoa powder into a feasible plain melon topping recipe and it didn't work. Bummer!
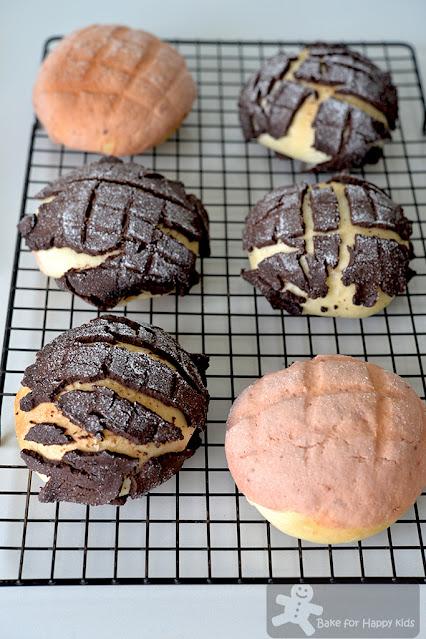
Here, I learnt that I can't just add cocoa powder to bake the chocolate melon pans!
Next, I tried another moister chocolate melon topping recipe that is made with more butter and eggs but it is still not stretchable enough. In fact, the toppings had cracked pretty badly with my well-risen super soft chocolate bread. These chocolate breads were delicious but they don't look so nice and perfect!
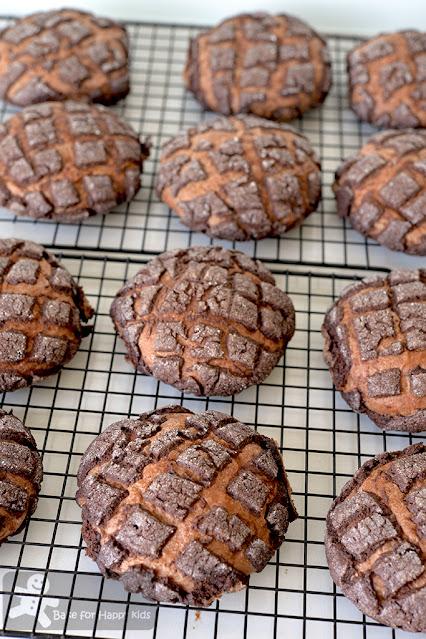
Failed?These chocolate melon pan were delicious but they don't look so nice and perfect.
You know what... Failure makes success and I kinda know that I'm nearly there. Next, I tweaked the recipe a little and managed to bake these perfect chocolate melon pan. Guess what? The trick is... Do not add too much cocoa powder! LOL!!! To offset this situation, I would strongly recommend using good quality cocoa powder.
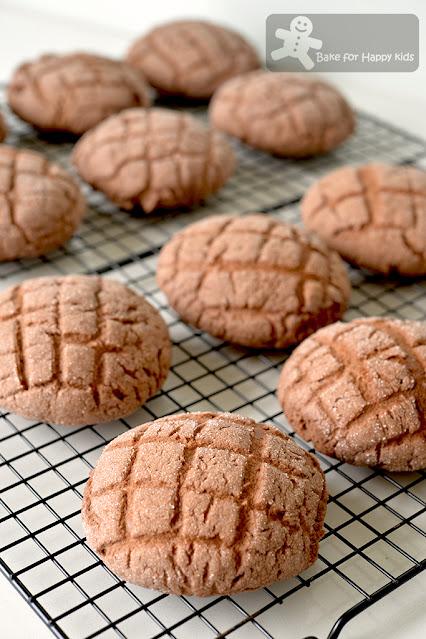
Yay!!!I can finally taste the sweetness of this success!
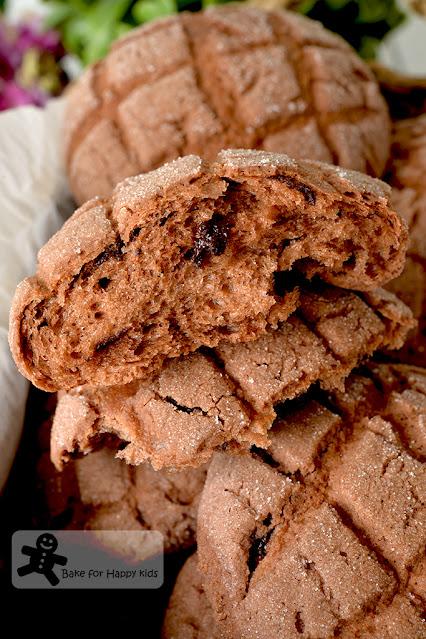
soft fluffy chocolaty bread with sweet crunchy chocolate cookie topping
Isn't this perfect?
Btw, my chocolate melon pans are better than "perfect" because I have used French butter, French Valrhona cocoa power, Belgian Callebaut dark chocolate callets and premium vanilla paste to make these melon pans. Atas huh? FYI, Atas means fancy and expensive in Singlish. LOL!
You can bake these chocolate perfect melon pans! Please watch my video and follow the steps and my recipe to the tee. No agak agak, please!
Music: Bensound
"Mum, please don't tell me that you are going to bake ugly chocolate melon breads again?"
"NO! You can't laugh at me again because...." And I proudly showed my son these perfect chocolate melon pans. Boys are so mean!
If you have tried my chocolate melon pan recipe and like it, please LIKE, SHARE and FOLLOW me at either my Facebook at here or here or my Instagram @zoebakeforhappykids or SUBSCRIBE my YouTube channel at here because every LIKE, SHARE and FOLLOW or SUBSCRIBE from you means a lot to a busy working mom like me. I will know that I'm in the right track and continue to bake and share more in the future. Thank you!!!Here's the recipe.
Make 12 bunsFor the chocolate bread dough:
180g water, lukewarm
245g bread flour with 12% protein
20g milk powder - please do not use milk to replace water and milk powder.
25g caster sugar
2g salt
5g cocoa powder, preferably Dutch processed
1 tsp vanilla paste or extract
30g unsalted butter, softened at room temperature
3/4 tsp instant dry yeast
100g (1/2 cup) dark or milk chocolate chips - I used Callebaut dark chocolate callets with 54% cocoa
extra bread flour for dusting and shaping
If you are using a breadmaker to knead and prove the dough, add all ingredients except chocolate chips into the breadmaker according to this order. Use "dough" setting to mix and knead dough for 30 mins or until the dough is elastic and stretchy. At the last 3-5 mins of kneading (or some breadmakers will beep), add chocolate chips and continue to knead until the chocolate chips are well incorporated. Then, let the dough prove for 1 hr or until doubled in size.
If you are using an electric mixer with an hook attachment or your hand to knead, combine all ingredients except butter and chocolate chips in the mixing bowl and mix at low speed until a soft dough forms. Then, knead in the butter until incorporated. Continue to knead for at least 25 mins or until the dough is elastic. It is important that the dough has to be elastic and stretchy. Add chocolate chips and continue to knead for 3-5 mins until the chocolate chips are well incorporated. Cover the dough and allow the dough to prove in a warm and humid place for about 1 hr or until doubled in size.
While proving, prepare melon topping.
For the melon topping:
60g unsalted butter, softened at room temperature
80g icing sugar, sifted - Do not reduce this essential amount.
1 tsp vanilla paste or extract
50g egg (about 1 egg without the shell) - please use exact weight
180g cake flour with 8% protein
5g cocoa powder, preferably Dutch processed
1/2 tsp baking powder1/4 tsp salt, optional
To finish:
about 20g caster sugar, to coat
Using a wooden spoon or an electric mixer with paddle attachment, beat butter and sugar in a large mixing bowl until combined. Add vanilla and beat until combined. Then, add egg bit by bit and beat well after each addition.
Sift flour, cocoa powder, baking powder and salt into the butter mixture. Use a spatula to fold in gently until just combined. Wrap dough in cling wrap and allow it to rest at room temperature until the bread dough is ready for shaping. Do not let the melon topping dough dry out without wrapping it.
To assemble, Gently deflate the dough and divide it into 12 pieces (about 50g each). Shape each piece into a round smooth ball. Divide melon topping into a total of 12 portions equally by weight (about 31-32g each). Roll all melon topping portions into flat round discs. Place each disc on each bun and wrap the bun with the topping. Coat topping layer with caster sugar. Use a knife or metal ruler to score criss cross pattern (about 3-5 lines on each side) on the topping.
Line baking trays with baking paper. Arrange the shaped buns with their topping sides up, about 5 cm apart on the prepared baking trays.
Cover the dough with cling wrap and allow them to prove in a warm and humid place for another 1 hr or until doubled in size.
Bake in a preheated 180°C (350°F) oven with one tray at a time for 15 mins or until the breads are thoroughly baked and the topping is firm and crisp.
Transfer immediately onto a wire rack to cool completely before serving. These buns are the best on the day they are freshly baked.
Please note that the toppings on the buns won't be crispy on the next day even if you keep the buns in airtight containers. The best way to store is to wrap tightly in plastic wrap and freeze them in serving portions for up to 3 months. To reheat, bake frozen buns in preheated 180°C oven for about 10-15 mins until they are thoroughly warm and the toppings are crispy again. You don't have to thaw the frozen buns before reheating. You will be amazed that the breads will be fluffy soft and moist just like they have been freshly baked.
Happy BakingPlease support me and like me at Facebook...
