The making of my first German brick stitch embroidered purse - from #LRCrafts - DIY Passion: if you can think it, you can make it by Rici86.
Sometimes you have unfinished projects staying around for a long time before you finish them. I mean, a long time. That went out of control with my embroidered Medieval purse.
There’s a project of mine that has stayed in a drawer for too long. It used to be my companion during commutes and travels before the 2020 pandemic. When the first lockdown struck, I left it aside. I don’t know exactly why, because I made many projects in that period.
It came back to my mind here and there, but I never got my hands on it in 2021 or 2022. Yes, I had to think about a pregnancy and a newborn, in that period, but that’s not the main reason I left the project aside. I still don’t know what kept me away from it, since I really enjoyed the German brick stitch I chose to embroider.
One day at the beginning of 2023, I happened to rethink about the purse and thought it a good time to pick the needle and finish it. Now the project is done, I’d like to start another! It’s not perfect, I made a few mistakes because it was my first embroidered purse, but I like it nonetheless.
Read about what I got right and the mistakes I made during this long, long process.
Embroidery and sewingLucet and lucetting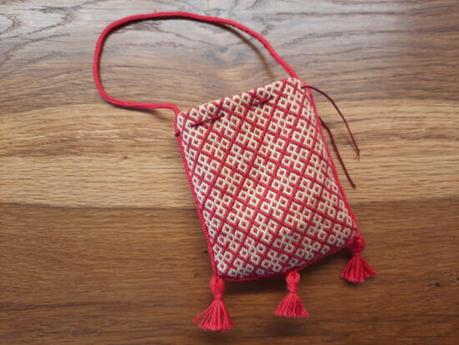
Click for the finished project detailed photos
Embarking in the project: sources and inspiration
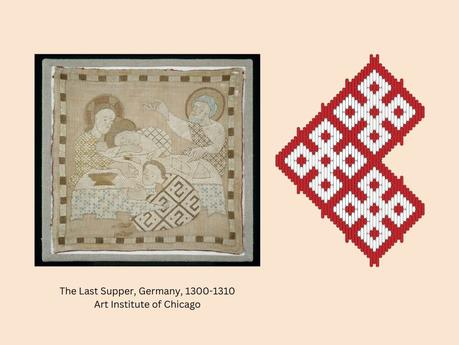
I saw reenactors around with those beautiful embroidered purses… since I love embroidery, I though I could give it a try. So I started asking and reading about them. I discovered the existence of German brick stitch, a counted stitch used between the late 13th and the end of the 15th century, mainly in Germany and Northern Europe. It was mainly applied to religious clothing, containers, furnishings and, obviously, purses.
One source I like to recommend is Wymarc.com, full of patterns based on extant finds and rich in history information.
The pattern I chose for my purse was an easy one, quite simple, repetitive, with just two colors. Since it was my first project of this kind, I wanted to start small (and better I did!). I chose a design coming from a convent piece now at the Art Institute of Chicago, depicting a Last Supper. It’s the pattern on the tunic worn by the saint on the right. Of this, you find a great pattern on the article by Christa C. Mayer “An Early German Needlework Fragment” in The Art Institute of Chicago Museum Studies 6 (1971), pp. 66-76, available on Jstor.
I found the chosen pattern perfect for me: all stitches spanning an even number of thread counts from 2 to 6, the two colors easily aligned. I don’t usually indulge in cross stitch, since I prefer more intricated embroidery, but I do love counted stitches. I love the regularity, the predictability, when I master the rhythm I find it really relaxing.
The first thing I did was a small mockup, just to try out the strand count. I decided to use 4 strands of embroidery floss. Since my Medieval gown is red, I wanted the main color to be red. I did not want to match all the colors, though: I decided to embroider all the red part first, then choose the second color later. That was a though choice, making me more prone to errors…
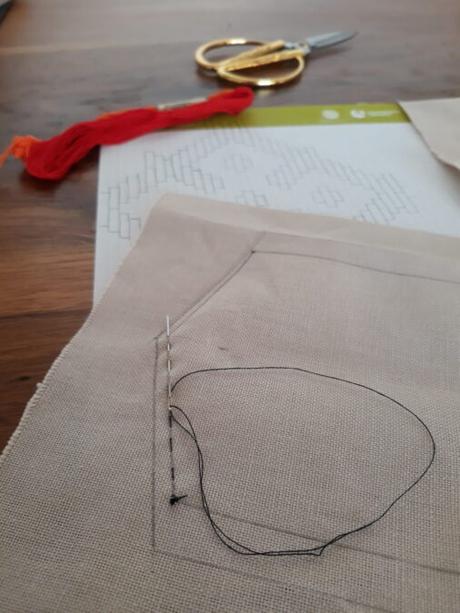
I had a perfect piece of cotton fabric for my purse, easy to count stitches on. I cut two pieces the same size to be the two panels of the purse. And here I have to say I wanted the purse to have a pointed bottom: I saw reenactors wearing bags with such a shape, so elegant. But as I researched it later on, I found little to no evidence of it in Medieval extant pieces or paintings. Well, the first mistake, maybe the most trivial one.
On my two fabric panels, I traced two equal shapes, which I outlined with a long running stitch, just to mark where I’d sew the two panels together later on. Then, the proper embroidery began.
The (long) embroidery process
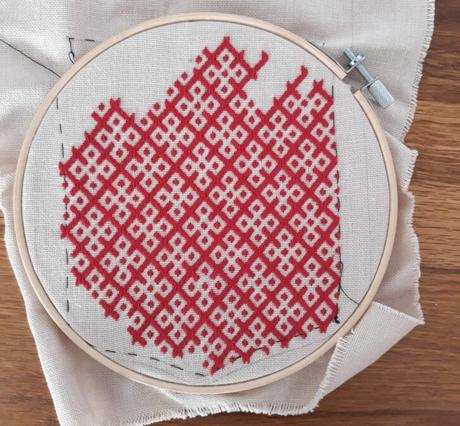
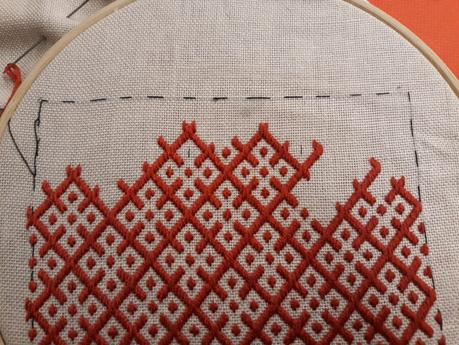
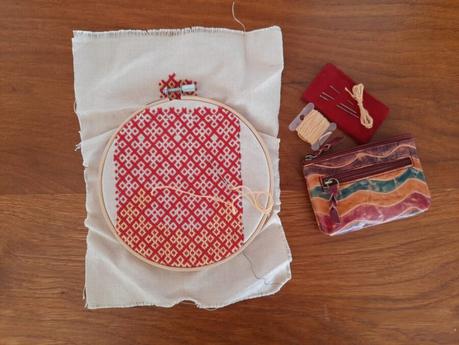
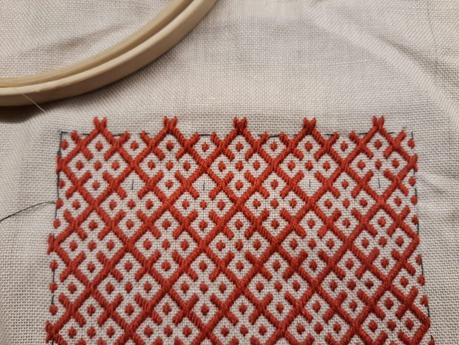
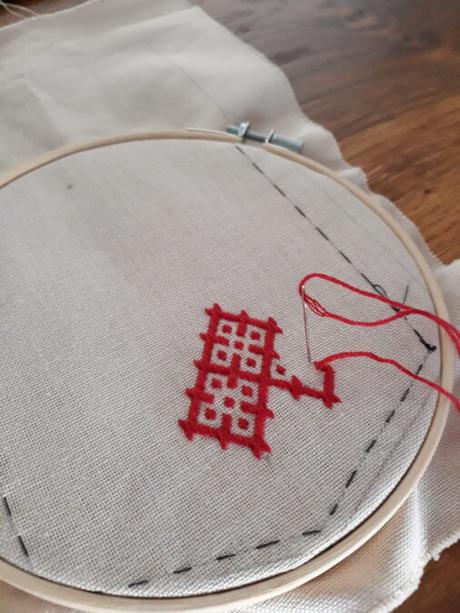
At first, I stitched with my pattern at hand, carefully counting and checking each stitch. After a while, I got my own rhythm, being able to count without a reference, and could leave the scheme aside.
This way I started carrying my embroidery everywhere: on my commute to work, at the airport on vacation, visiting my parents… Actually, I enjoied a lot embroiderying in front of their fireplace! I even prepared a kit for travels: a small pouch with pre-cut little skeins of floss, spare needles, scissors, a bobbin with more thread ready to be cut to lenght.
I started with the main color, red, and that made my work harder. Missing stitches or counting wrong was easy, I wasn’t a brick stitch expert, so I had to tear apart big sections of embroidery. Sometimes I could let go, I knew, correcting errors with the second color, but every time I noticed an imperfection I simply couldn’t bear it. This made my progress slower than expected and sometimes I felt frustrated.
Reaching the top of the purse panels, I left four non-embroidered stitches: I marked them to become the future holes for the closing laces. Actually, when I started constructing the purse, I changed my mind and embroidered them… another thing I should get right from the start in the next project!
Well, one day, after long weeks of stitching, I completed all the red embroidery on both panels!
Having my panels half finished, for a while made me wonder… what if I don’t choose a second color? Would it be historically plausible? I asked fellow reenactors and embroiderers: while we agreed on the fact that we lacked evidences of this practice, we couldn’t say for sure nobody ever did what I wanted to do.
Well, in the end the discussion was cut short: I made a few samples with different color combinations, then found a shade of yellow I liked and decided to go on with the embroidery.
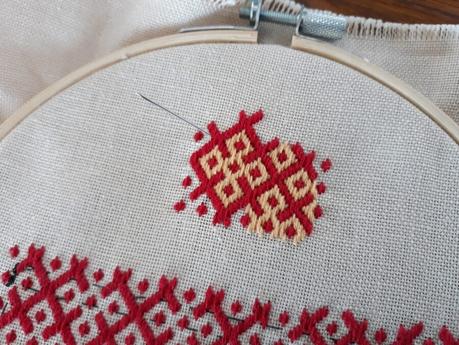
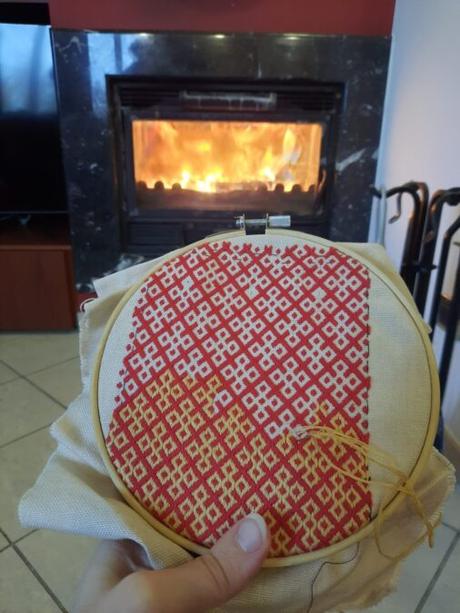
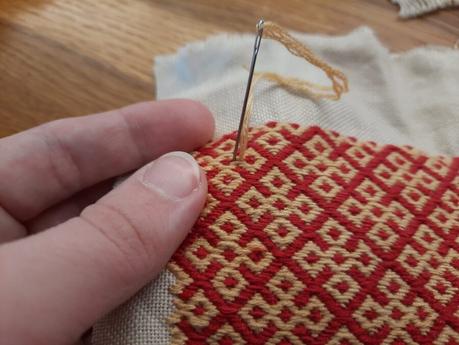
I thought I needed now about the same amount of time to finish the second color. Maybe less, since I had a lot of practice and the guidance of the red stitches to help me speed up. What I didn’t forecast were external factors to slow down my pace: the Covid-19 pandemic first, when I started a few other projects for various reasons, and the birth of my first child. Yes, the last event gave an abrupt stop to crafing for a few months!
I don’t want to get into the details now, but the reasons for the interruption were deeper and more complicated. I could rethink of this project just when I got to solve a few other problems I happened to have after giving birth, but it took me almost a year to realize they even were there.
One day, though, I happened to find on Instagram the 2022 edition of a social challenge I liked, Seidennater by Alte Faeden. Preparing images and captions for that week led me to the purse project, that had been resting in a wardrobe for too long. Time had come to finish the purse! I took it everywhere I went, mainly during the commute to work, and was able to complete the stitches in a short time.
The last stitch came more than three years after the beginning of the project.
It was an emotional moment. I didn’t just finish a craft, I ended a period of struggles. I felt renewed. The power of crafting burst out like magic. I finally remembered why I like making crafts so much. It has a healing and calming power on me.
I came back to the Facebook group where I asked for advices at the beginning of my embroidery adventure and posted a photo of the last stitch. It was a sealing moment.
After that, my two panels finally ready, I couldn’t wait to complete the purse and have it finished in my hands.
The construction of the purse
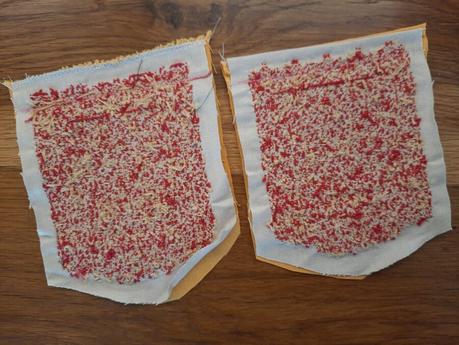
And here’s where I found out I made some mistakes. Nothing permanent, I could fix them, but I learnt a lesson for future projects.
First, I found a matching yellow cotton to become the lining of my purse. When I had to cut the fabric ready for assembly, I noticed that the two panels I embroidered had slightly different sizes. That was because of the way I started embroiderying I thought I could simply stitch the tw panels together hiding a few millimeters of embroidery inside the seam. So, when I embroidered, I didn’t care too much about the side finishing: sometimes I stitched more, sometimes less.
Well, I didn’t think of how thick what would come out! Next time, I’ll be sure my panels are the same size and I embroider just until the edge where the seam will be. I’ll follow this lovely construction method: compare this to how I made my first purse, you’ll see I have a lot to learn!
Now, I could have resorted back to embroidery to make the two panels the same precise size, the stitches ending in a straight line. But after all those years I simply wanted to see my purse finished. I wanted to make it quickly with what I had at hand. This is why I sacrificed a little the accuracy of my method. All I did, though, could not be seen from the outside without a close inspection, so I thought the compromise would work.
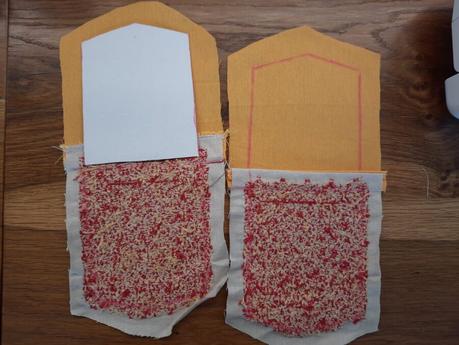
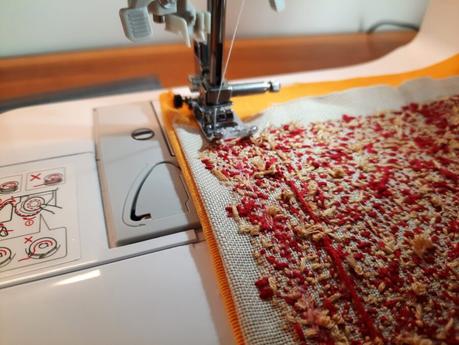
I prepared a cardboard shape to help me trace the correct stitching lines. Part of the compromise was using the sewing machine for seams not visible outside: I decided I needed strong stitches because of how thick the embroidered fabric was.
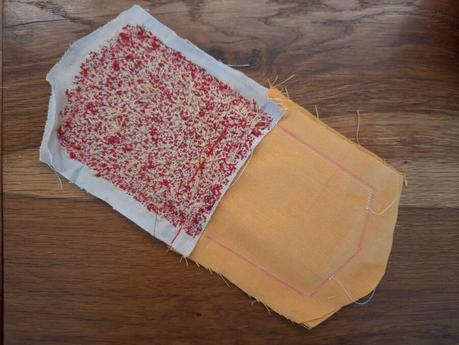
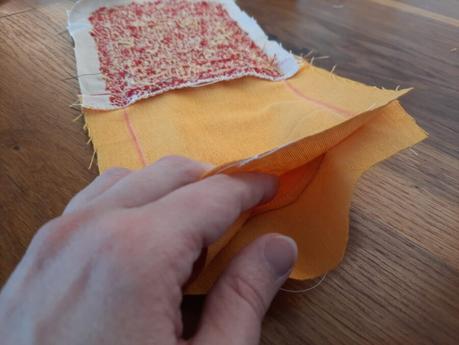
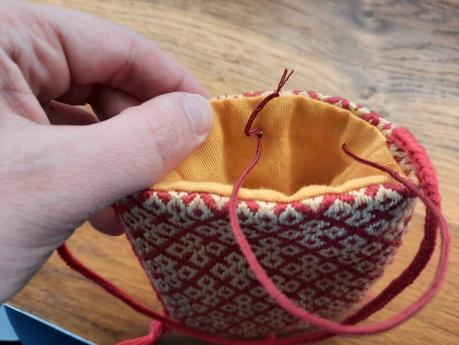
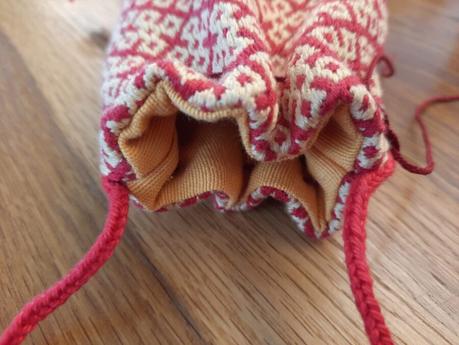
First I united each panel to its lining on the top side, then stitched together the two embroidered panels and the two lining panels, right sides together, leaving a small opening on the bottom to reverse. After reversing, I closed the opening by hand.
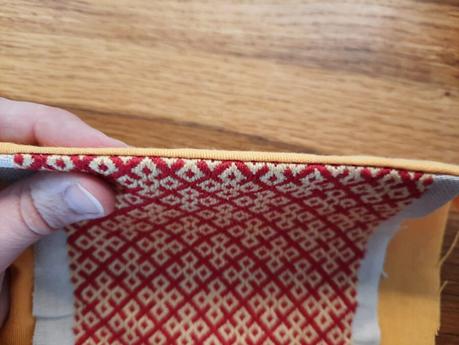
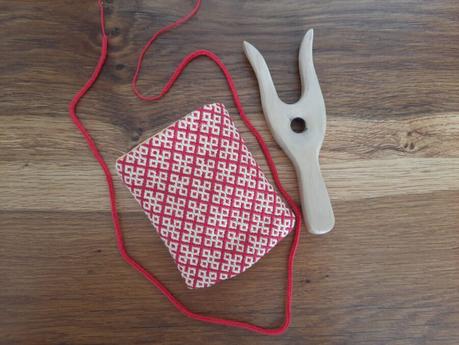
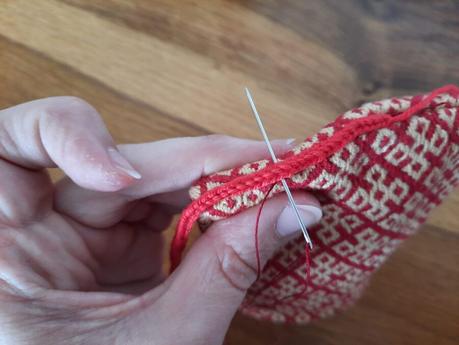
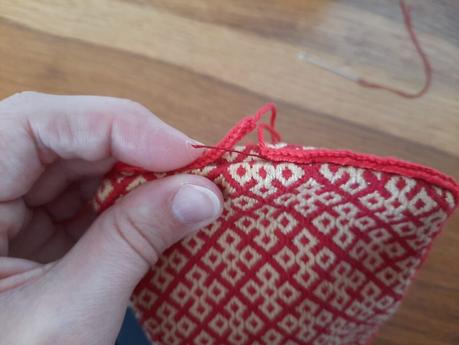
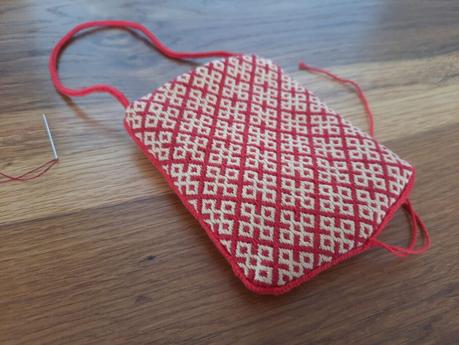
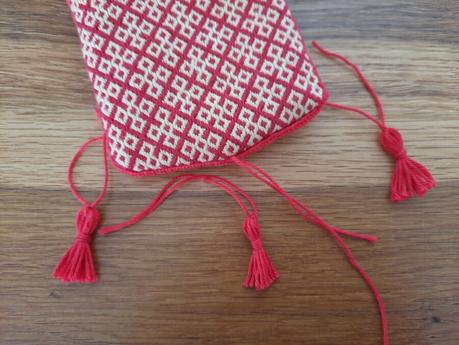
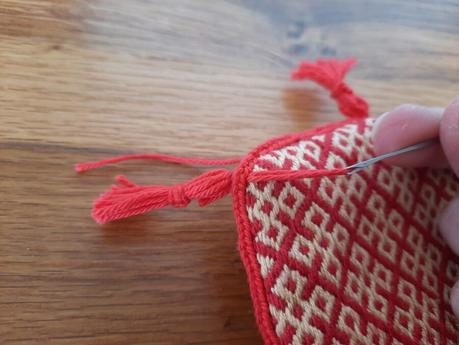
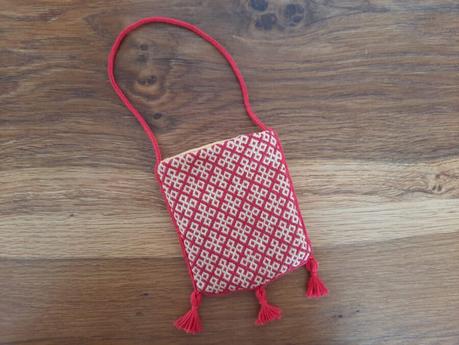
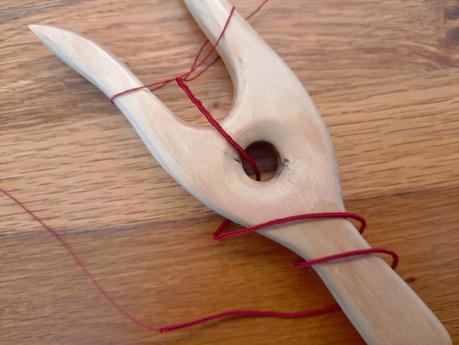
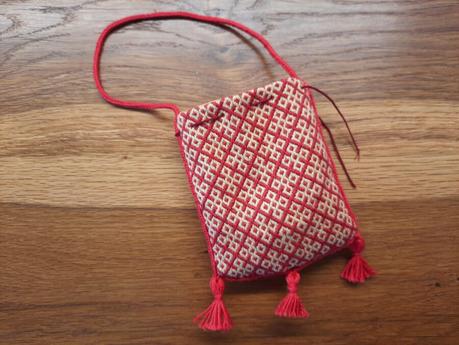
Time to refinish the sides! I used my faithful lucet to knit a cord that would become the hanging cord, but also the side finishing: one single continuous cord, stitched to the sides and bottom of the purse.
Next time I’ll try weaving the sides together using a rigid heddle: it’s an ancient tool and technique I am experimenting, I tried weaving the neckline of the first tunic I made for my child to follow us during reenactment events. I have a plan to weave bottom edges of gowns… you’ll see!
After stitching the lucetted cord all the way around the purse, I attached three red tassels at the bottom of the purse. A decoration widely used also in extant finds.
Final touch, I lucetted another thin cord to become the closing lace. I chose a thin but strong thread.
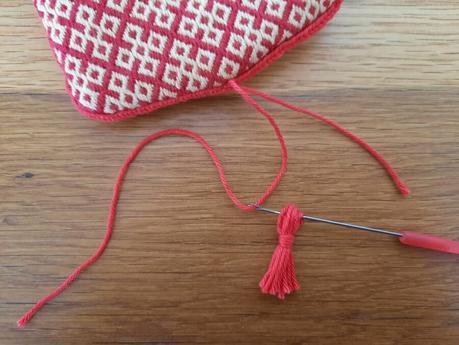
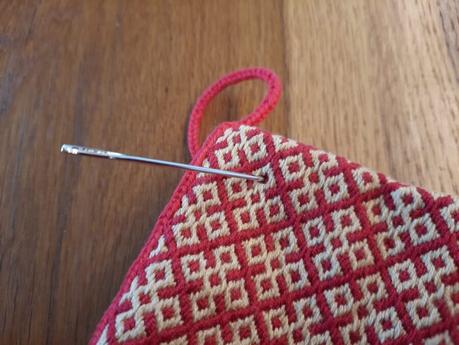
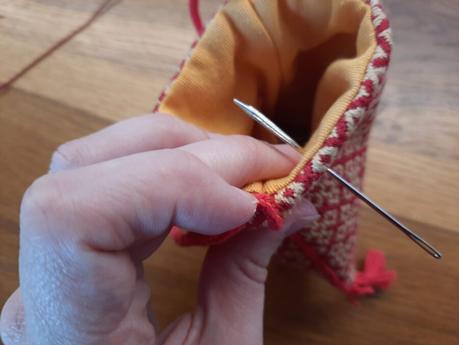
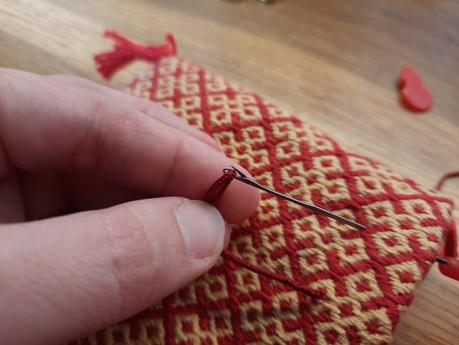
To let this closing lace pass through the fabric, at first I left four unembroidered stitches on each panel. I then changed my mind studying the purse construction more deeply: I used a tapestry needle (since I didn’t have a proper awl at hand) to open the weave and embroidery apart and let the cord pass through.
To thread the cord in and out of the small holes in the fabric, I used another tool I love: a latch hook, perfect to help me in this task. Usually for pulling through snags on knitwear, I find this tool super handy. In this case, I didn’t have a needle with an eye big enough for my lucetted cord, so the latch hook was perfect.
Ant that was the last step in this long, long project!
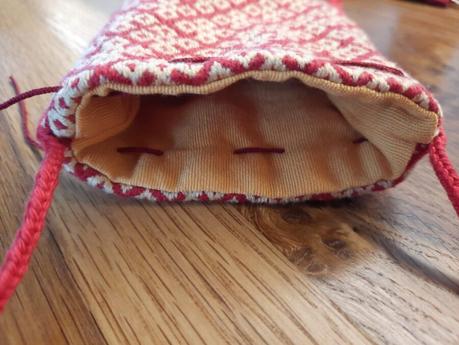
When my purse was finally completed, I felt a mix of joy and lacking. I wanted the craft to be finished, I longed to see it completed and be able to use it, but I also enjoyed the process.
Well, this little bag wanted to be the first of a series of crafts related to historical sewing and reenactment. Now, I look forward to the new crafts ahead that will pair with this purse!
And your opinion? What do you think of the final result? The comments section is open to anyone, as always!

